


No code tools are enabling businesses to build amazing things — without writing code. Vlad Lokshin, founder of Turtle, uses a combination of Webflow and Typeform to build a website that empowers developers and teams across the world. In this post, we’ll peel back the curtains on exactly how Turtle is able to accomplish this.
“I’m going to build new features for my website without writing any code.”
A decade ago people would raise an eyebrow if they heard you say that.
But times are changing. We live in a time where no code tools are on the rise and the solutions they offer are now being adopted by startups and large corporations — who despite knowing how to code, choose not to.
Today, you really can build a web app, and an entire business, with just a vision, a willingness to learn, a computer, and a stable internet connection.
The barrier to entry has decreased ten-fold, and that’s exciting. It means more creators are empowered to build the things they’ve dreamt about.
This is why companies like Turtle excite me. It’s a reminder that there’s no better time to be an innovator than today.
What is Turtle?
Turtle is where project management meets freelance development.

Created by Vlad Lokshin, Turtle’s vision is to empower freelance developers and companies looking to hire freelancers for contract work. On one end, it’s a project management tool, similar to Asana or Trello, with a built in chat system like Slack — allowing teams to stay organized and collaborate. On the other end, it’s a marketplace for freelance developers — similar to Upwork or Toptal.
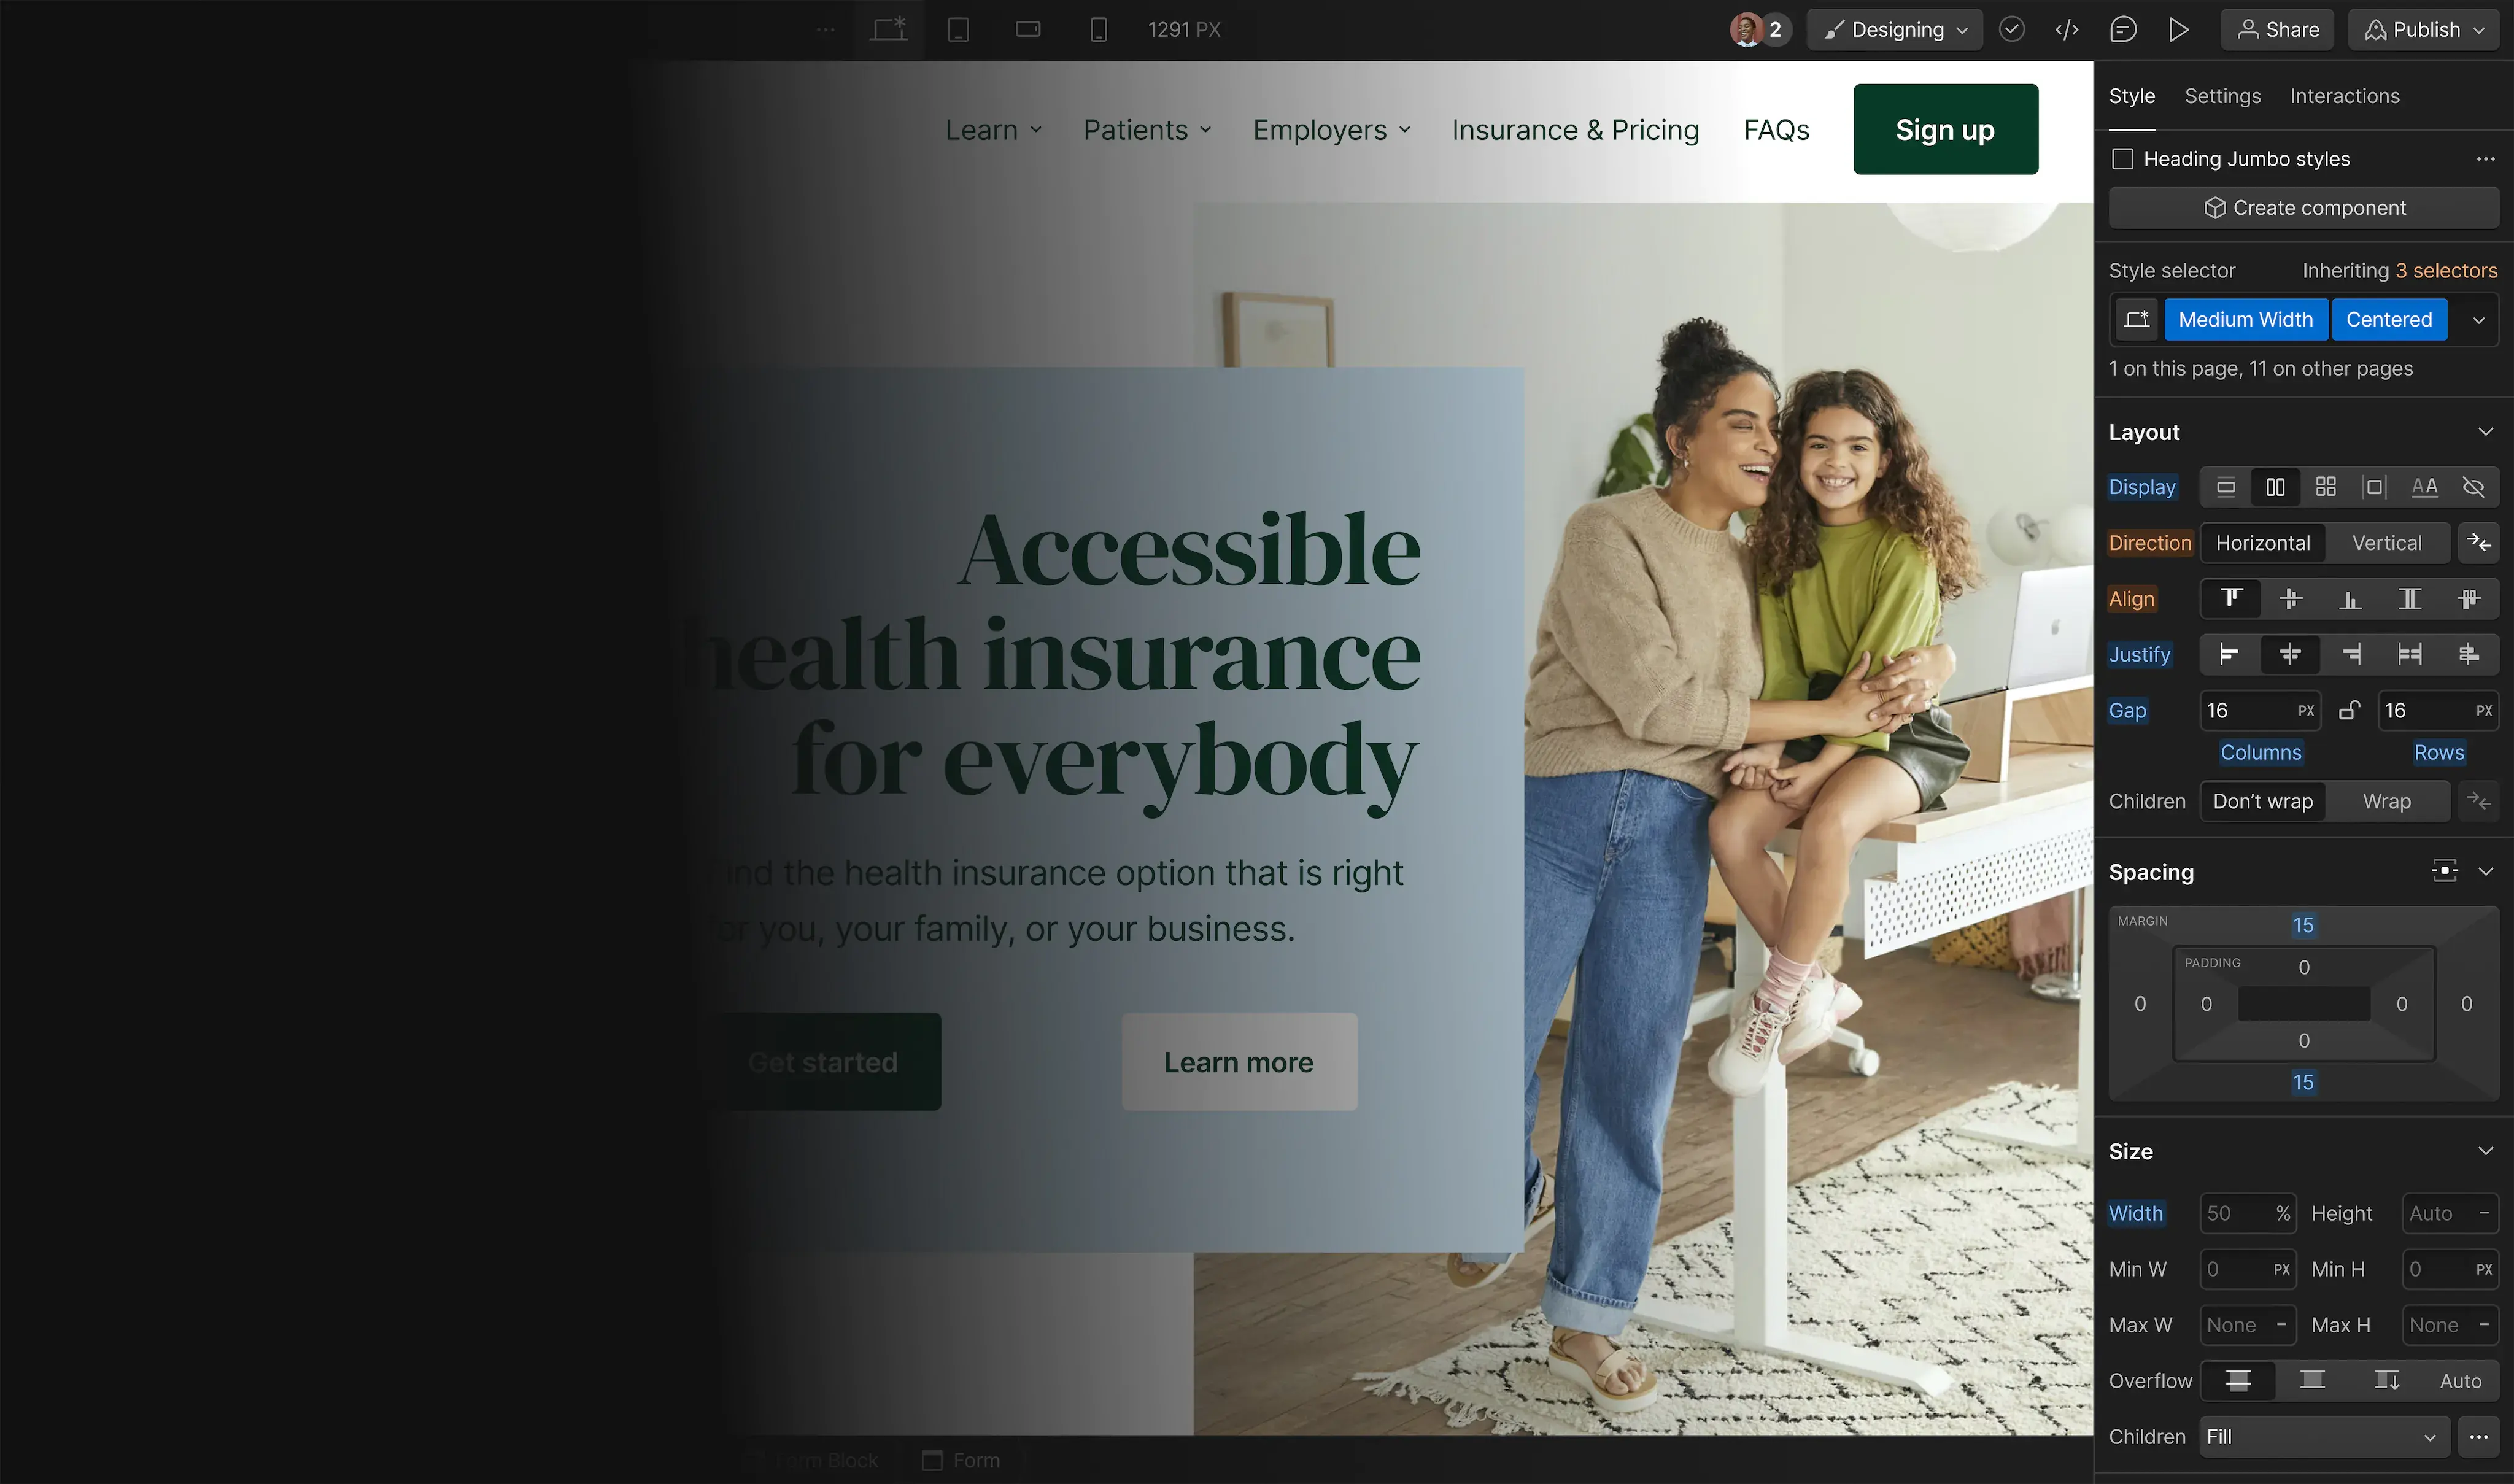
Turtle’s entire marketing website is built in Webflow, and they use Typeform to power their lead generation efforts and onboarding process for freelance developers.
In this post, we’ll show you how Turtle built out their application process using no code tools. In the meantime, you can read more about how Vlad moved Turtle from concept to customers.
Identifying Turtle’s goal
Before we get into the nitty gritty of how Turtle integrated Typeform on their website, it’s important to understand their goals. Turtle is a marketplace for freelance developers. This means they need both freelance developers to sign up and teams looking to hire them. Think supply and demand.
Turtle needs to create an application process for developers and an application process for teams looking to hire those developers. This means, at its core, Turtle has 2 different flows with 2 different typeforms. Turtle has also recently released 2 more typeforms for their programs around Turtle for Startups and Credit for companies during these tough times — making them have a total of 4 typeform flows.
Why Webflow and Typeform?
If you’re reading this, chances are you already know what Webflow is and what it can do for you. But you may or may not know how adding Typeform to your Webflow website can enable you to build a powerful application process.

Typeform allows users to create beautiful forms and surveys. Think of it as a more personal way for people and businesses to exchange information at scale. Much of Typeform’s goal is to turn data collection into an experience, and they do a great job of doing just that. With a plethora of templates to choose from, typeforms can be catered to any brand.
On the same token, Webflow enables businesses to create powerful websites — without writing code. In a world where customer experience is becoming more important than ever, using both Typeform and Webflow is the perfect way to create a blend between your brand and user experience.
As you read through this post, we’ll show you how to easily integrate Typeform and Webflow to build a powerful, and credible, application process. However, the sky’s the limit to what you can do by combining the two.
Build completely custom, production-ready websites — or ultra-high-fidelity prototypes — without writing a line of code. Only with Webflow.
Build completely custom, production-ready websites — or ultra-high-fidelity prototypes — without writing a line of code. Only with Webflow.
Integrating Typeform and Webflow for applications
There are 4 different ways you can embed a typeform into Webflow — and we’ll be going over all of them. The 4 ways are as follows:
- A Typeform link that links out from your Webflow website
- A full-page Typeform embed on your Webflow website
- A pop-up form
- An embedded form in a div block
In the case of Turtle, they use option 2 — a full-page Typeform embed. However, we decided to include some other ways you can integrate Typeform and Webflow if you want to spice things up a bit.
Prefer to watch?
We’ve got you covered.
For those who like to read, let’s get into it.
1. A typeform link
This one is pretty simple. You’ll first need to sign up for Webflow and create a project. We won’t get in too much detail on how to do that in this post, but you can check out Webflow University for some awesome tutorials on this.

Next, you’ll need to sign up for Typeform and create your first typefrom.

After you’ve created your typeform, head back to your Webflow project. In our project, we’ll be adding a link to the “Get started” button on our page.
Before you do this, make sure your typeform is published. Once it’s published, head over to the share tab and copy your typeform URL.

Back in Webflow, simply paste your typeform link as you would with any other link.

That’s it. Now, when you click the button, you should be directed straight to your typefrom.
Okay, let’s get into how to embed your typeform fully into a page on your Website — similar to how Turtle does it for their application process.
2. A full-page Typeform embed
In this part, you’ll want to create a new blank page in your Webflow project. The idea is to use a custom code embed on a blank page and embed your typeform into it. To add a custom code embed to your Webflow page simply drag the Embed element into your project.

Now you’ll want to go back to the share tab in your typeform and this time click on “Embed into a web page.”

You’ll want to click on the “Full page” tab and grab the custom code.

Once you’ve copied the code to your clipboard, go back into Webflow and simply paste the code inside your custom embed element.

Once the code is pasted in, click “Save & Close.” You may notice that you can’t see your typefrom in the Webflow designer. This is because the Typeform will only appear on your published, or exported, Webflow site. Once you publish the page, the live version should look a little something like this:

Easy right? But wait, we only have a page on our website that goes to a Typeform embed. We need to add this page to a button on our website. Again, we want to have a set up similar to how Turtle has it set up when you click “Apply to hire.”

To do this, go to your Webflow project and instead of adding a link to a button, similar to how we showed in option 1 above, click on the add a page option and select the Typeform embed page you created.

Now when we click on the “Contact us” button on our Webflow website, we should be directed to our full-page Typefrom embed — nice.
3. Create a Popup form
To create a Typeform popup on our Webflow site, you’ll follow a few similar steps mentioned above. Go to the share tab of your Typeform project, click on “Embed into a web page,” and this time click on “Popup.”

From here we can edit our button settings. We can experiment with our button text, font size, border radius, and color.
In our case, we want to have a white button. The only problem is that we can’t change the text color of our Typeform button in Typeform. But we can in our Webflow project.
Once you’ve created your button, you simply click on “Get the code” and copy your Typeform code to your clipboard.
Back in our Webflow project, we’ll want to delete our button and replace it with an Embed element.
Now, we’ll paste our Typeform popup code into our element.

As you can see, our text color is the same as our button — we want to make the text color red. To do this, you’ll want to locate where it says “color” within your Typeform code and manually change the hex color.

Similarly, we can change our text font to better fit our brand.

Once that’s complete, click “Save & Close.” Again, you will only see the final product after you publish your Webflow website.

Voilà!
4. Embed a typeform in a div block
The final option we are going to cover for integrating Typeform with Webflow is to embed a typeform within a div block on your Webflow website.

We went ahead and created this layout. The iPad displayed in this layout is a simple image added to a div block that we called “iPad wrapper.”

Because we want our typeform to be responsive within our iPad display, we’ll drag in an Embed element into the iPad wrapper. The embed element should be a sibling of the iPad image and a child of the iPad wrapper.
By default, the position of an HTML embed is static, but we want to absolutely position it in our settings.

But before we do this, we first need to go back to our iPad wrapper and set its position to relative. So, to put simply, the parent element (iPad wrapper) is set to relative, while the child element (HTML Element) is set to absolute.

Now to make sure that our HTML Embed is lined up within the borders of our iPad we’ll adjust the absolute positioning to 5% — as shown below.

Now we have a fully responsive layout for our Typeform embed. All we need to do now is grab our Typeform code from Typeform itself.
Similar to how we’ve done before, we are going to go to the share tab, and this time, select the “Standard” tab.

Click on “Get the code” and copy it to your clipboard. Now, we’re going to go back into our Webflow project and embed the code in our HTML Embed element.

After we publish our website we should see our Typeform embed into our custom div block.

That’s it! We just went over 4 different ways to embed a typeform in a Webflow site.
Gathering the data
Now that you have a better understanding on how to integrate Typeform and Webflow, you can easily send and analyze all the data that comes through your typeform.

Easily create reports or connect Google Sheets to send data straight to a spreadsheet. You can even use another no code tool like Zapier to create various triggers between Typeform and Webflow. For example, if someone submits something through a typeform on your website, you can fulfil an order through Webflow Ecommerce — and that’s just one of many examples.
Typeform isn’t just a great lead generation tool. It enables you to understand who your customers really are so you can better serve them.
Empowering developers around the world
Both Typeform and Webflow allow for a new breed of creators. I say this because you don’t have to have much coding experience to create a website or a full application flow to collect leads. Back in the day, you had to code all of this stuff together. Today, the power of no code enables less-technical individuals to create amazing products, while experienced developers are able speed up their front-end development work.
We can see this with Vlad Lokshin and his team at Turtle. By using the powerful no code tools of today, Turtle has empowered dozens of freelance developers and teams across the world.
Don’t forget to read Vlad’s story on the Typeform blog.