


Design Approvals

Webflow Enterprise customers can leverage design approvals to reduce the risk of unapproved changes going live to the site by ensuring all changes merged into the site from a page branch have been approved by the right stakeholders.
Junior designers can build independently on page branches, then request design approval from key stakeholders before merging their branch — allowing for more independent design time and more regulated main site edits.
The value of design approvals
- Enhanced quality control: Prevents unapproved changes from being published without review and approval, maintaining site integrity.
- Empowered team collaboration: Allows junior designers to work independently while ensuring oversight of their proposed changes.
- Structured review process: Facilitates a clear approval workflow, building confidence in the published changes.
When to use design approvals
- High-stakes updates: Highly risk-averse teams would benefit from enforcing approval of design changes.
- Highly collaborative teams: When multiple team members simultaneously contribute to the website, design approvals can help track updates and reduce the risk of publishing accidental or unapproved changes.
- Training new contributors: Design approvals can be a valuable training tool to oversee and guide less experienced designers’ contributions.
How to use design approvals effectively
Here are the eight best ways to make the most of design approvals.
1. Assigning appropriate roles
Although design approvals can be used by anyone making changes on a page branch, to enforce that certain designers’ changes must be approved before going live you’ll need to create and assign a custom role that does not have the permission “Make changes without approval.” Users who are assigned to such roles, will be unable to make any changes outside of a page branch and are blocked from merging changes until the branch is approved by all required reviewers.
2. Proposing changes in a page branch
Create a page branch to initiate changes without affecting the main site.
3. Request design approval
After completing edits in a branch, request a review from key stakeholders.
4. Identify who should be invited to review.
Required reviewers: If design approval is enforced through custom roles, a branch will not be able to be merged unless all required reviewers invited approve the branch changes. Required reviewers could include:
- Key stakeholders
- Design leads
- Team members with subject matter expertise for content review (e.g., Legal or compliance reviews).
Anyone listed as a required reviewer should be able to respond with a review status in a timely manner to unblock progress.
Optional reviewers: Optional reviewers are notified of the proposed changes and are given the opportunity to approve or request changes, but their status or lack of status provided will not block the branch from being merged.
Optional reviewers could include:
- Peers who should have visibility into progress being made across other parts of the site.
- Any stakeholder who could contribute feedback but will not block progress if the feedback is not provided.
5. Monitoring review status
The branch is auto-published to branch staging upon requesting approval and all requested reviewers are notified of the request via email. The email will include a link to review the branch in Webflow, as well as a link to branch staging to enable testing the changes across the entire site.
6. Making changes after requesting a review
Post-request, further edits can be made and reviewers will see all changes made after the request is sent. However, making edits after requesting a review is discouraged unless integrating feedback since, ideally, all reviewers should review the same branch state to avoid miscommunication and unapproved changes. If significant changes are necessary (not explicitly requested by a reviewer), it’s best to cancel the review request, make the edits and re-request the review when the branch is ready.
If any required reviewer has requested changes, their approval is necessary before merging. Once edits are integrated, you can re-request approval to notify them that the branch is updated and ready to be reviewed again.
7. Merging an approved branch
Once all required reviewers have approved, proceed to merge the branch into the main site.
Staging

Webflow’s staging environment provides a safe place to preview, test, and refine site changes before publishing to production. Benefits of using staging include:
- Risk-free testing: Test your design, functionality, and custom code in a production-like environment without impacting the live site.
- Performance validation: Evaluate site performance, responsiveness, and interactions before launch.
- Client and team collaboration: Share a staging URL with stakeholders for feedback before publishing to production.
When to use staging
Reviewing site-wide changes before publishing to a live domain; testing any form submissions with data or certain unique cases of custom code not currently supported in preview and comment modes (e.g., certain libraries or custom code scripts with security controls); and validating performance.
Branch staging
Branch staging enables Webflow Enterprise customers to publish a specific page branch to its own staging environment, enabling your team to test and review the changes on a published site before merging the changes into the main site.
Difference between staging and branch staging
Feature
Staging
Branch staging
Scope
Entire site (excluding page branches)
Entire site and the changes made on a specific page branch
Purpose
Testing all site updates before going live
Testing and iterating on a single page branch including changes to global classes and components before merging into main
Use Case
Full-site previews, performance testing, review and approval
Isolating large page updates, testing proposed changes across the entire site
Custom staging domains
If you’re a Webflow Enterprise customer or Enterprise partner, you can add a custom staging domain to your site for more granular control and consistency for staging across your team’s tech stack.
We recommend you use the www version of your custom staging domain. Using the root domain may not be supported by your DNS provider and requires manual setup.
Private staging
For projects requiring confidentiality, Webflow Enterprise offers private staging, ensuring only authorized users can access staging.
Use private staging to:
- Prevent premature public access: Keep work-in-progress designs and content confidential.
- Keep reviews secure: Share a link requiring authentication (SSO or username/password) for stakeholder feedback.
- Protect unreleased features: Keep sensitive updates confidential until they are ready to go live.
Next up: Publishing
Webflow’s publishing system enables teams to seamlessly push updates to a live website while maintaining flexibility and control over what gets published.
More ways to level up
 Webflow University
Explore courses and pathways to grow your skills or prepare for a Webflow-verified certification.
Go to University Help Center
Find solutions to your Webflow questions and get help from our expert customer support team.
Go to docs Community
Connect with other designers and developers to share tips, ask questions, and show off your work.
Go to Community
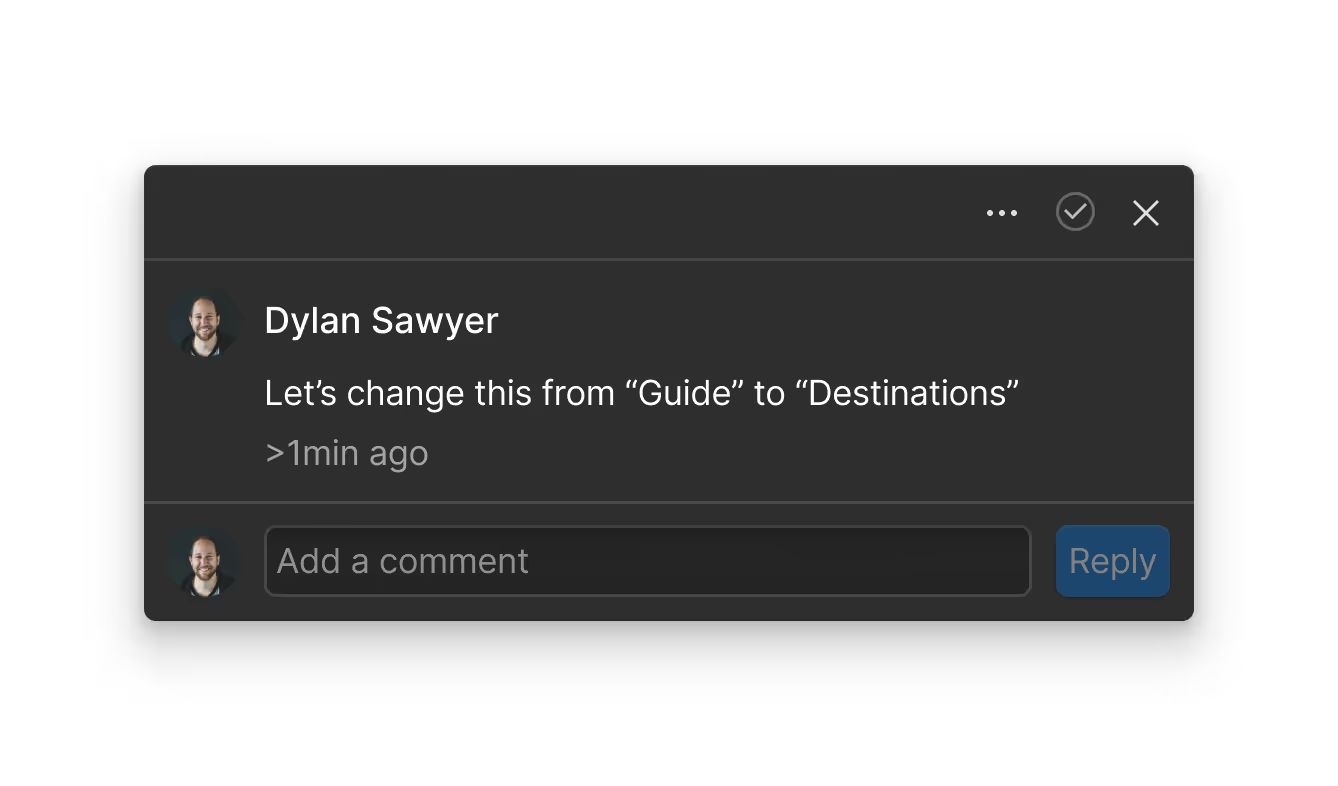
Comments
Webflow's comments feature enables seamless collaboration across your entire website experience team, allowing team members to provide feedback directly on page designs and content. Benefits of using comments include:
When to use comments
Commenting is ideal for:
How to use comments effectively
A dedicated free reviewer role for comment-only stakeholders
Anybody in Webflow can leave comments on page designs and content, but we also have a dedicated role for teammates who only need to be able to participate in review cycles and leave comments. This could be your Head of Marketing, your Legal or Product teams, a client — the list goes on and on.
Assigning these stakeholders the reviewer role allows them to participate in ongoing review cycles while being restricted from being able to make any changes to designs or content.