Include a "skip to main" link
Keyboard users use the “Tab” key to navigate from link to link on a web page. Without a “Skip to main” link (sometimes referred to as a “skip navigation link”), users are forced to tab through every link in a navigation bar before getting to the main content.
If you don’t start your webpage with a navigation bar feel free to skip this guideline.
How to add a “skip to main” link:
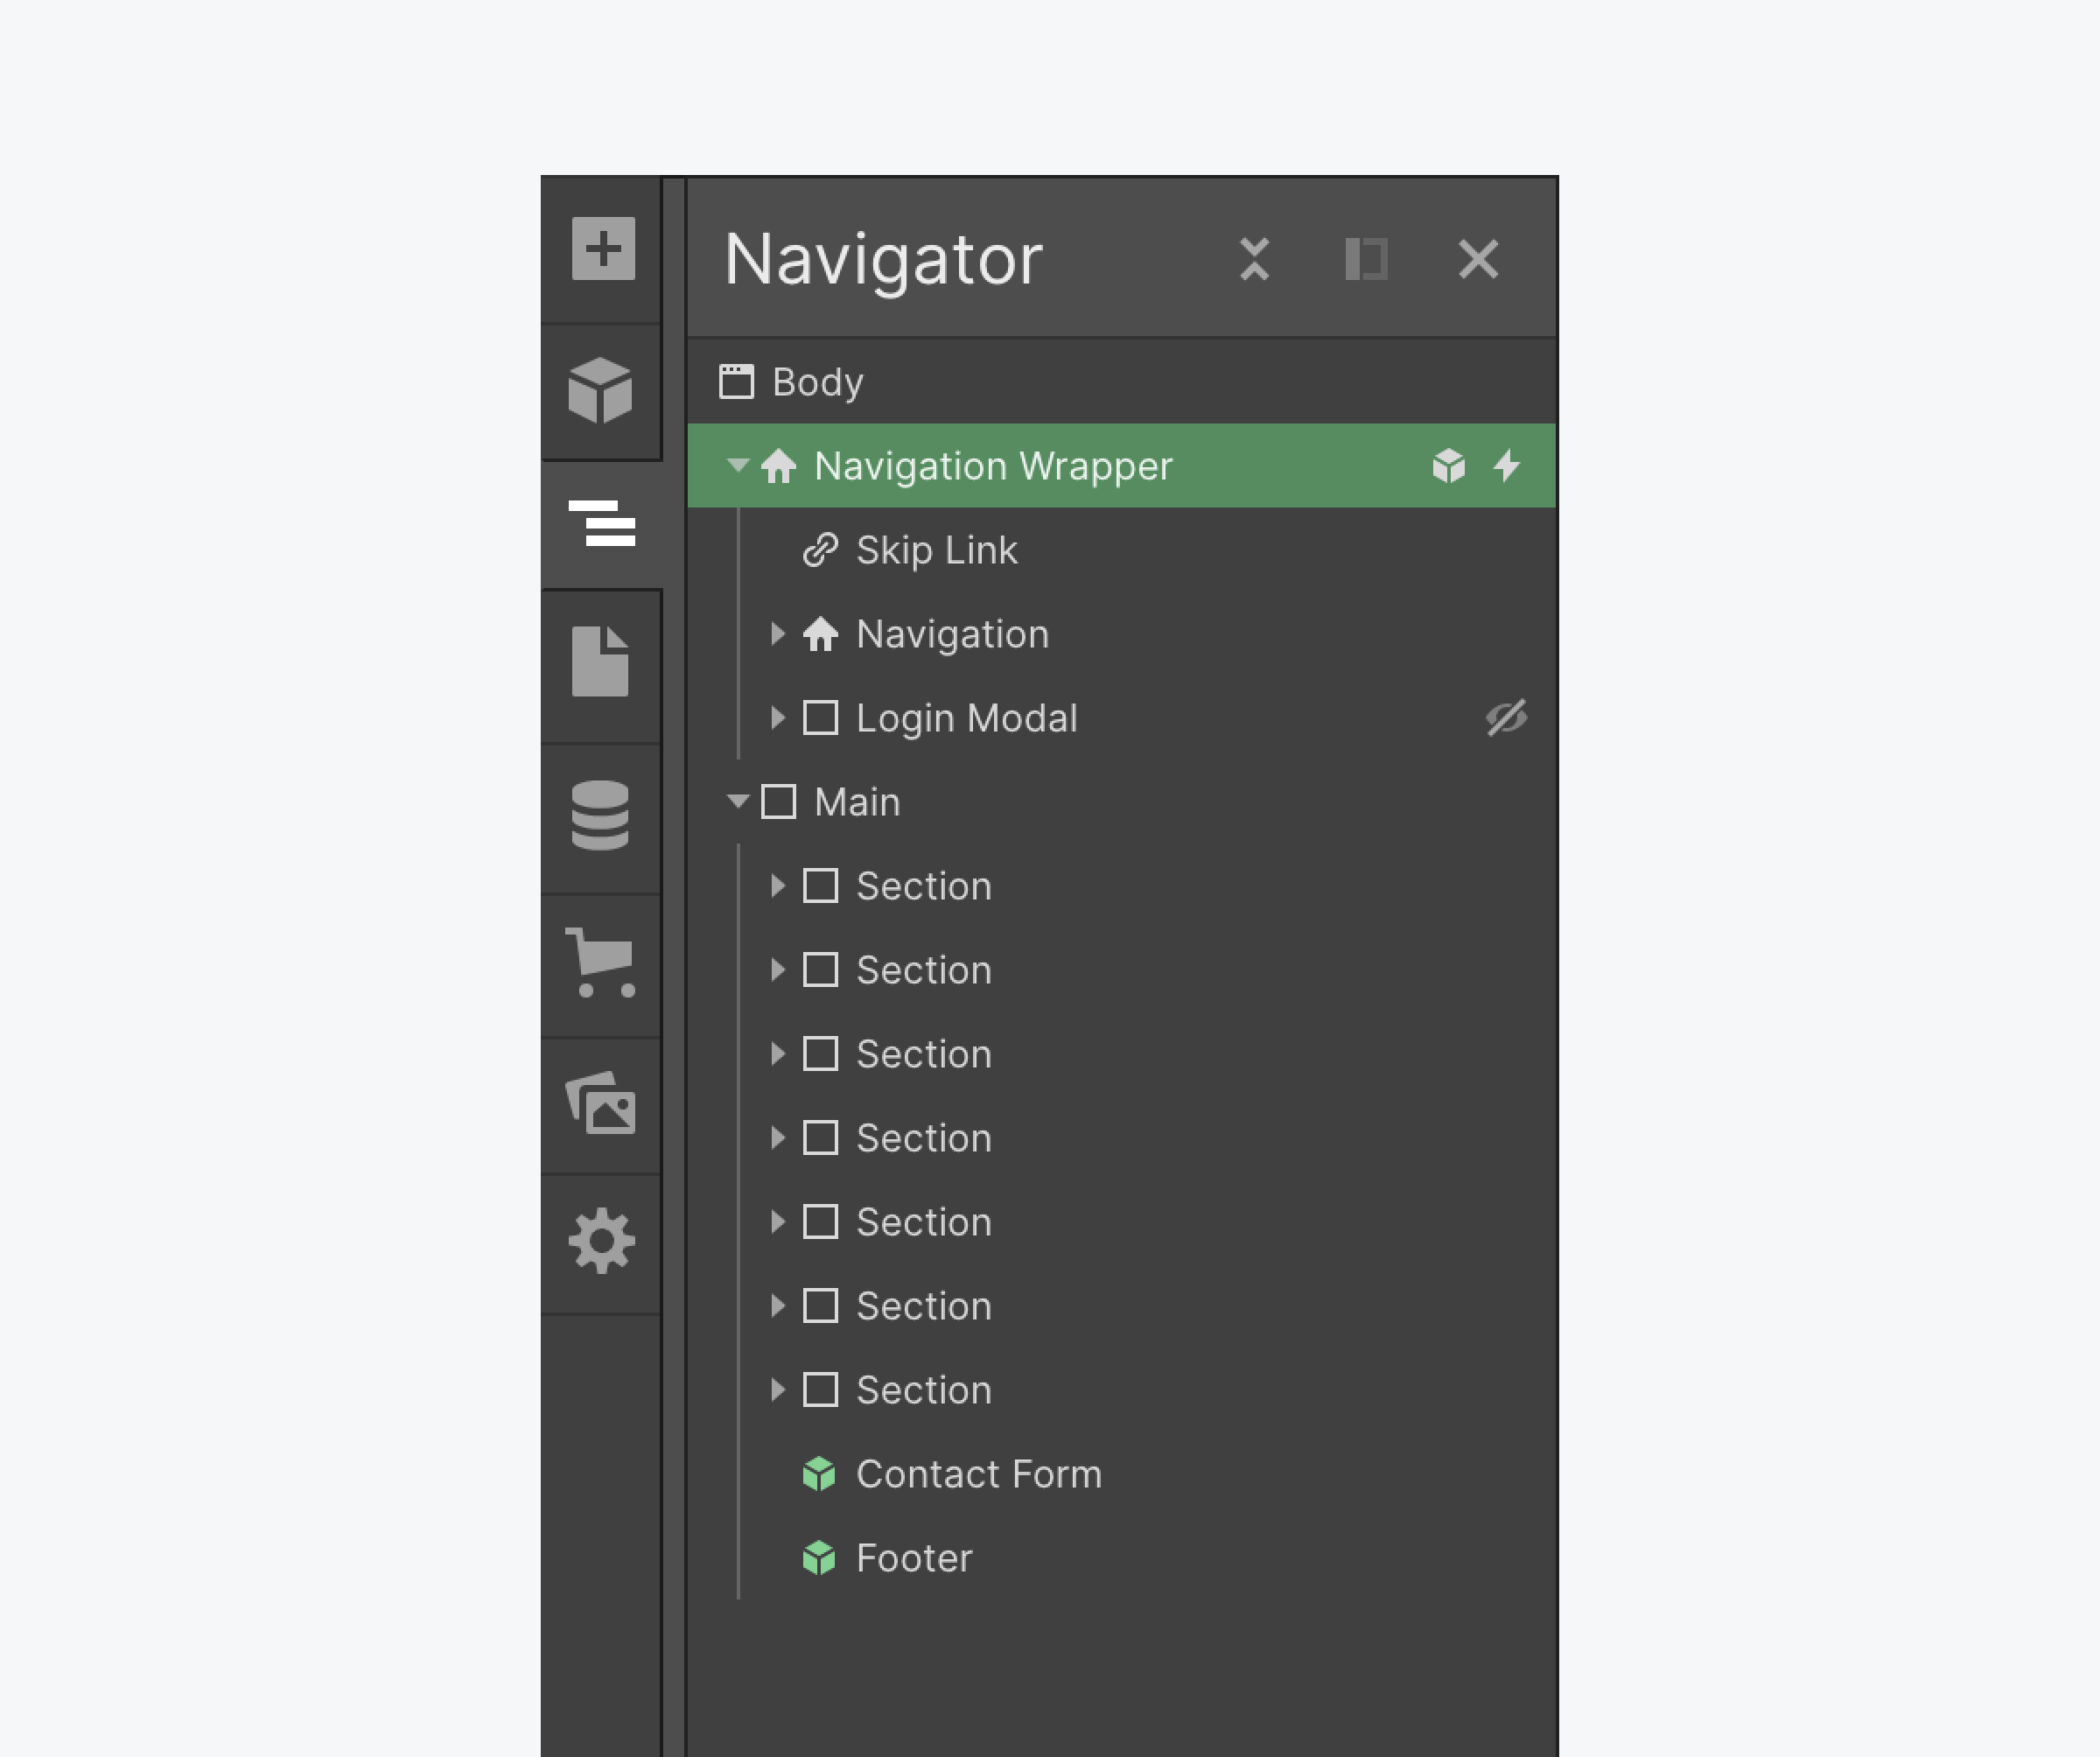
1. Add a link as the first child of your header element. In this example, it’s the link called ‘Skip Link.’ This is the element that you’ll click to skip to main content.

2. Give the link an ID, like <checks-richtext_class>skip-link<checks-richtext_class>.
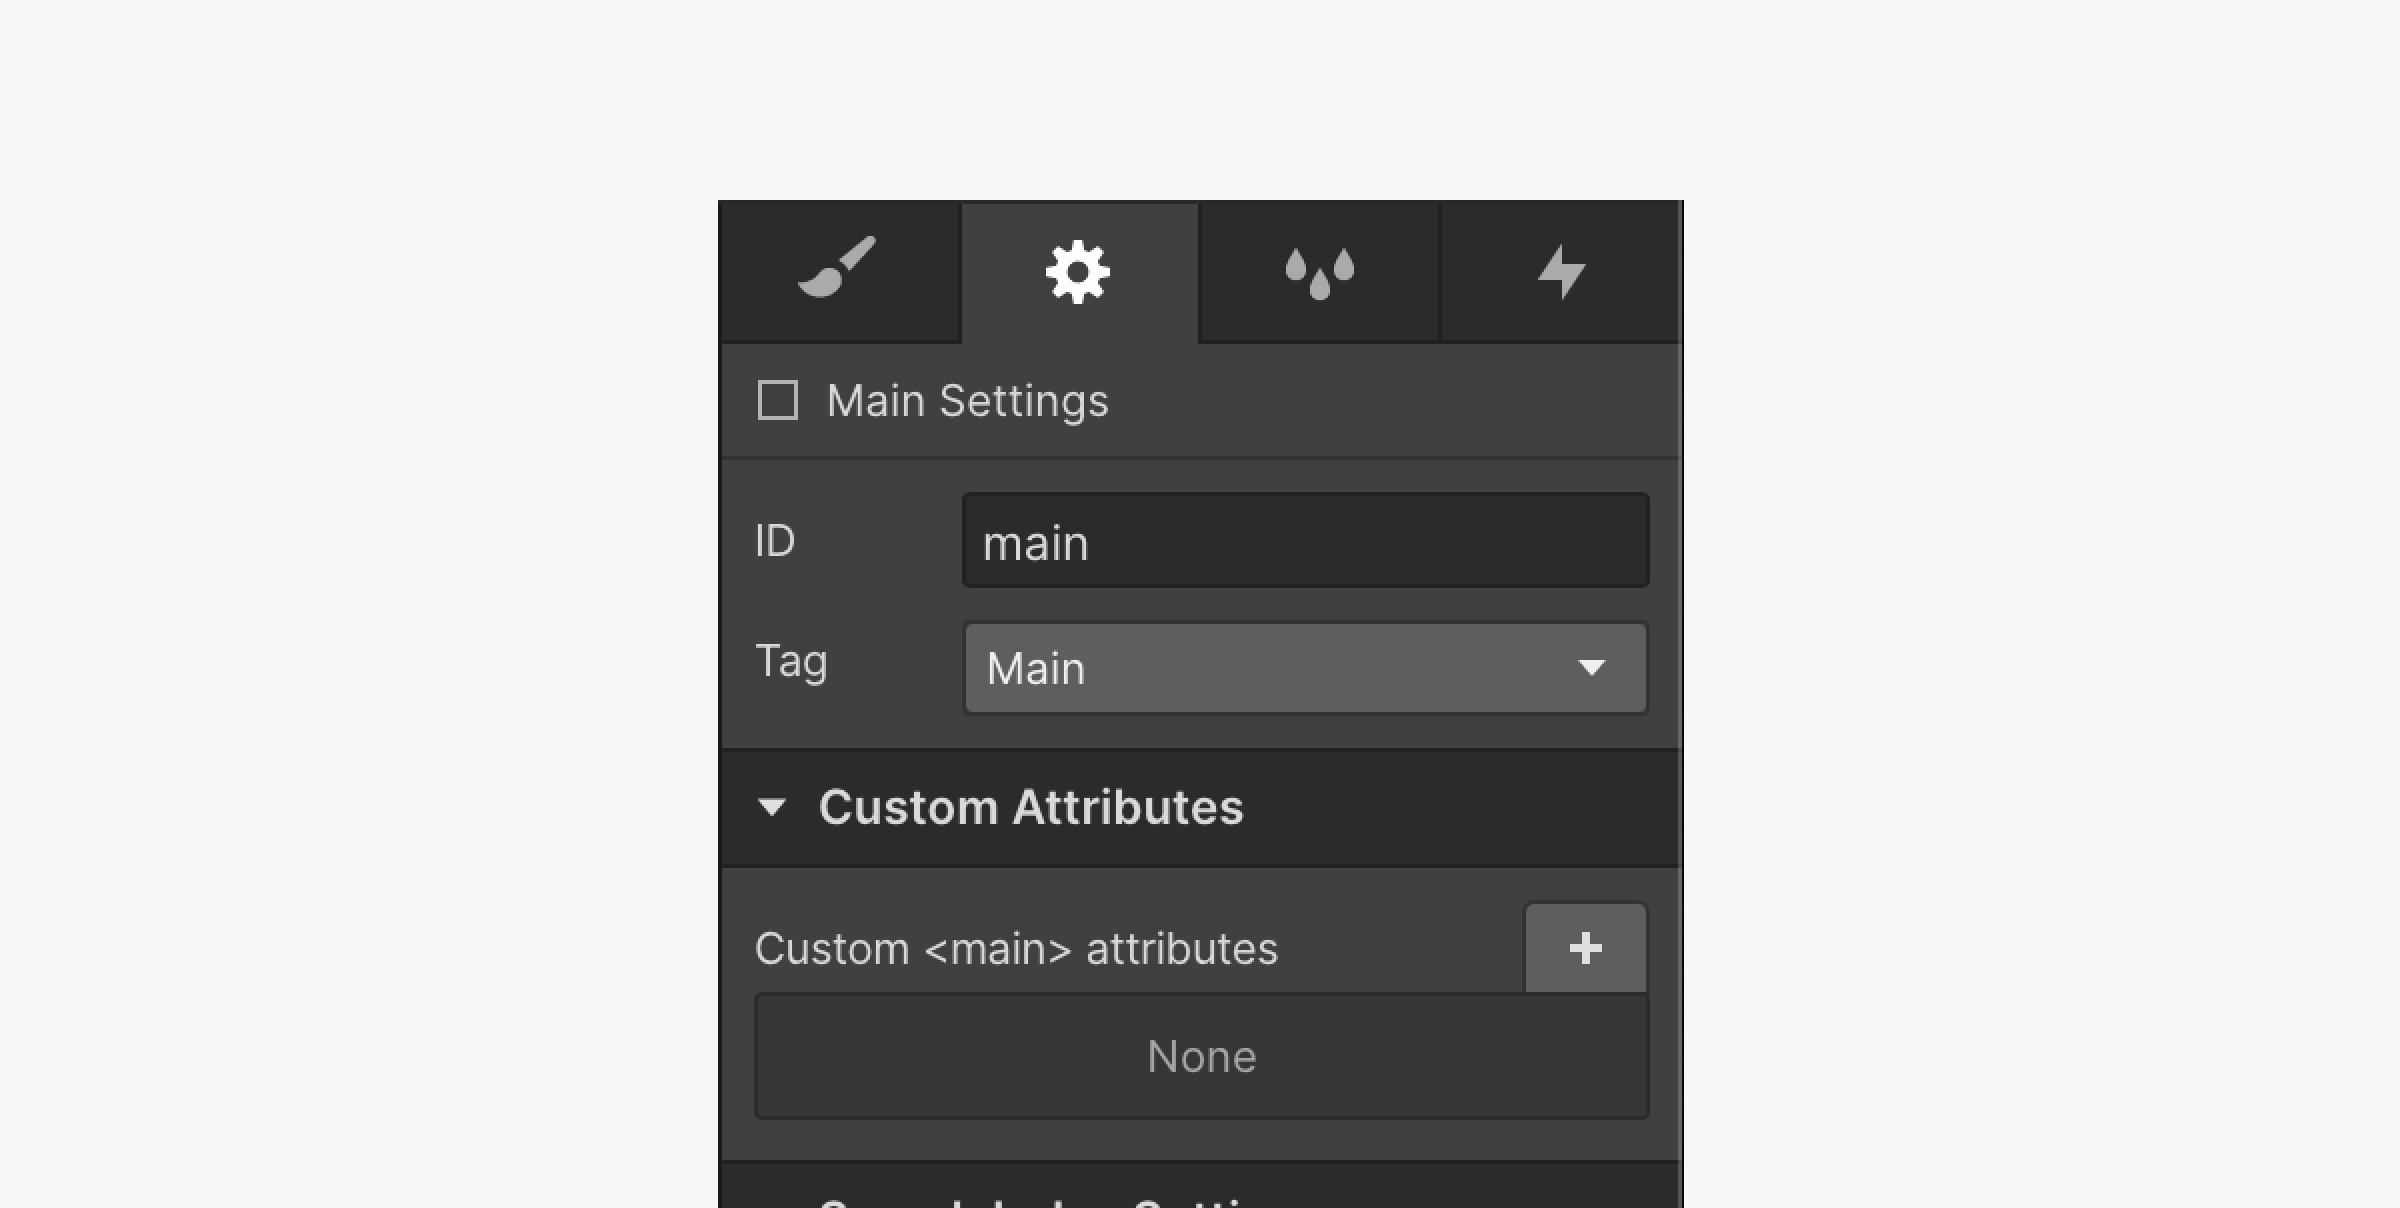
3. Assign the main landmark tag and an ID of <checks-richtext_class>main<checks-richtext_class> to your main content. This is normally the next element after your navigation bar, like your H1.

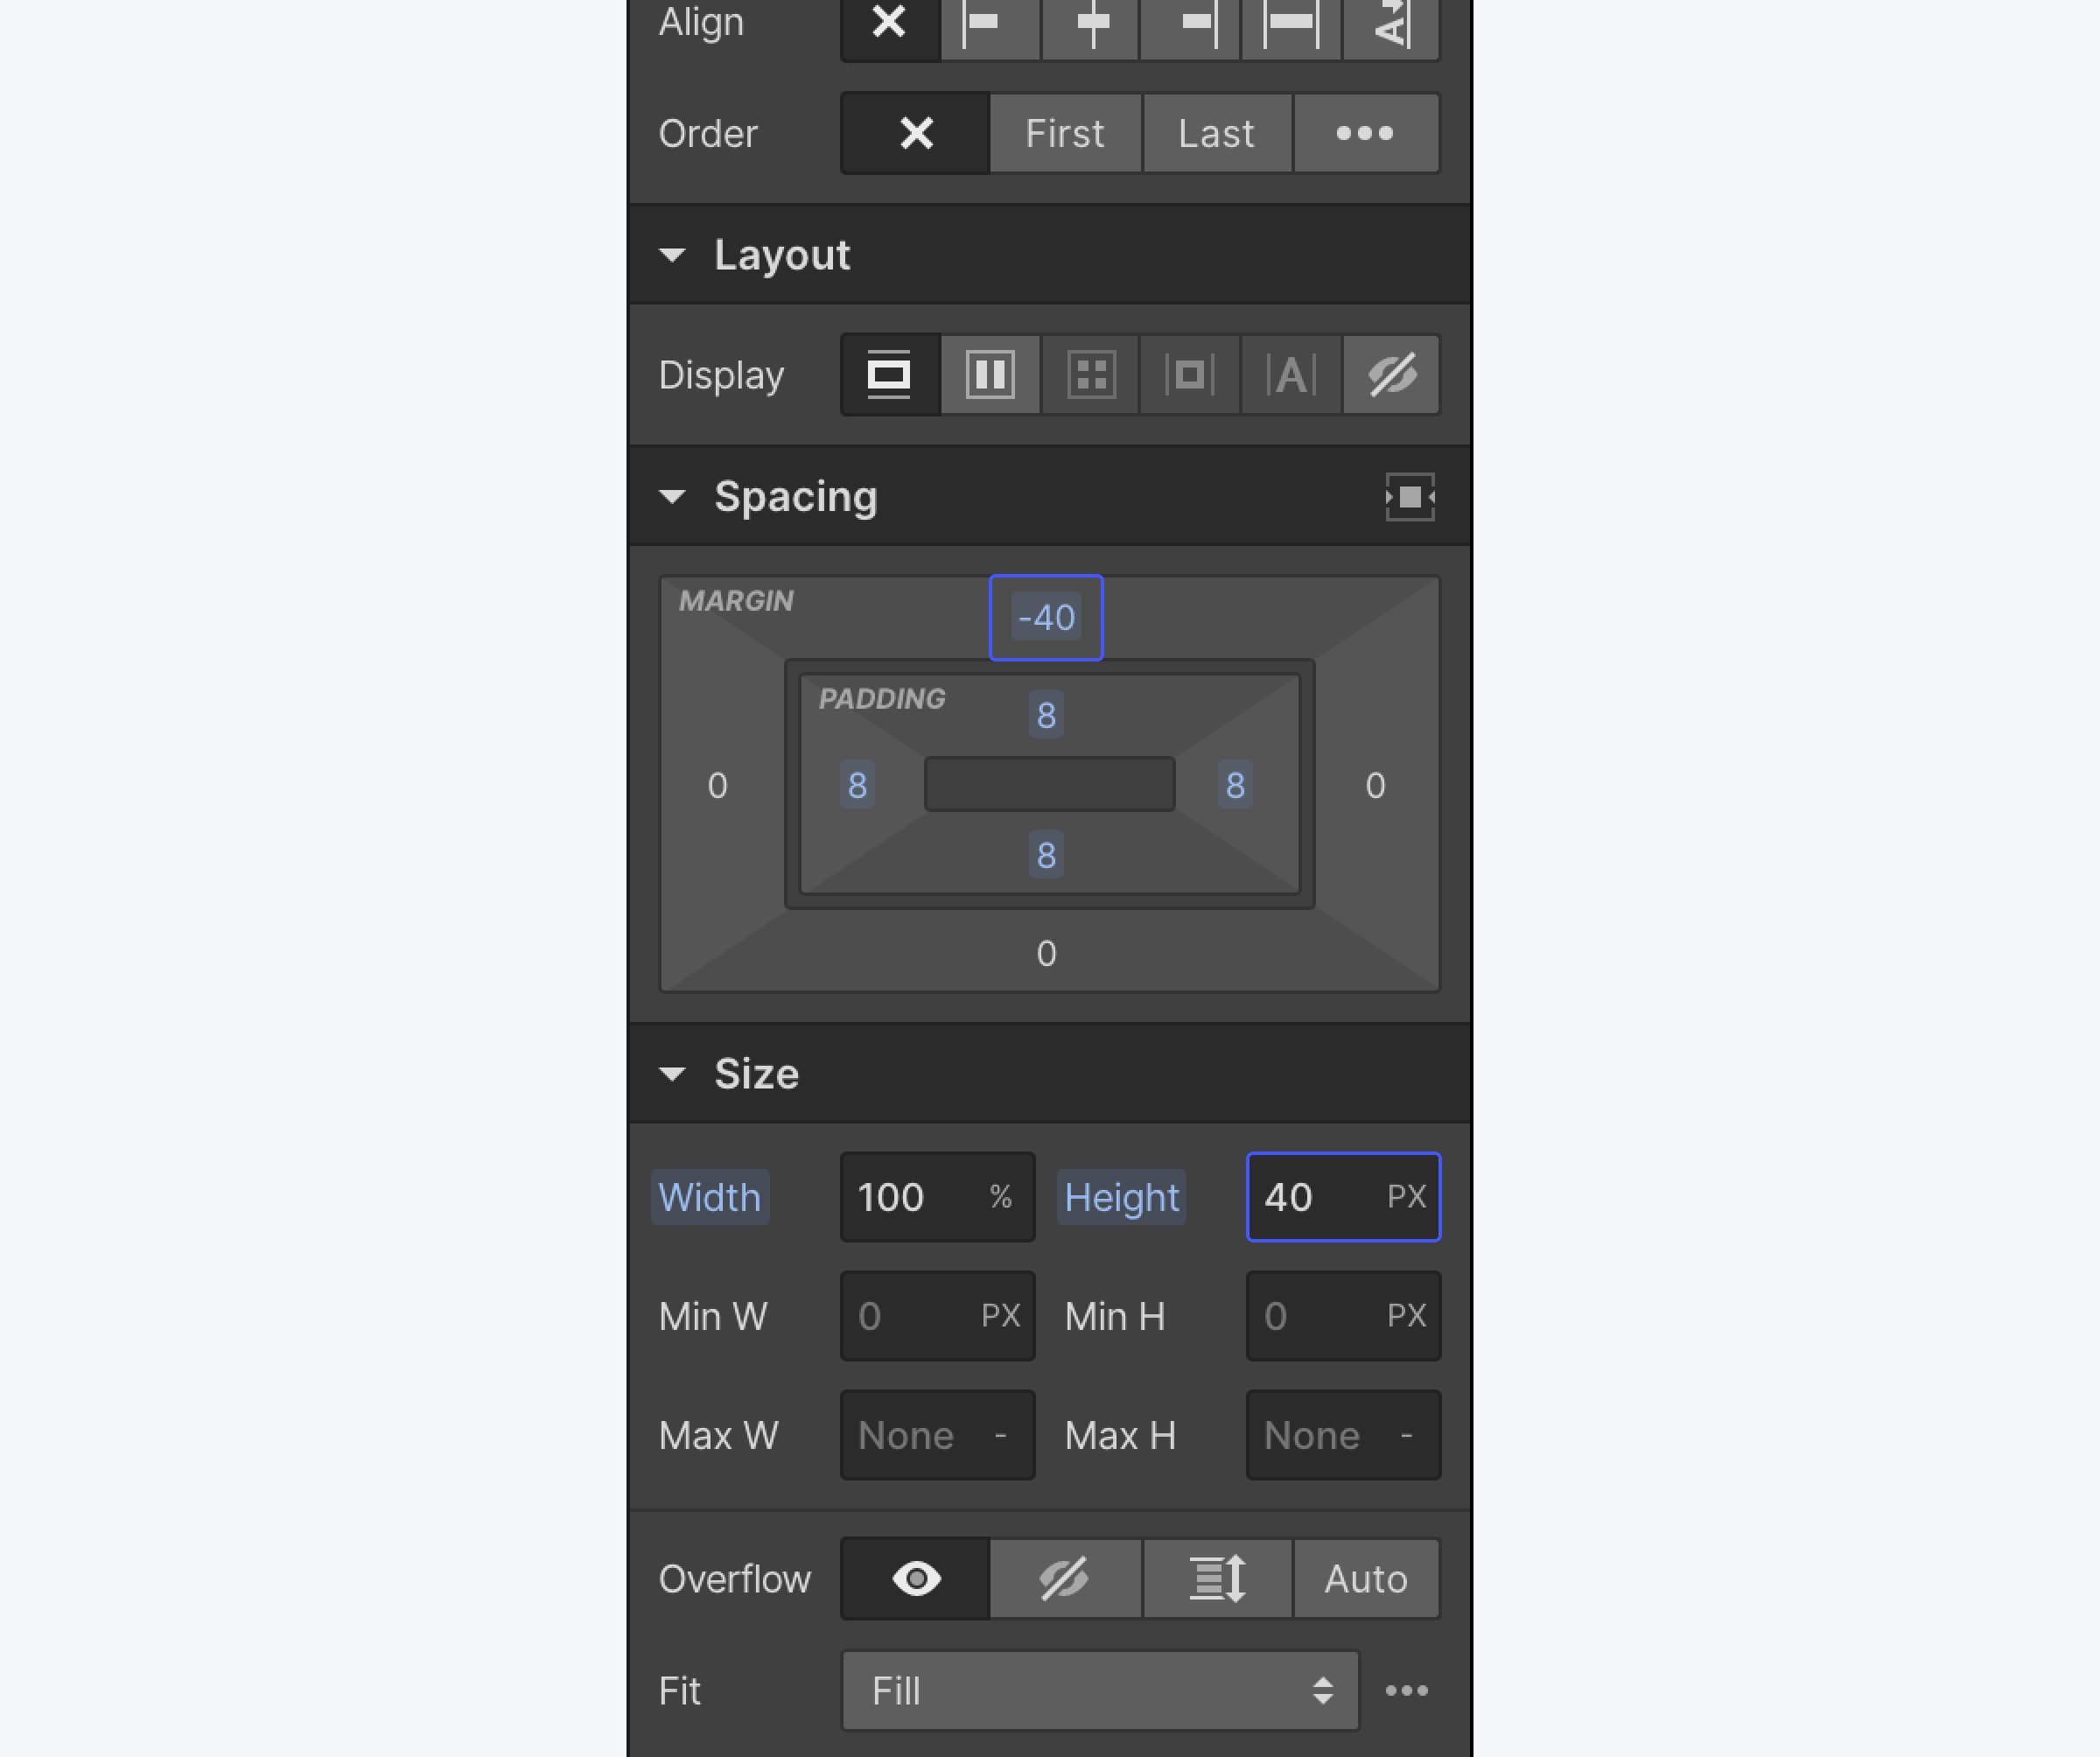
4. Design your skip link with the Styles panel. A common approach is to hide it unless focused. You can do this by setting a negative margin-top on the link in its default style, and then setting that margin-top back to 0 with the Focused state selected.

5. Add the following custom code to the Project Settings > Custom Code > Before footer. Remember to replace <checks-richtext_class>ID-of-your-link<checks-richtext_class> with your chosen ID for the skip link, and <checks-richtext_class>ID-of-your-main-section<checks-richtext_class> with the ID chosen for your next focusable area after triggering the skip link
<!-- Skip-to-main script -->
<script>
  $(document).ready(function () {
    $('#ID-of-your-link').on('click keydown', function(e) {
      if (e.type === "keydown" && e.which !== 13) {
          return;
      }

      e.preventDefault();
      var target = $('#ID-of-your-main-section');
      target.attr('tabindex', '-1');
      target.focus();
    });
  });
</script>
6. Publish your site to make sure that your skip link is working, and that after pressing the “Tab Key”, the focus continues in your chosen main element .
Useful resources:
WCAG reference:
Congratulations on making the web a more accessible place!
Where:
When:
Where:
When:
Where:
When:
Where:
When:
Where:
When:
Where:
When:
Where:
When:
Where:
When:
Where:
When:
Where:
When:
Where:
When:
Where:
When:
Where:
When:
Where:
When:
Where:
When:
Where:
When:
Where:
When:
Where:
When:
Where:
When:
Where:
When:
Where:
When:
Where:
When:
Where:
When:
Where:
When:
Where:
When:
Where:
When:
Where:
When:
Where:
When:
Where:
When:
Where:
When:
Where:
When:
Where:
When:
Where:
When:
Where:
When:
Where:
When:
Where:
When:
Where:
When:
Where:
When:
Where:
When:

