


In this fourth and final part of our series, we'll tackle API integration with a quick tutorial on setting up Zapier. We’ll also take a look at how smooth Webflow has made it to hand off your site to content creators. Hint: silky smooth.
Part 4: API integration and content creation
In part three of this series, we looked at steps six to eight to create your agency site in Webflow:
6. Harness the power of flexbox
7. Design logical interactions that don’t overwhelm users
8. Invert the palette for readability
In the fourth and final part of this series, we’ll look at steps nine and ten:
9. Use Webflow CMS’s API integraion
10. Call your favorite content creators
Step 9: Use Webflow CMS’s API integration
I won’t get too much into the technical weeds with this — Webflow covers a lot of the technical aspects of API integration.
If you’re unfamiliar with APIs, fear not. An API can be thought of as one of two things: data that a company or app allows you to use elsewhere, or a gateway to input data into an app or website. If apps and websites were a taco truck, APIs would supply the taco shells and the takeout window.
Or, maybe I need to work on my analogies …
But how does this impact you? Well, this allows you to take information and data from any source that exposes it, and put it on your site. This could mean tweets, maps, pricing tables, inventory, images … really anything you can think of.
All you need to do is find sites and apps that allow you to receive that data and then create a Collection inside of Webflow to catch the data. Oh — you’ll also need a delivery person (Zapier), but I’ll get into that later.
The first step in using the API with Webflow is to create a Collection for the data. For the Bespke site, I wanted to showcase the most recent Dribbble posts I liked.
Here’s what that Collection looked like:
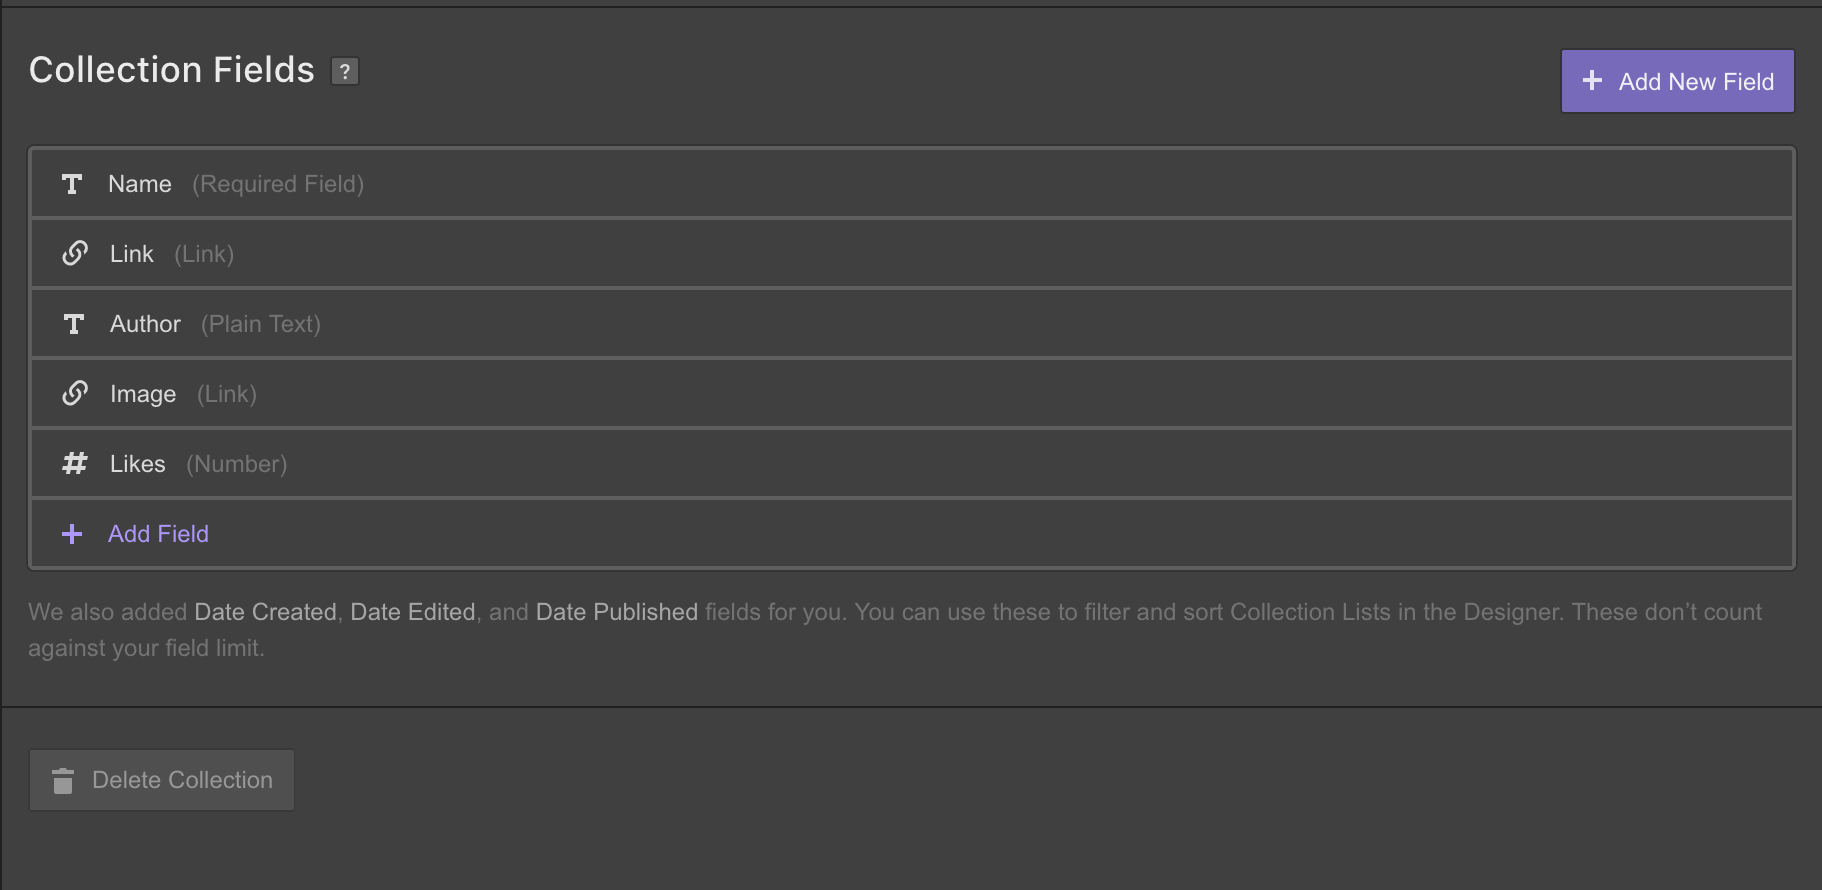
Once I had that Collection set up, I added a couple test items so I could style them on my site. I positioned that section on the bottom of the homepage and used a similar style and interaction as my featured Collection. I wanted to drive traffic to the Dribbble posts themselves — instead of to an individual Collection page — so the original designer was properly attributed.
Now, if you’re looking closely at the Collection I had above, you’ll notice the image field is not actually an image at all, but rather a link to an image.
Here’s what that looks like:
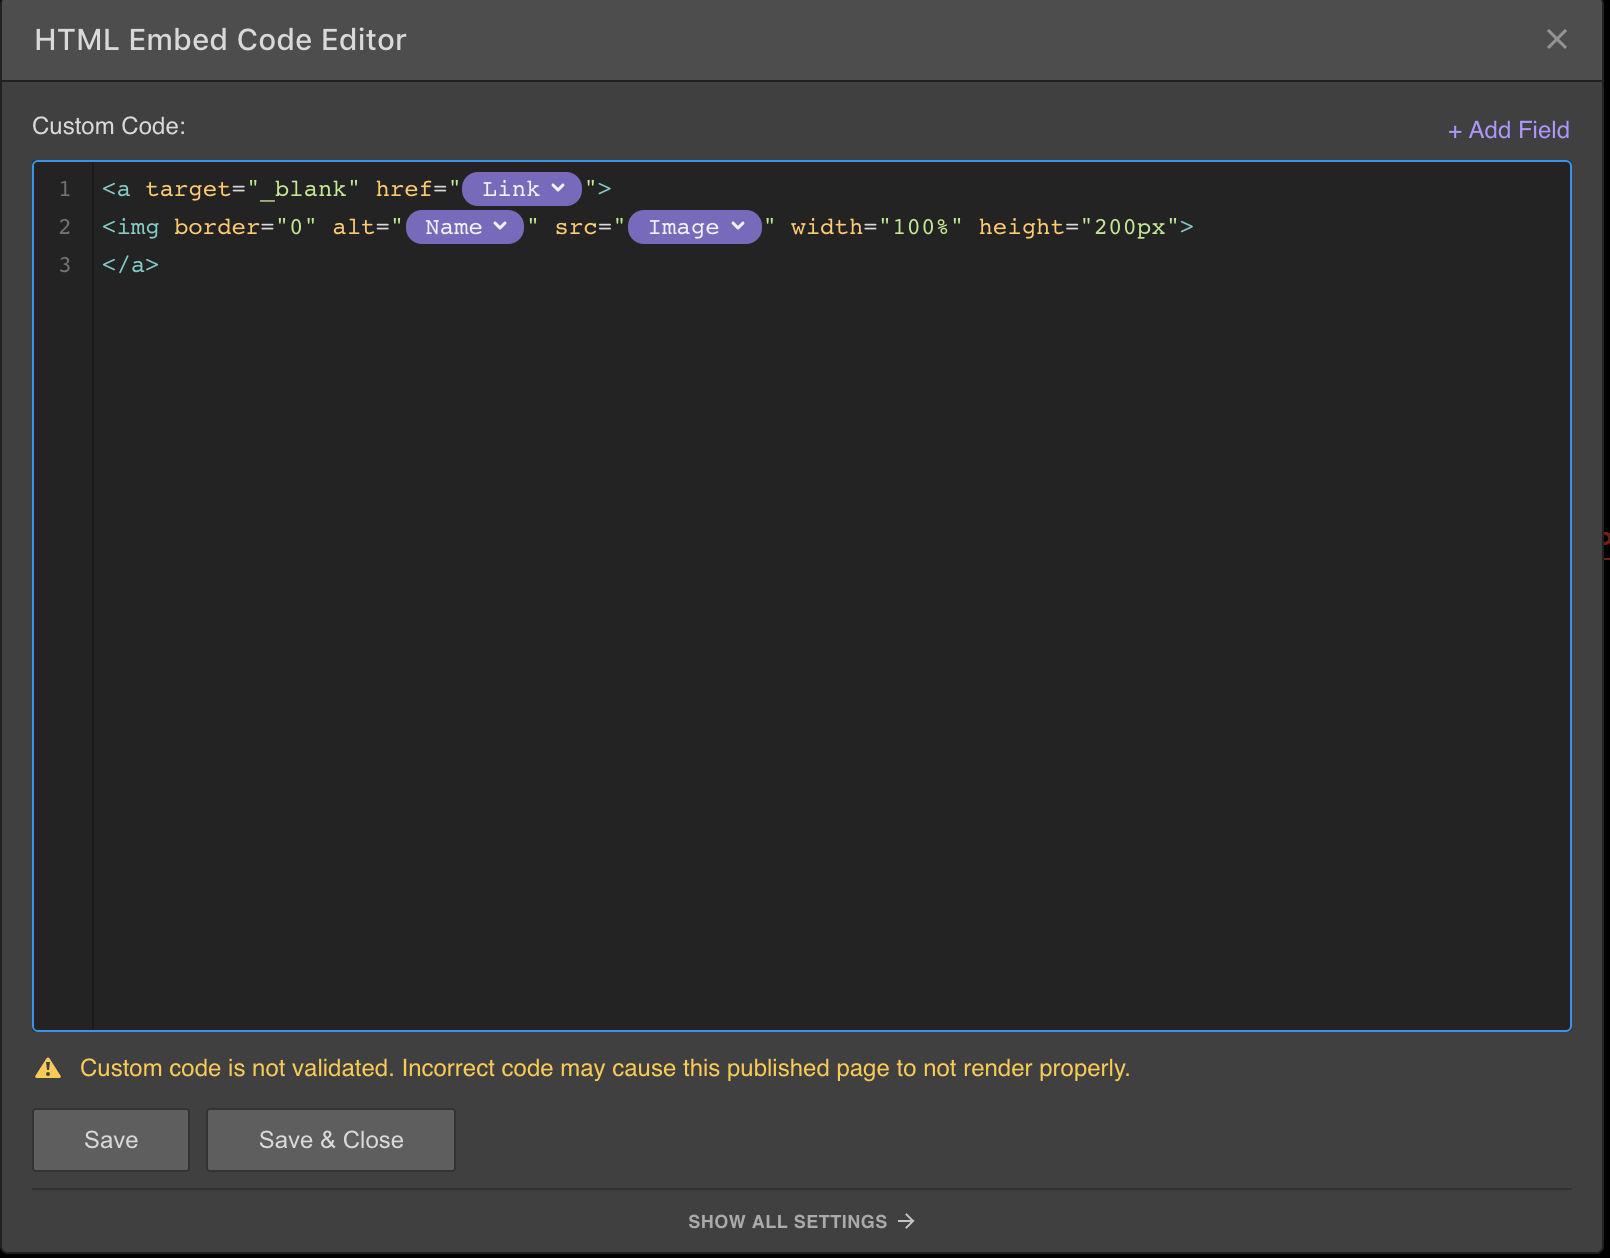
And here’s the code snippet I used:
<a target="_blank" href="{Link Field}"><img border="0" alt="{Name Field}" src="{Image Link Field}" width="100%" height="200px"></a>
Set up Zapier
Zapier is a service that allows you to join 2 APIs together. You can use it for some automation rules, but it gets much more powerful with Webflow’s CMS.
The first step will obviously be to create a Zapier account.
Once you’ve done that, click Make A Zap at the top of the screen and start typing in your triggering app — in my case Dribbble — and select from the list of available triggers. You’ll have to authenticate with the account you want to use, but that’s just a few clicks, depending on your service. Zapier does a great job of getting you authenticated quickly.
Here's what that process looks like:


Learn flexbox the fun way...
Master the basics of flexbox in 28 increasingly challenging — and fun!— levels, without writing a line of code.
Once you have your trigger and the action you want to take in Webflow selected, select the correct site from your Webflow account, and the Collection you made to consume the API event.
Once you’ve done that, you’ll come to a page that shows all of the Collection fields you set up in Webflow. You’ll want to fill each of those with the data from your service, and in the end, it should look something like this:
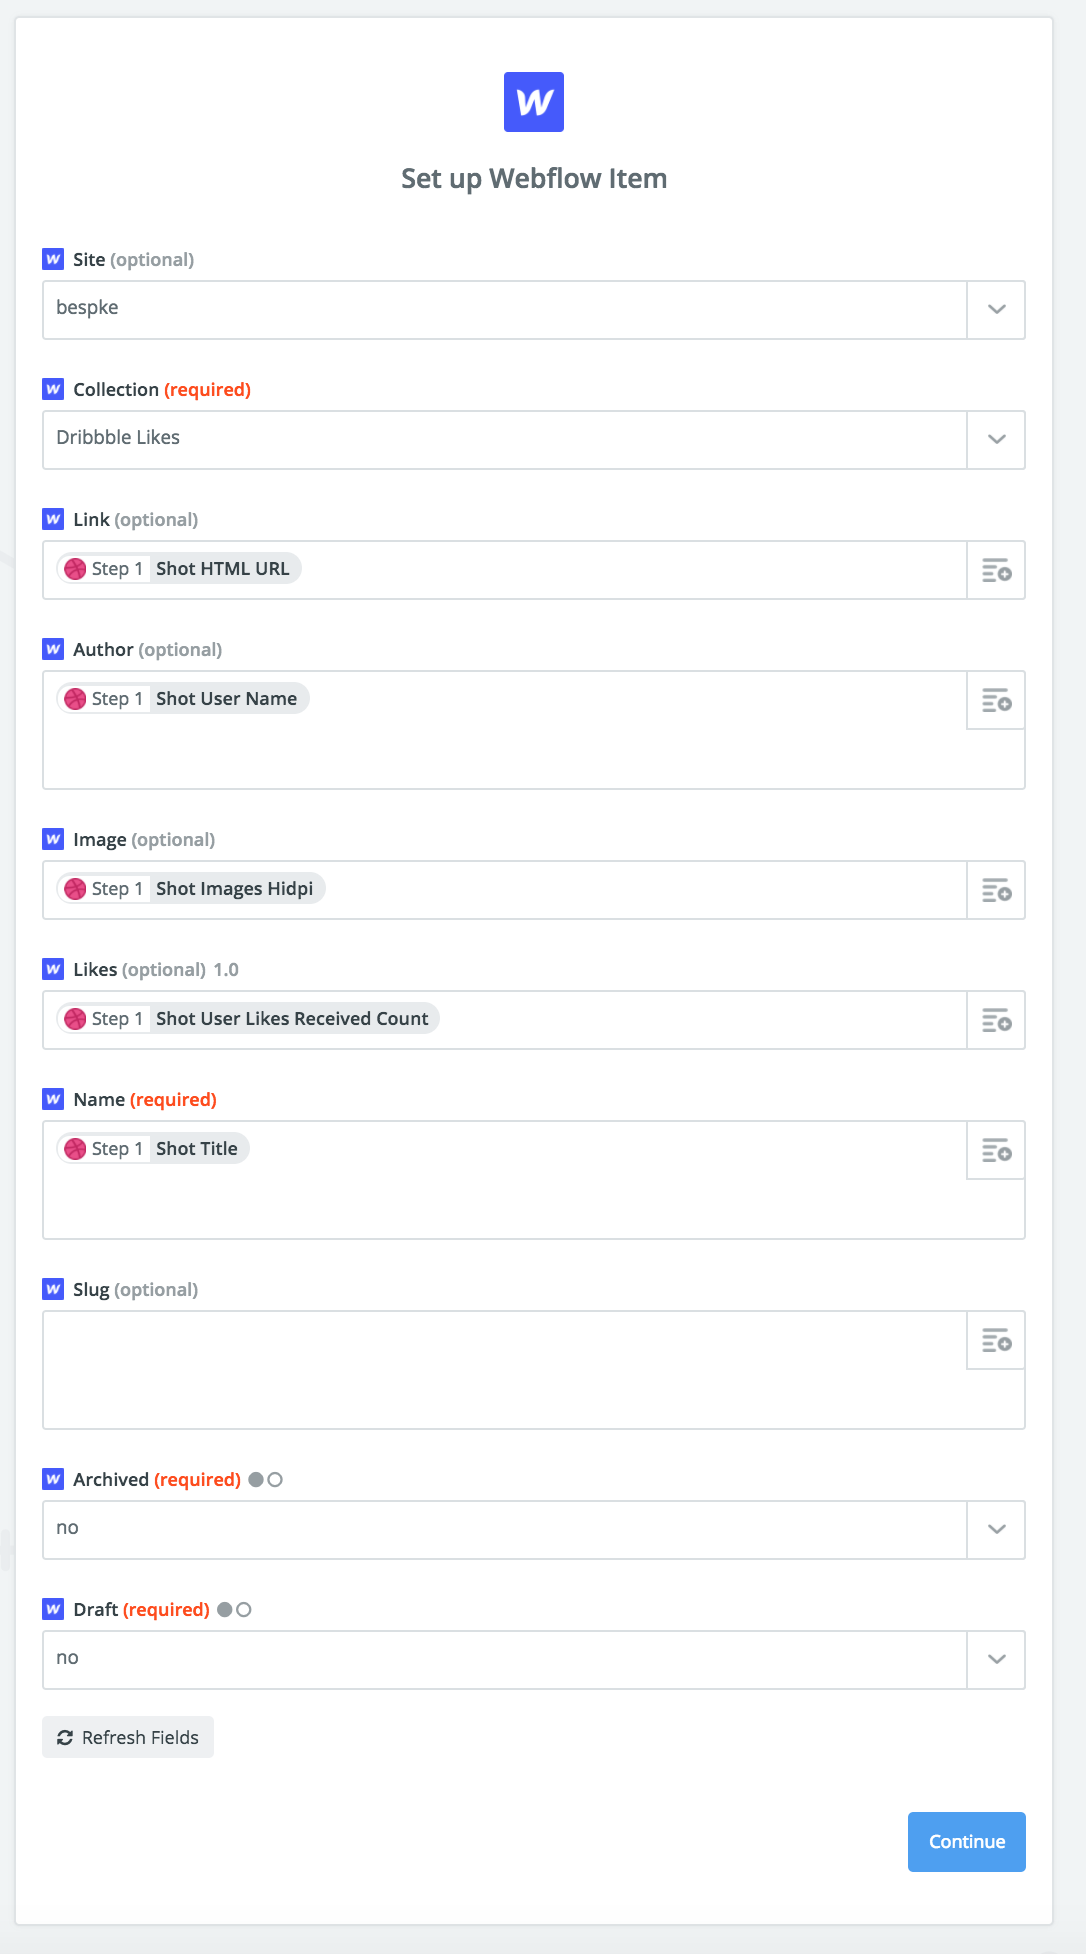
Each of the fields that has a Dribbble logo will be filled with content from Dribbble. It’s important that the data you select here matches the datatype you’ve defined in your Collection. For example, if I were to put the number of likes or shot title in a field that’s expecting to have a link, Zapier will throw an error. Zapier can’t expose the data types to you, so it will allow anything to be put there. You’ll only encounter the issue after you hit continue and it tries to test with a past entry.
Once you’ve done all of the bindings, the next step is to test your set up. There’s a bunch of different ways this can be wrong, but once you’ve done it right, you’ll see this page:
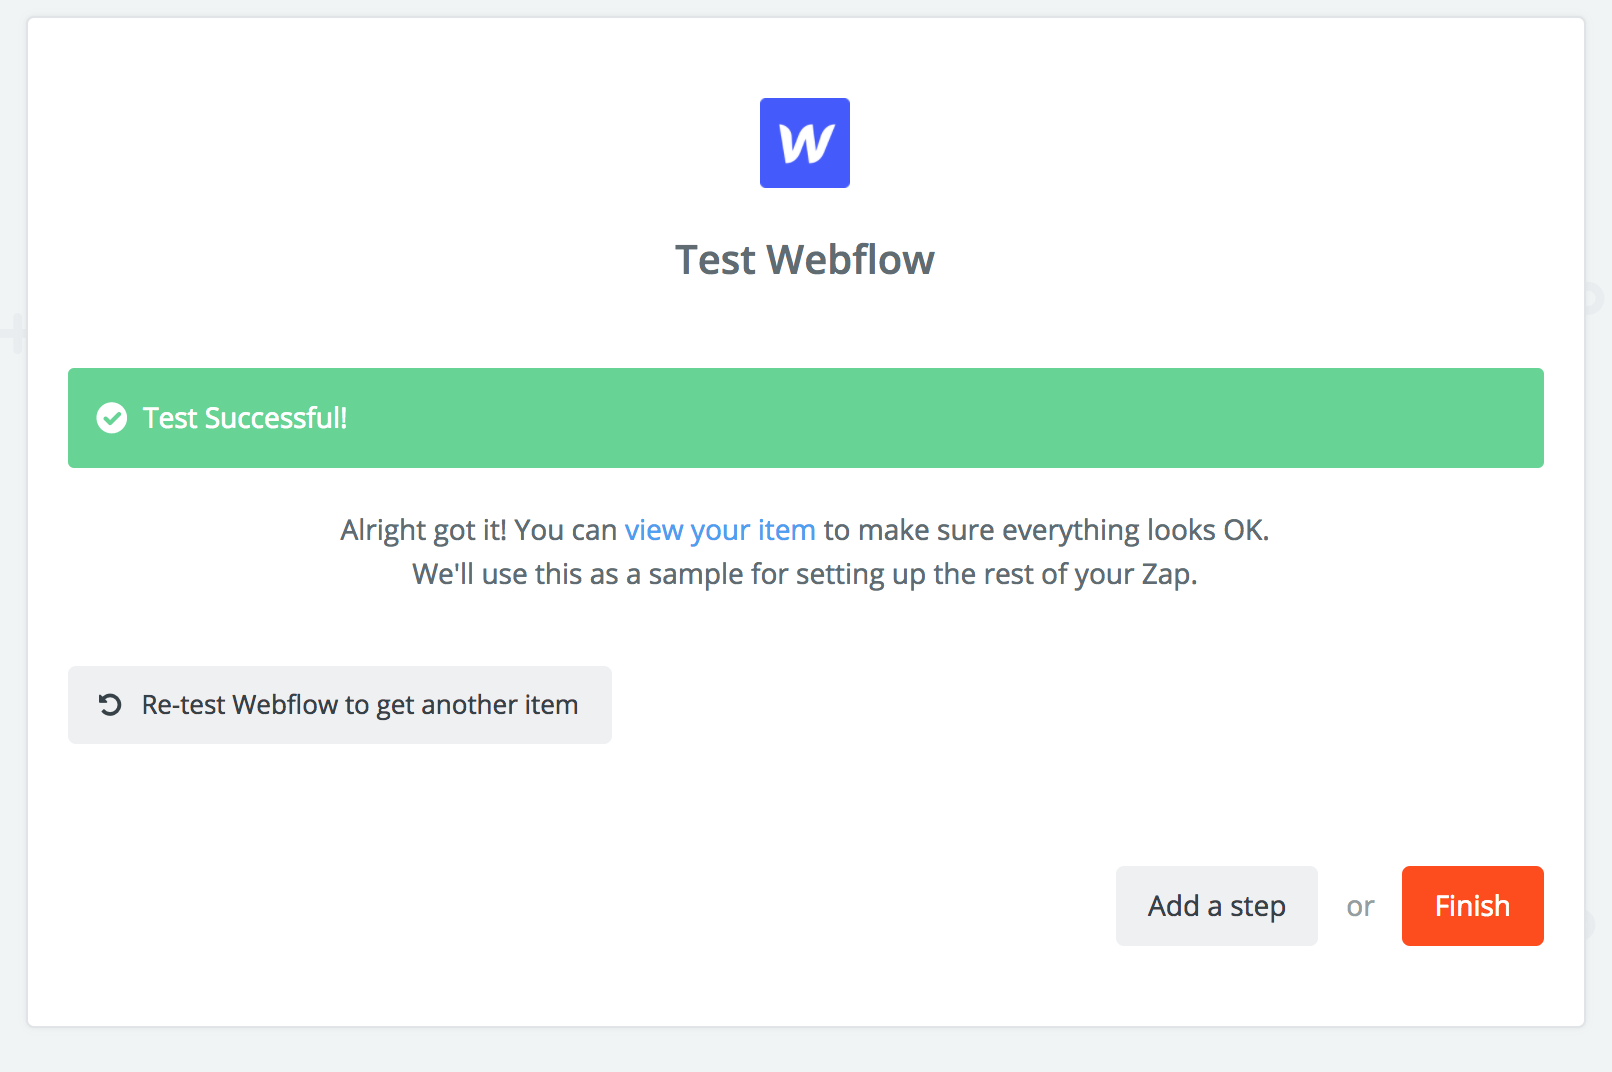
And then you’ll see that a new Collection entry will have been added to your Webflow site.
Congratulations! You’ve mastered the art of API integrations and can boast to everyone in earshot. #webflowandzapierbff4life #apihavethepower
Step 10: Call your favorite content creators
This is one of the easiest parts of the process. You’ve created the shells for your content, you’ve set up pages to contain that content, you’ve styled everything, and you’ve created the classes and interactions. Now you need to get someone to fill in the content.
That someone could be you, but in most cases it’s someone in marketing, or a freelancer you’ve never met. You may worry that you’ll have a lot to explain to that person by documenting a complex system or teaching someone about CMS.
But fear not, oh potentate of pixels, Webflow has made a template to make the handoff to your content creators silky smooth.
To use it, simply duplicate it into your account and open it. I could walk you through the steps to use it — but the site itself does that already! Take some time, read through the copy, and you should be able to figure it out. Come back here when you’re done.
Done already? That was fast!
Now, you can either take that site as it currently exists — publish it and pass it along to your content writers — or, you can go to the style guide page and customize it. This lets you hand off something that not only helps your content writers write, but it will be cohesive and not have that template/afterthought feel.
Here’s the CMS guide I made for Bespke.
I didn’t go crazy with it. The H2s, H3s, and H4s don’t match perfectly, but no one but you will notice.
Once you’re done with all of that, publish it and — voila! Not only will you not have to write a long-winded email every time someone new comes on board, but you now look ultra-legit and cool for your clients — just like we always knew you were.