

Last month, we launched a new Webflow site featuring top agencies and freelance designers using Webflow: Webflow Experts. Compared with some of our other more product-focused microsites, the Experts site is unique in how it fosters community and communication — and for the extent to which Zapier helps power that community.
In this post, we’ll look at how we’ve integrated Zapier with the Webflow Experts site to create:
- A custom email notification system that sends Experts new project submissions
- A Slack notification system that lets the entire Experts network know when a new general submission comes in
A little context
Before I dive into how we set up some of the Zapier integrations, let’s take a quick look at how the Experts site actually works. In concept, it’s pretty straightforward.
In practice … well, we’ll get to that in the next section.
On the one hand, we have visitors to the site who want help on a project (let’s call them clients). And on the other hand, we have the Experts, who each have a profile that highlights their work and features additional information about the services they provide.
Clients can submit a project in two places on the site:
- On an individual Expert’s profile, notifying only that Expert
- On the general submission page, notifying the whole network of Experts
Creating this notification system required some crafty Webflow and Zapier magic. Let’s start by looking at situation 1, where a client submits a project to a specific Expert, and we send them a custom email with all the project’s details.
Building the email notification system in Webflow
Step 1: Hidden form fields and dynamic embeds
To send a custom email to an Expert when they get a new project submission on their profile page, we needed to create a Zap that fed that form submission data into an HTML email template.
We also needed to populate the Expert’s email address in the form submission data, so we could use that address as the recipient for the email we eventually fired from Zapier.
Seems simple, right? Just add a field to the form on their profile page, and dynamically pull in their email address. Yes — but we also needed to conceal that field from public view, so all the communication mechanics just happened “in the background.”
Our solution? A little custom code, plus some dynamic embed Webflow CMS magic. Let’s see how.
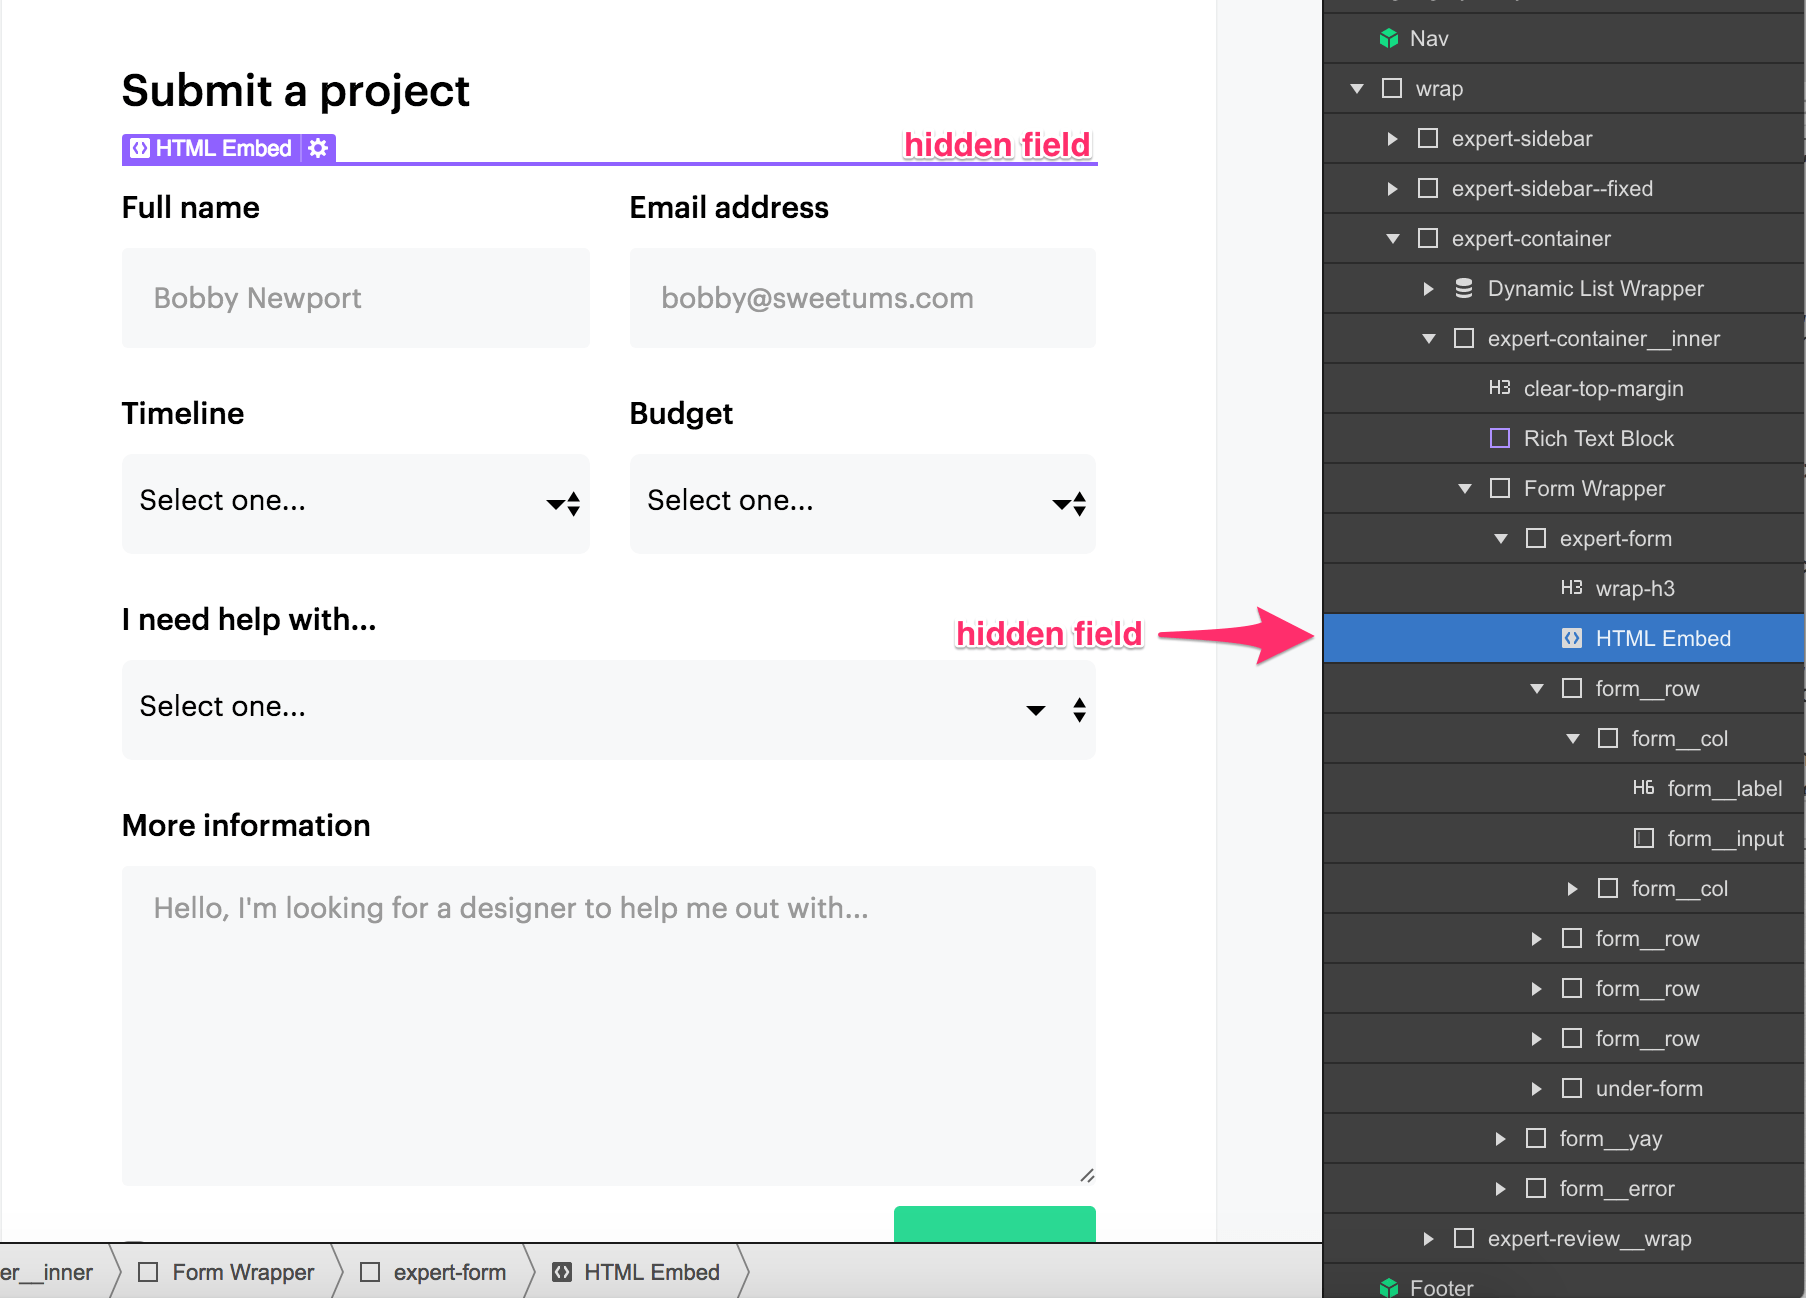
To include the Expert’s email address with each form submission, we:
- Added a custom code embed to the form
- Added a form field, set to type=”hidden”
- Then dynamically populated the value field with the email address.
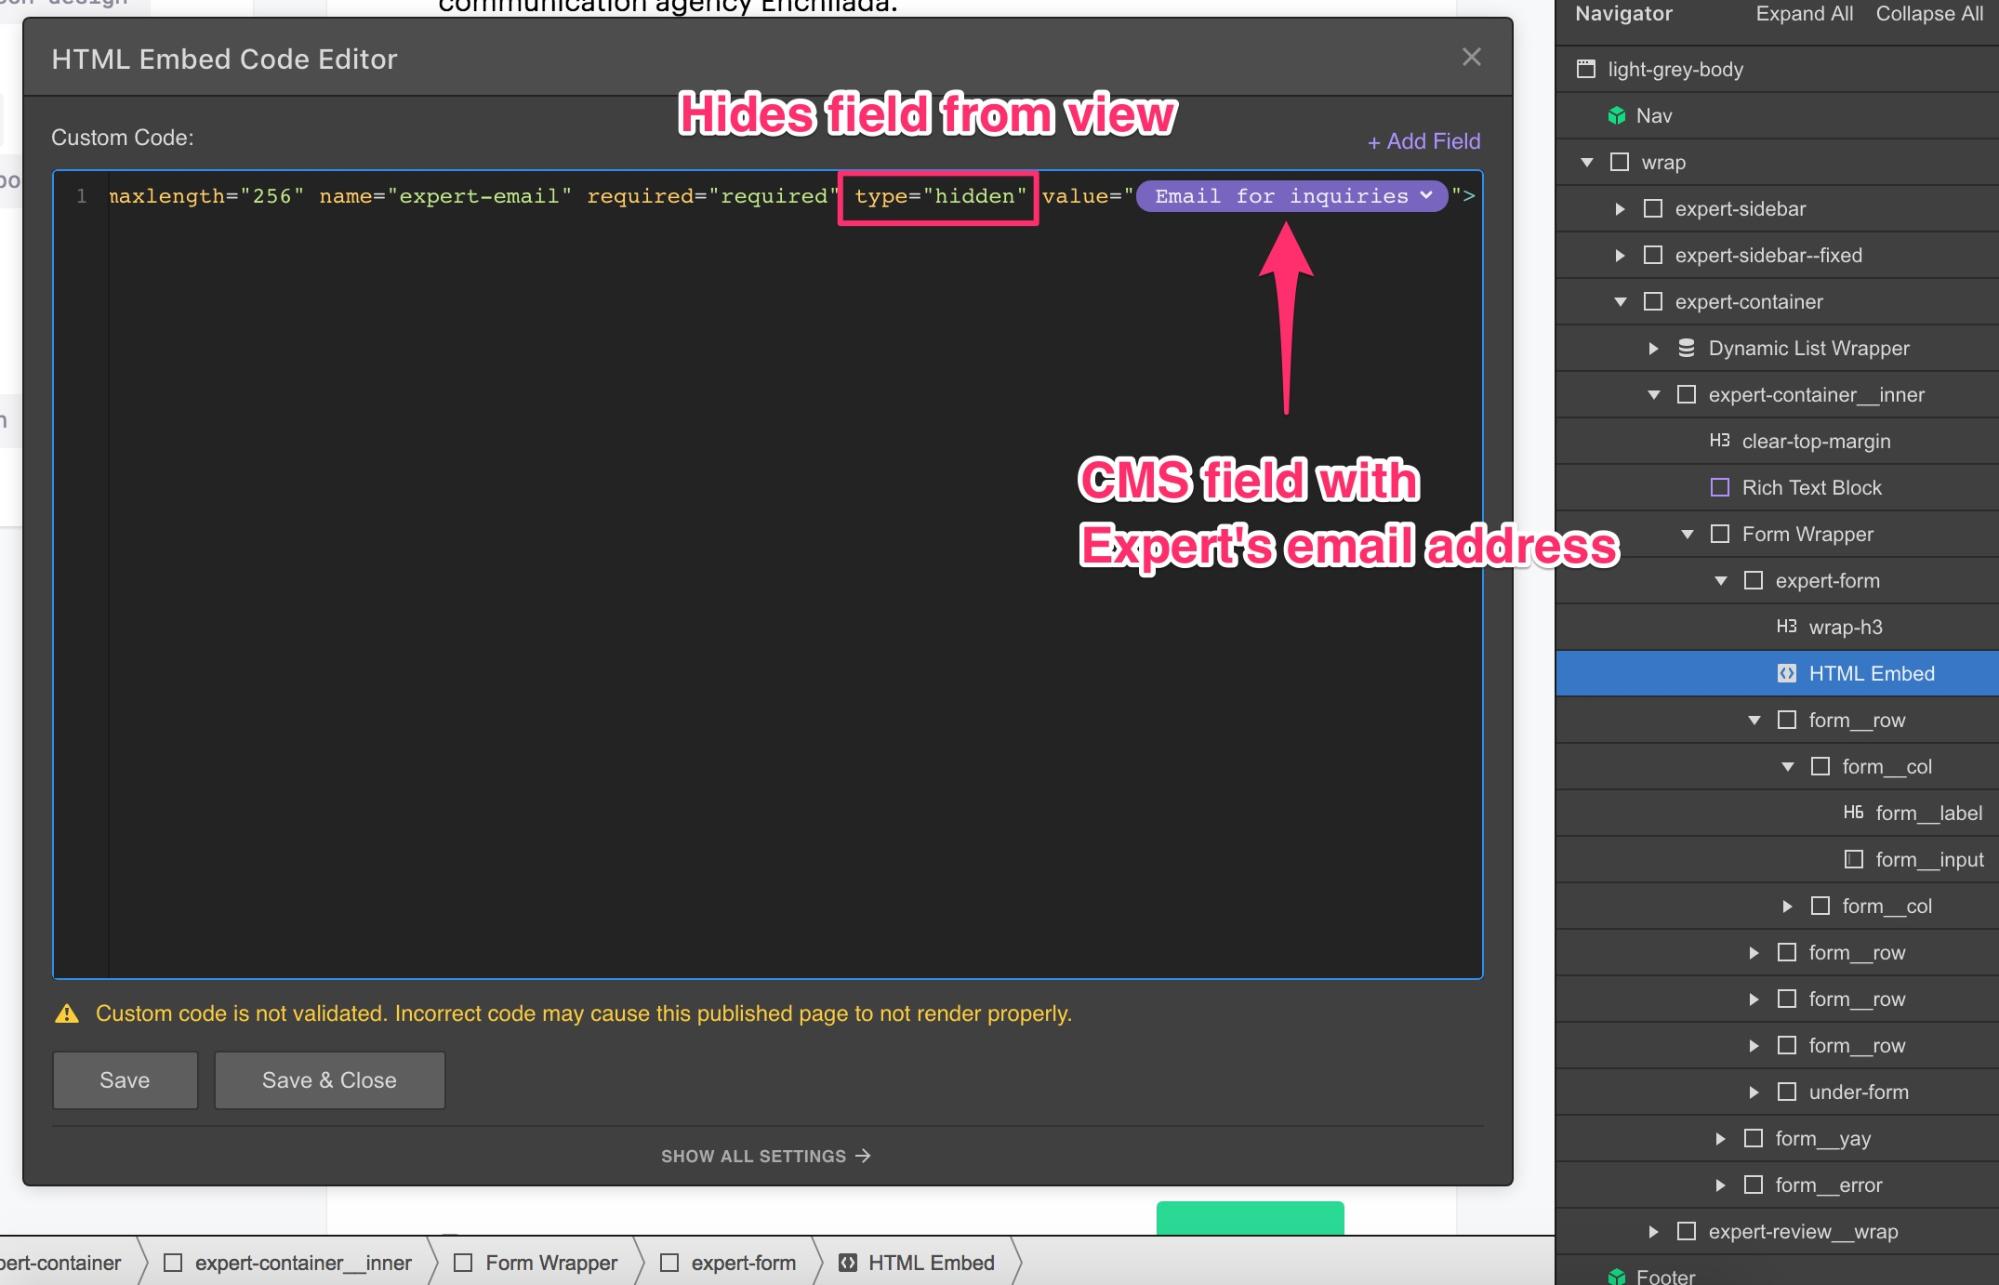
Here’s the dynamic embed code:
<input data-name="expert-email" id="expert-email" maxlength="256" name="expert-email" required="required" type="hidden" value="[DYNAMIC EMBED GOES HERE]">
And here’s a look at the custom code in the Designer, with the dynamic embed displayed:
With all this in place, and with an existing HTML email template, we had what we needed to set up the Zap.


Get started for free
Create custom, scalable websites — without writing code. Start building in Webflow.
Zap 2: Webflow Forms + Gmail
Now that our form was set up to use the Experts email, we needed to populate that form data in an HTML email template and send it to the Expert with a Zap.
For context, here’s the final product:
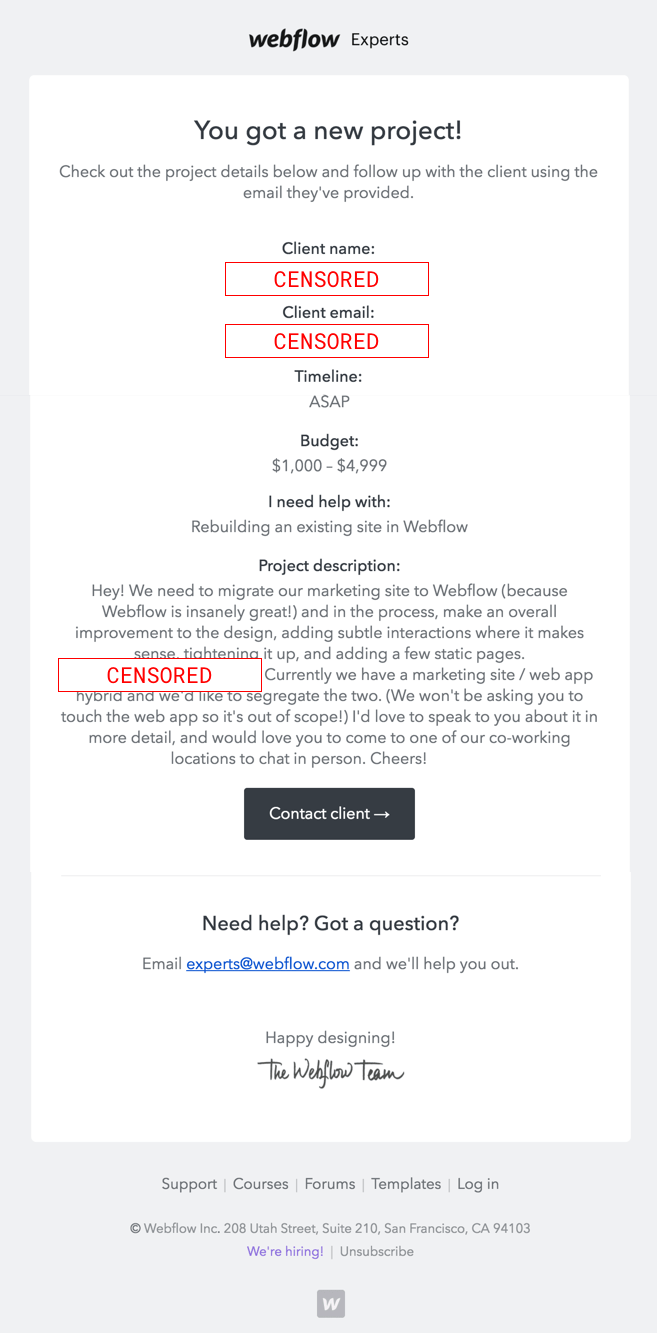
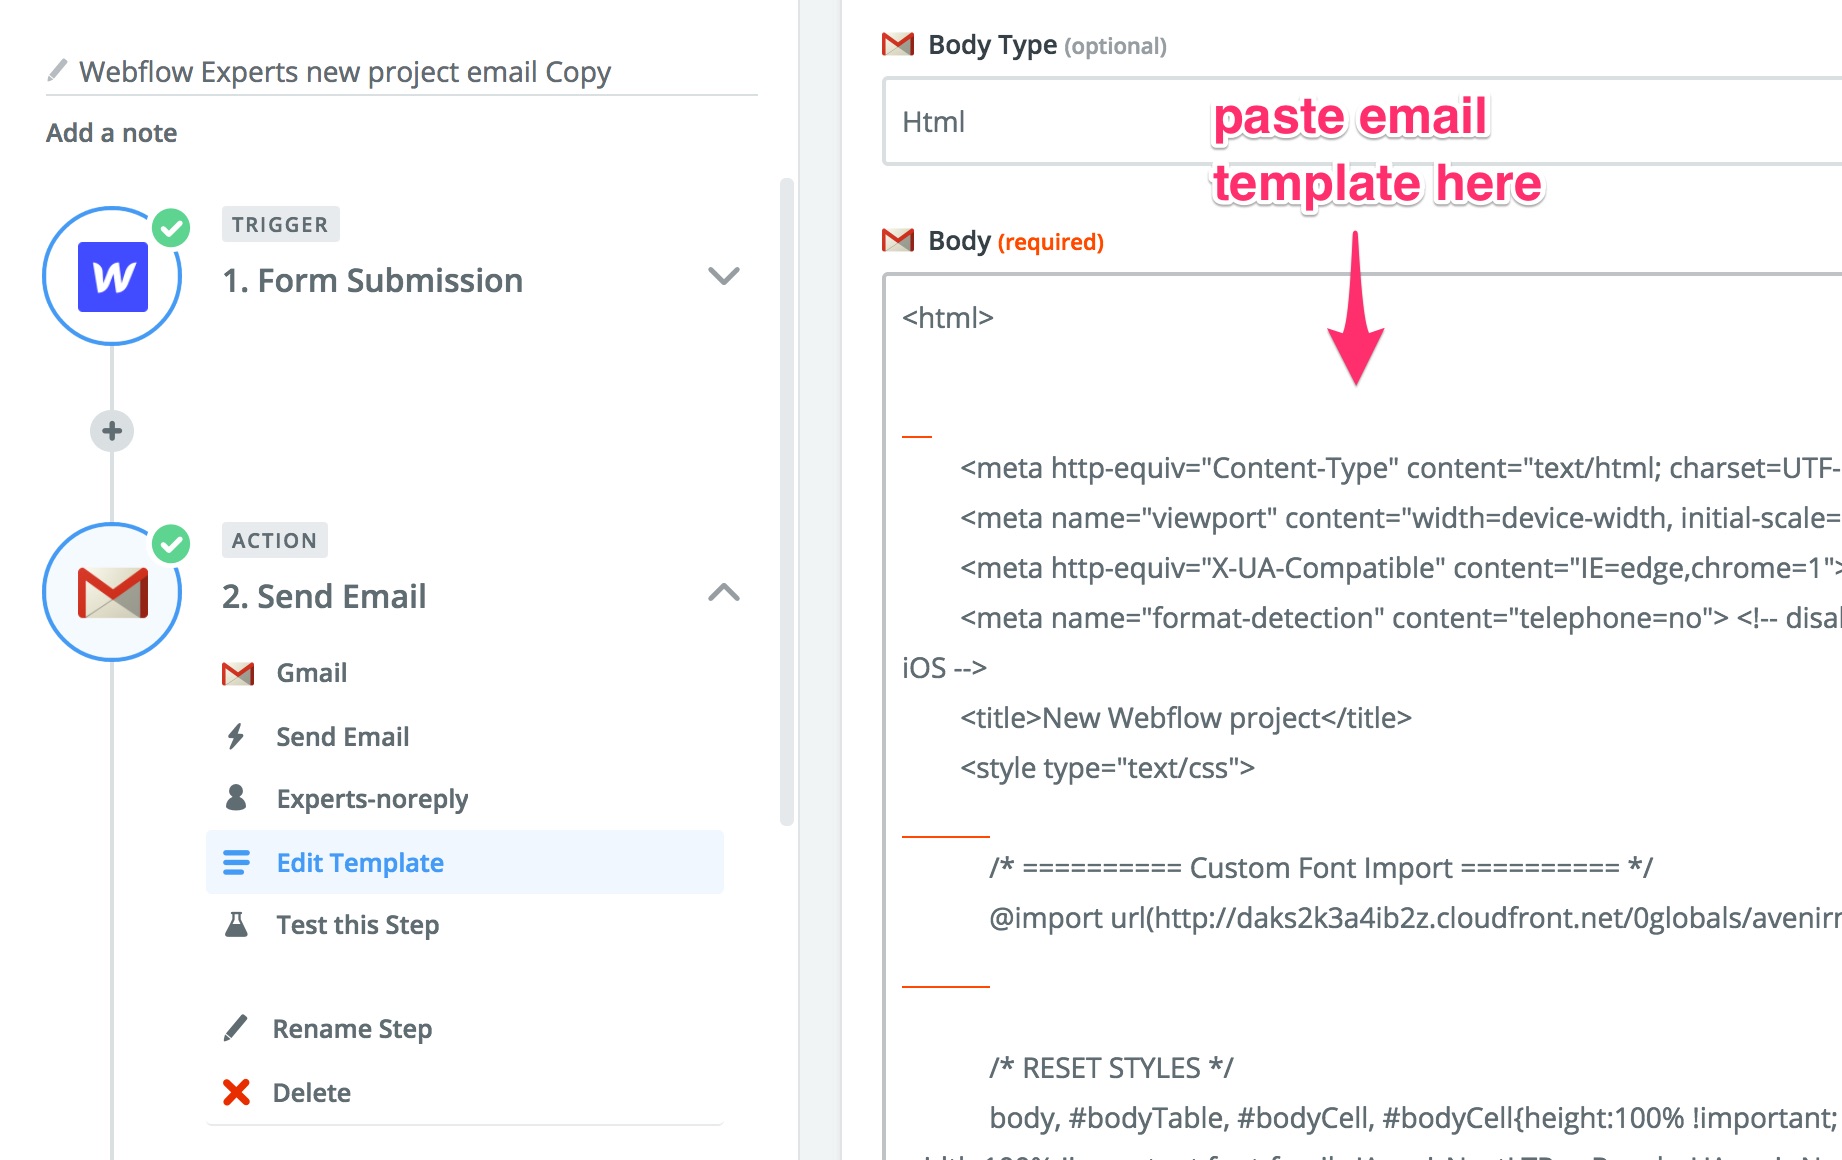
Compared to the hidden form field work, this part was easy. The Zap had the following pieces:
- Trigger: Webflow - Expert profile form submission
- Action: Gmail - Send email (and dynamically populate the HTML template with form data)
I’ll skip the basics of setting up the Zap (for more on that, check out our tutorials on the Help Center) and jump into the email template, which is the more advanced component of the Zap.
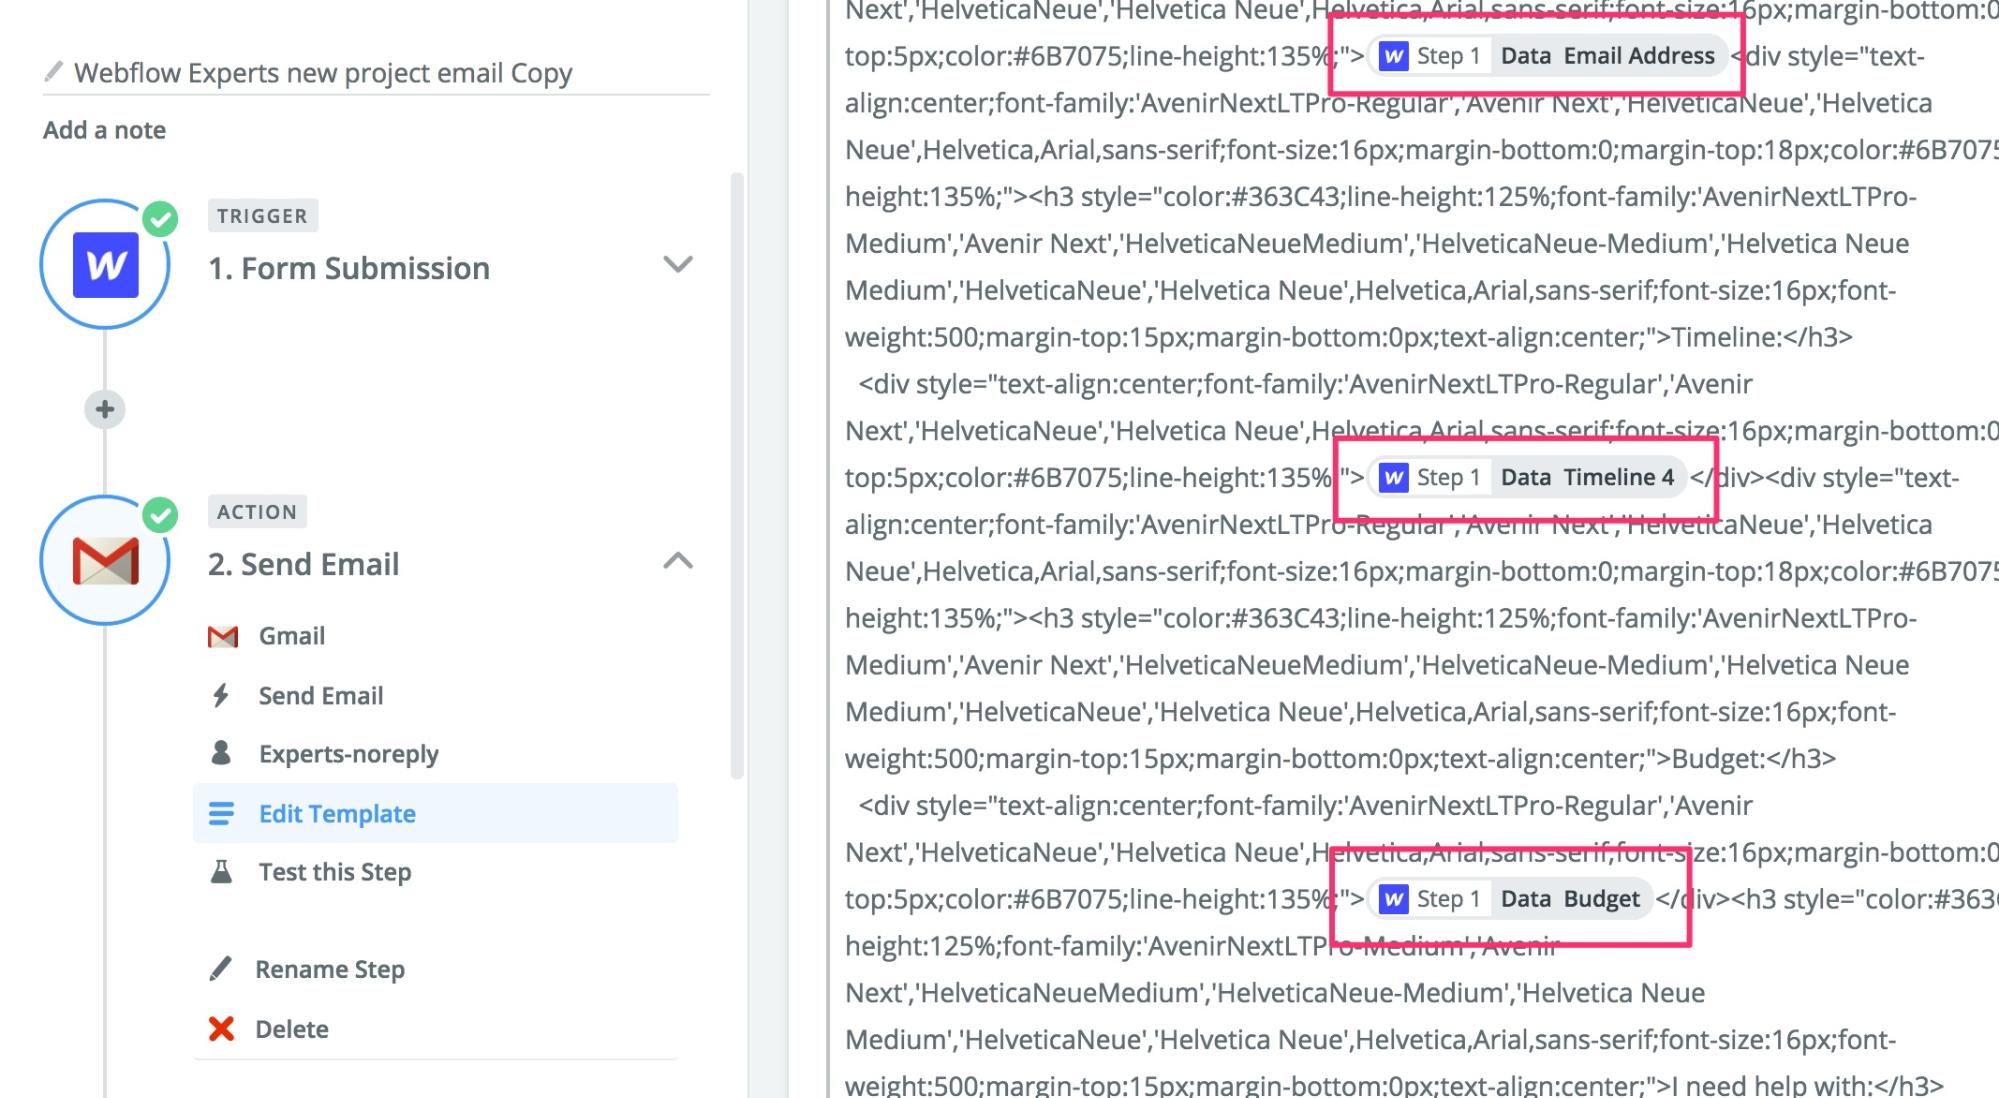
Once you’ve set your recipient and subject line, set the body type to HTML, then paste your email template’s code in the body field.
Now you can replace any part of the email with a dynamic value from the form submission (it actually works a lot like dynamic embeds in Webflow). Here we simply highlighted and replaced the email fields in the template with the form data.
And boom! Give it a few tests and you’ll be up and running with a custom email notification system, powered by the magic of the Webflow CMS, dynamic embeds, and Zapier.
Building the Slack notification system
Zap 2: Webflow forms + Slack
To foster a sense of community among the Experts, we created a Slack channel. Aside from helping everyone communicate and share ideas, the Slack channel makes communicating incoming projects that are submitted to the whole network a lot easier and more immediate.
How, you ask? Simple. Integrate that form with Slack, so that each new submitted project gets pulled directly into a Slack channel that everyone has access to.
Again, let’s start by looking at the final product:
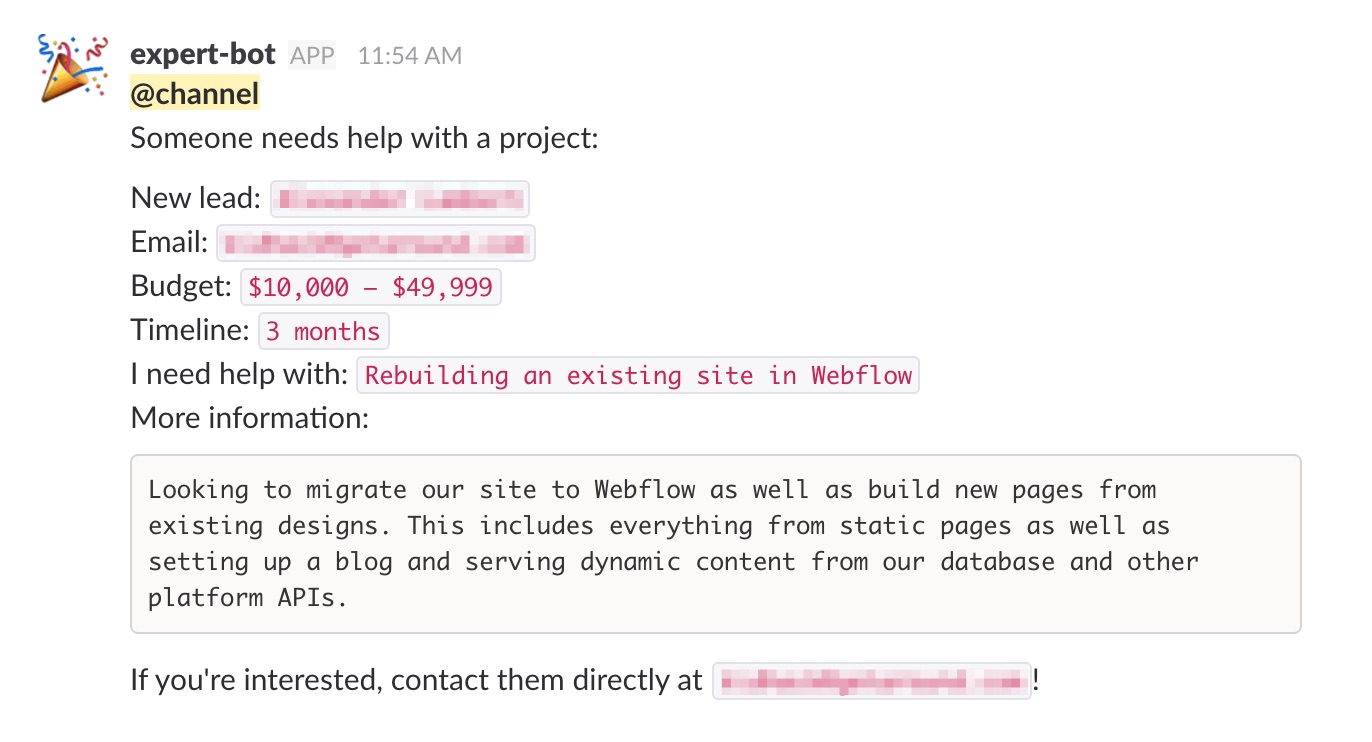
Because this form doesn’t need to dynamically pass in an Expert’s email address, it’s a lot more straightforward. We just take the form data and feed it into a custom Slack message template.
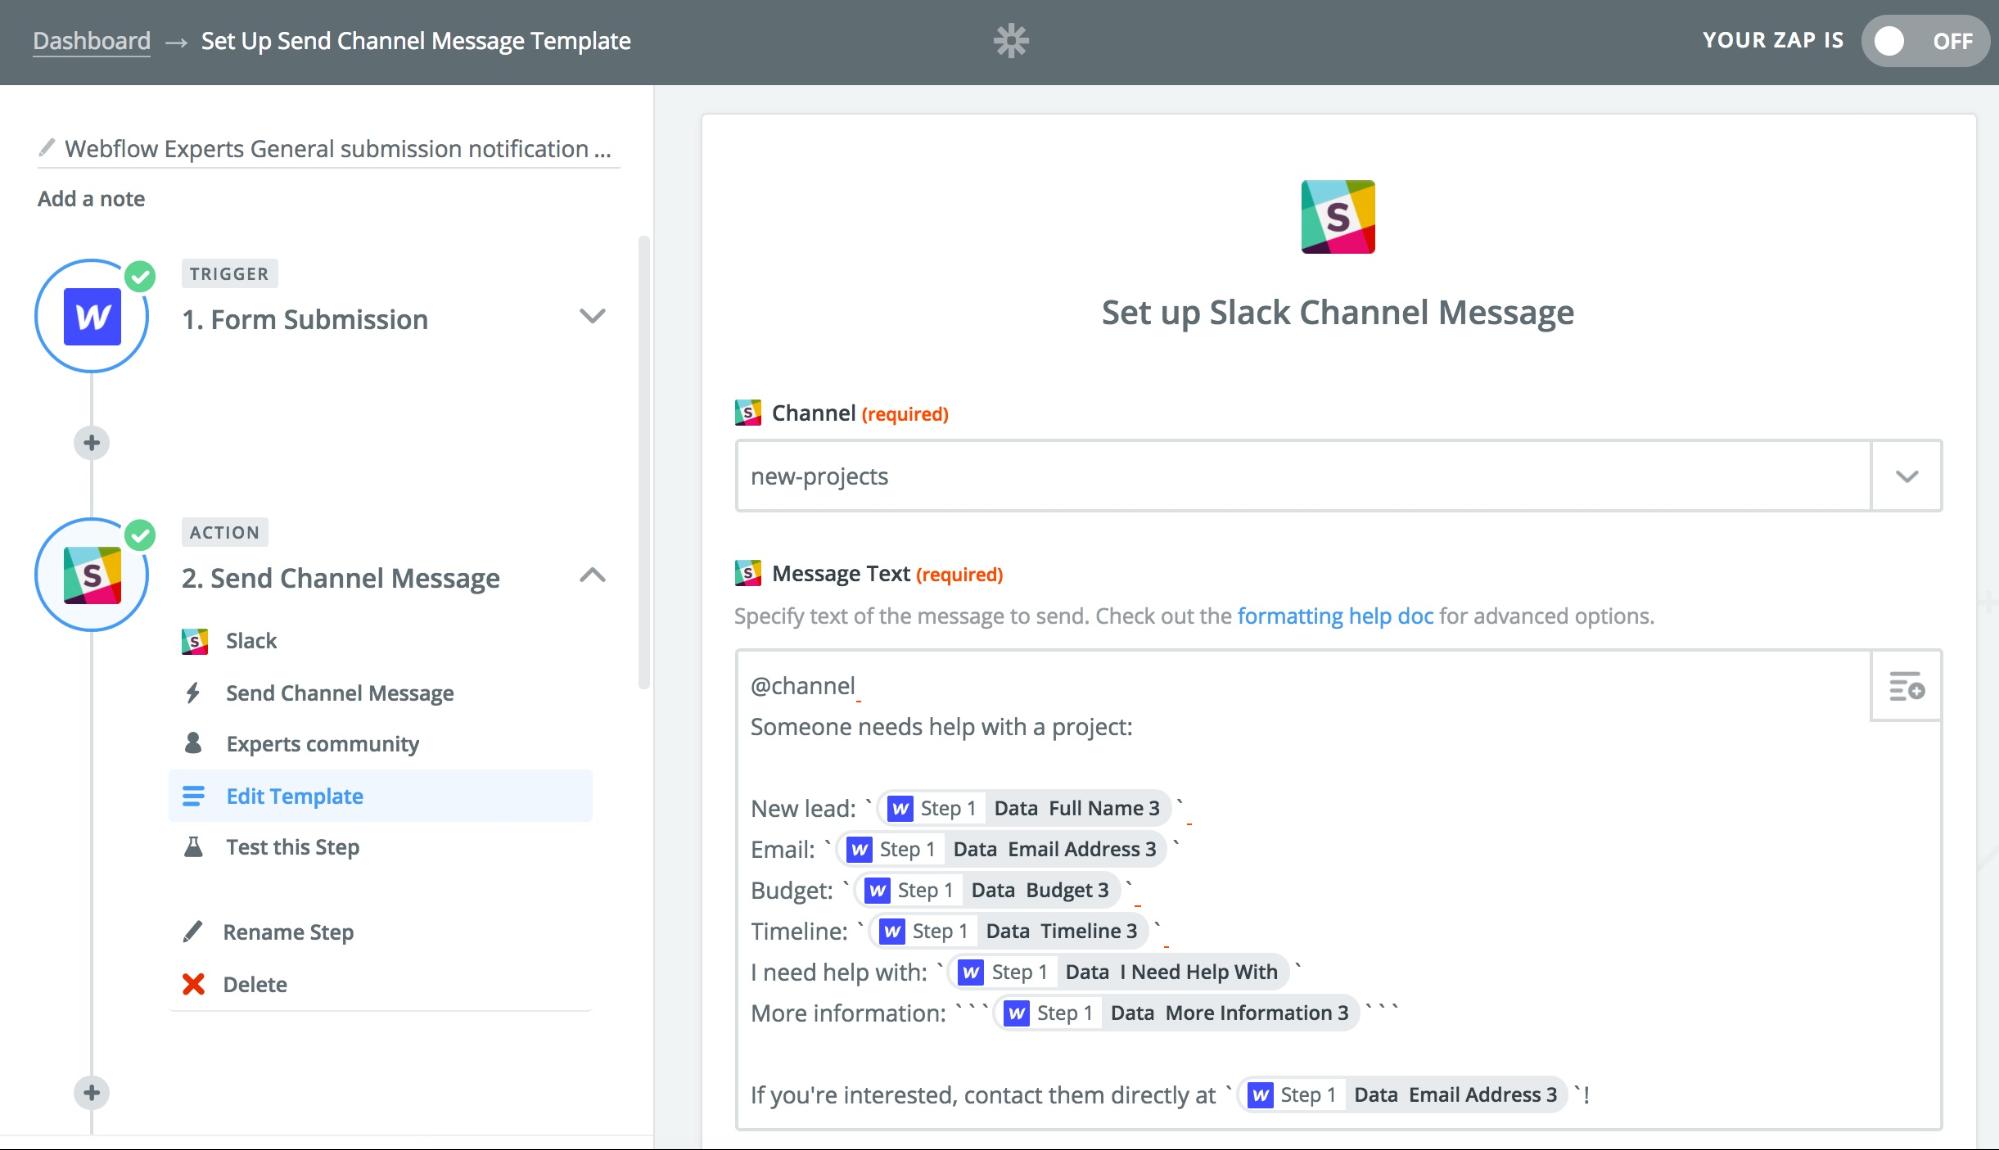
Again, replacing your Slack message template with form data works just like dynamic embeds in Webflow, so this Zap is a pretty easy one. But so cool, right?!
What I didn’t cover
Working on this project really drive home the power of Webflow when you throw Zapier in the mix, and Zapier has over 750 apps in total, so there are many thousands of other possibilities that I’m certainly leaving out. So if you haven’t already, definitely dig into Zapier and experiment with some integrations for your site!
What useful integrations have you built for your sites with Zapier? Let us know in the comments!