


Facebook launched dynamic product ads in 2015 to help ecommerce owners run targeted, optimized, and scalable ad campaigns. Dynamic ad campaigns are a powerful tool for emerging and established businesses looking to increase conversions and boost sales — without spending hours configuring individual campaigns. In this post, we’ll show you how to launch dynamic ad campaigns on Facebook from your Webflow Ecommerce store.
With our recent release of integrations such as Facebook pixel and Facebook catalog, setting up dynamic ad campaigns on Facebook from your Webflow Ecommerce store is simple — and the lasting impact these ads can have on your ecommerce business are immense.
Key benefits of Facebook’s dynamic ad campaigns
Before we dive into the how, let’s look at why you should consider setting up dynamic ad campaigns on Facebook.
They’re optimized to boost conversions.
Dynamic ads rely on data, captured by the Facebook pixel, that helps you optimize your ad campaigns and target the right people with the products they’re most likely to buy.
For example, you can target users with ads for products similar to those they’ve purchased, viewed but did not purchase, or products they added to their cart but abandoned because they got distracted by oh wow the new Black Mirror movie is out?
They’ll save you time
The dynamic product ads allow you to automate the ad creation process and use a single ad template to generate any number of ads you need. Once you set up your campaign once, it will continue running, and updating with your inventory, for as long as you’d like.
They’ll update to match your store’s inventory — automatically
Facebook’s dynamic ads are synced directly with your store’s product feed, ensuring that your ads are updated with product prices and availability.
Convinced? Great! Let’s look at how to set up these dynamic ad campaigns, starting with the Facebook pixel and Facebook catalog.
The Facebook pixel
One of the most powerful tools in this set of integrations is the Facebook pixel. The Facebook pixel is an extremely useful tool for boosting conversions and selling your products. The power of office pets to also sell your products shouldn’t be overlooked.
The Facebook pixel is a snippet of code you install on your site to track people’s activity and relay that information back to your Facebook Ad account.
Once you’ve installed the pixel, it yields powerful insights that let you build custom audiences for your dynamic ad campaigns. Below, we’ll walk you through the process of creating your Facebook pixel, adding it into your Webflow Ecommerce site, and connecting it to your catalog to run dynamic ad campaigns.
If you’re still curious about exactly what the Facebook pixel is, I’ll defer you to Facebook’s description, a handy dandy Google search, or Bing … if that’s your thing.
Step 1: Creating the Facebook pixel
To create a Facebook pixel, you’ll need a Facebook Business Manager account. Don’t have one yet? Don’t worry, setting one up is easy. Simply follow these steps, outlined by Facebook.
Once you’ve done that, follow Facebook’s instructions to create your Facebook pixel in your Facebook Business Manager settings.
Step 2: Copying the Facebook pixel
Now that you’ve created your Facebook pixel, you’ll want to copy the pixel ID to add to your Webflow project. To do this, open the settings tab under your Facebook pixel and copy the pixel ID:

Step 2: Adding the Facebook pixel to your Webflow project
Now that you’ve created your Facebook pixel, you can add it directly into your Webflow project in your Webflow project settings — in three simple steps:
- Open your Webflow project settings and head to the integrations tab
- Scroll down and paste the pixel ID under Facebook pixel
- Save your changes and publish your project
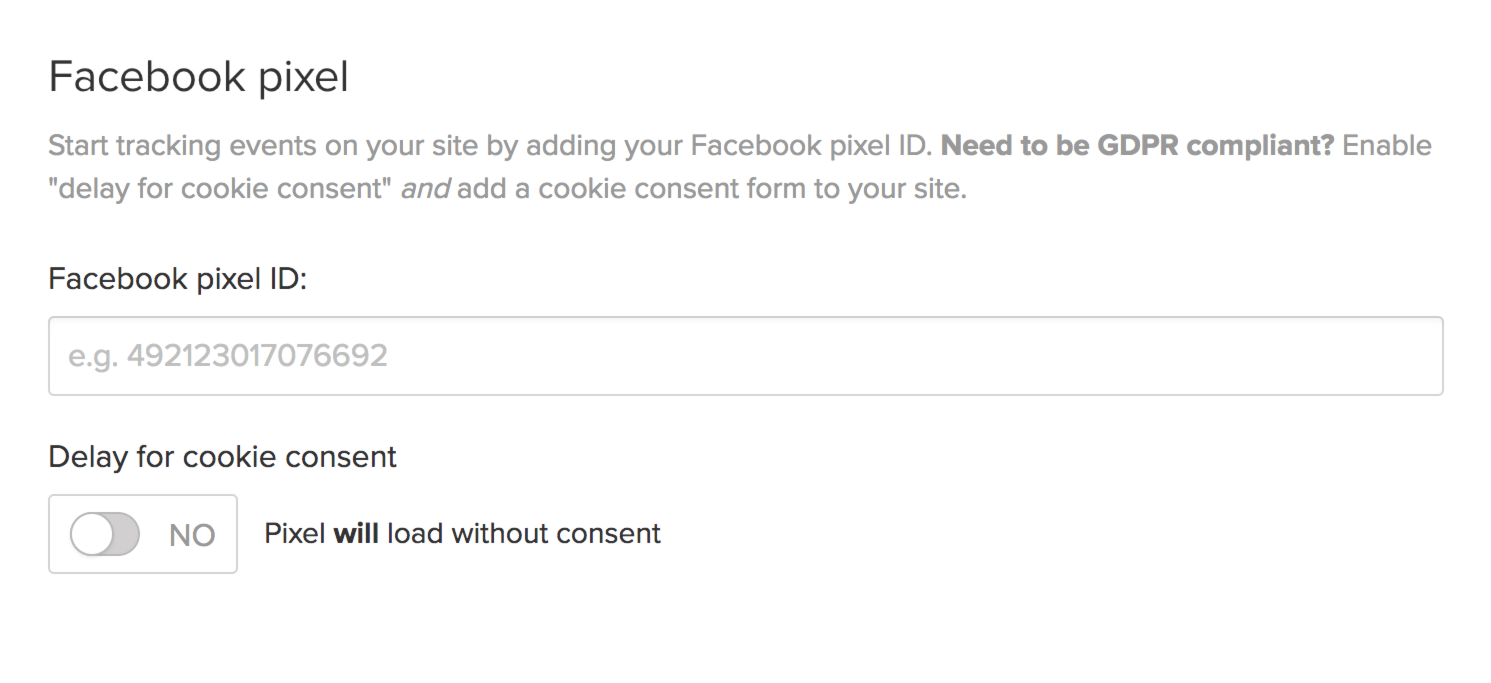
If your site might collect personal data from EU residents, you’ll need to comply with the GDPR. To do this, enable delay for cookie consent — this delays loading the pixel until your site visitors accept cookie consent.
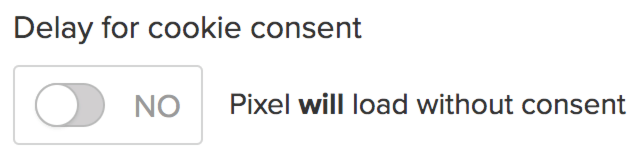
You’ll then need to add a cookie consent manager to your site.
Once you integrate the pixel into your Webflow project and you’ve enabled ecommerce, it will automatically track the following events:
- Viewed product
- Added product to cart
- Purchased product
Now that we’ve installed the Facebook pixel, we’ll set up a product Catalog in Facebook so that we can run targeted ad campaigns with an updated product inventory.


The modern web design process
Discover the processes and tools behind high-performing websites in this free ebook.
The Facebook catalog integration
The Facebook catalog stores all the product information that will dynamically fill your ads. Once you create your catalog and connect it to your ecommerce store, by way of the all-powerful pixel, the Catalog will automatically update to match your actual product inventory in the Facebook Business Manager.
Creating your Facebook catalog
To set up your catalog:
- Open the Catalog Manager in your Facebook Business Account
- Select Create Catalog
- Select the catalog type that best describes your business (for you, E-commerce)
- Click Next
- Enter a name for your catalog
- Click Create
Enabling the catalog integration in your Webflow project
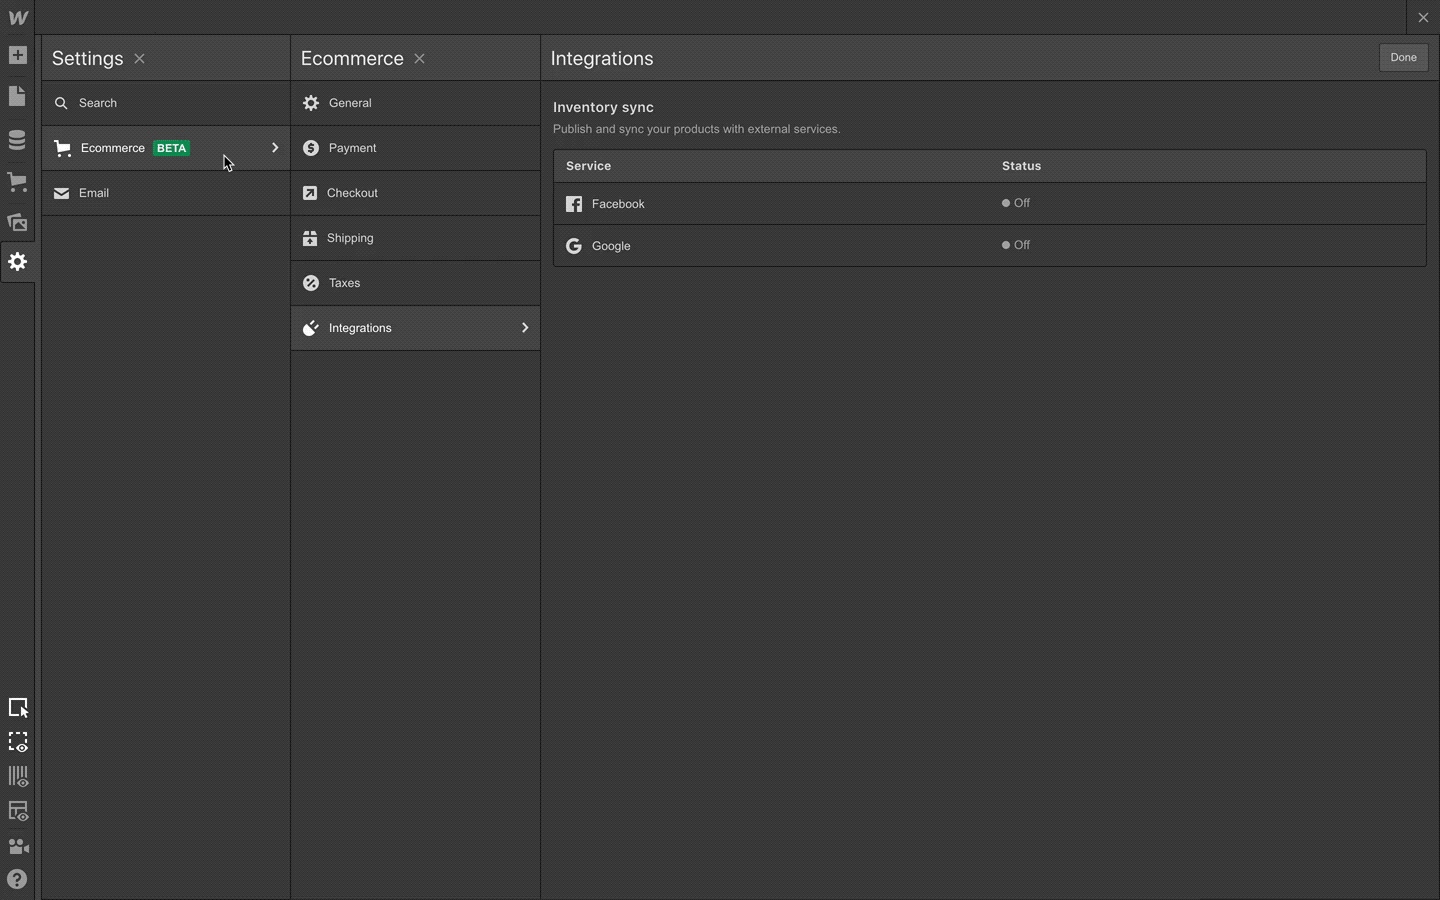
To enable the Facebook integration in your Webflow project:
- Open your Ecommerce settings in the Designer
- Select Integrations
- Enable Facebook inventory sync
- Copy the data feed URL
- Save and close the integration settings
Connecting your product catalog to your ecommerce store
Now that you’ve copied the data feed URL from your Webflow Ecommerce store, you’ll add it to your Facebook catalog. To do so, open your Facebook catalog > select Product Data Sources > select Use Data Feeds > paste in your data feed URL. Finally, wait for the upload to complete and review your products
Now that your product catalog is set up, you can set up your dynamic ad campaigns.
Setting up a dynamic ad campaign
To set up your dynamic ad campaign:
- Open the Facebook Ads Manager
- Click Create
- Select Catalog Sales as your objective
- Select the product catalog with the inventory you'd like to promote in your ads
- Click Continue
- Open the products section and choose a product set or create a new one
- In the Audience section, choose the people you want to target with your ads
- Choose your placements, budget, and schedule for your ads
- Click Continue
- Select the Facebook Page and, if you’d like, the Instagram account representing the business you're advertising
- Select an ad format for your template: you can choose a single image, carousel, or collection format
- Fill in the rest of the details for your ad
Next steps
The great news about dynamic ad campaigns? Once you’ve set up your dynamic ad campaign, it will continue working for you for as long as you want — targeting the right people with the right product(s), and constantly updating pricing and availability.
With your Facebook pixel and Facebook catalog set up, you’ll also be able to set up Instagram Shopping, which allows you to tag products in your posts and stories.
Next, check out our guide for growing your ecommerce business using Instagram.