

Installing analytics on a website is a common practice. All website admins should be tracking their analytics closely to better optimize for site visitors and increase conversions.
You can get far with a simple Google Analytics tracking code and a Facebook pixel, but when you want to start split-testing, retargeting, and embedding multiple widgets that help optimize your site traffic, it’s time to consider Google Tag Manager.
What is Google Tag Manager?
Google Tag Manager (or GTM) is a simple, reliable service from Google you can use to consolidate all your script tags, analytics codes, and/or pixels into a single tag. This makes it incredibly easy to manage your website integrations without editing code.
A few of the benefits for installing GTM is the ability to:
- Quickly deploy 3rd-party tags with zero code on your actual website
- Simplify collaboration between marketing and IT
- Easily check errors, security, and get the benefits of async tag loading
- Scale up tags without the headaches. Add dozens of pixels and track your performance thoroughly.
Webflow, a fantastic tool for building modern websites, allows you to easily integrate your GTM tracking code and start tracking performance seamlessly.

Let’s look at how to set up GTM inside Webflow to start consolidating tags and improving your site metrics!
📈 👉 😁
Set up Google Tag Manager
Prefer to watch?
We got you.
Alright, for those who like to read, let's dive right in.
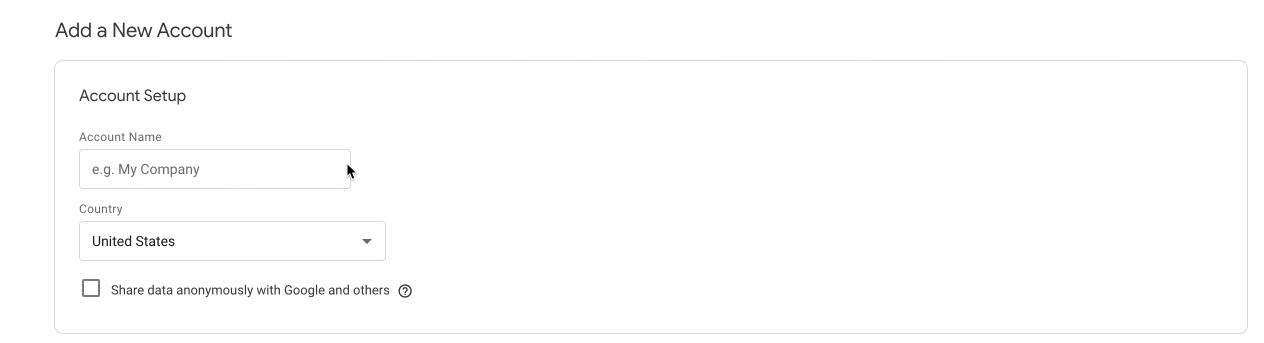
First, just sign up for an account.
If you already have a Google account (and who doesn’t?!), this is super simple. Start by adding your company name.
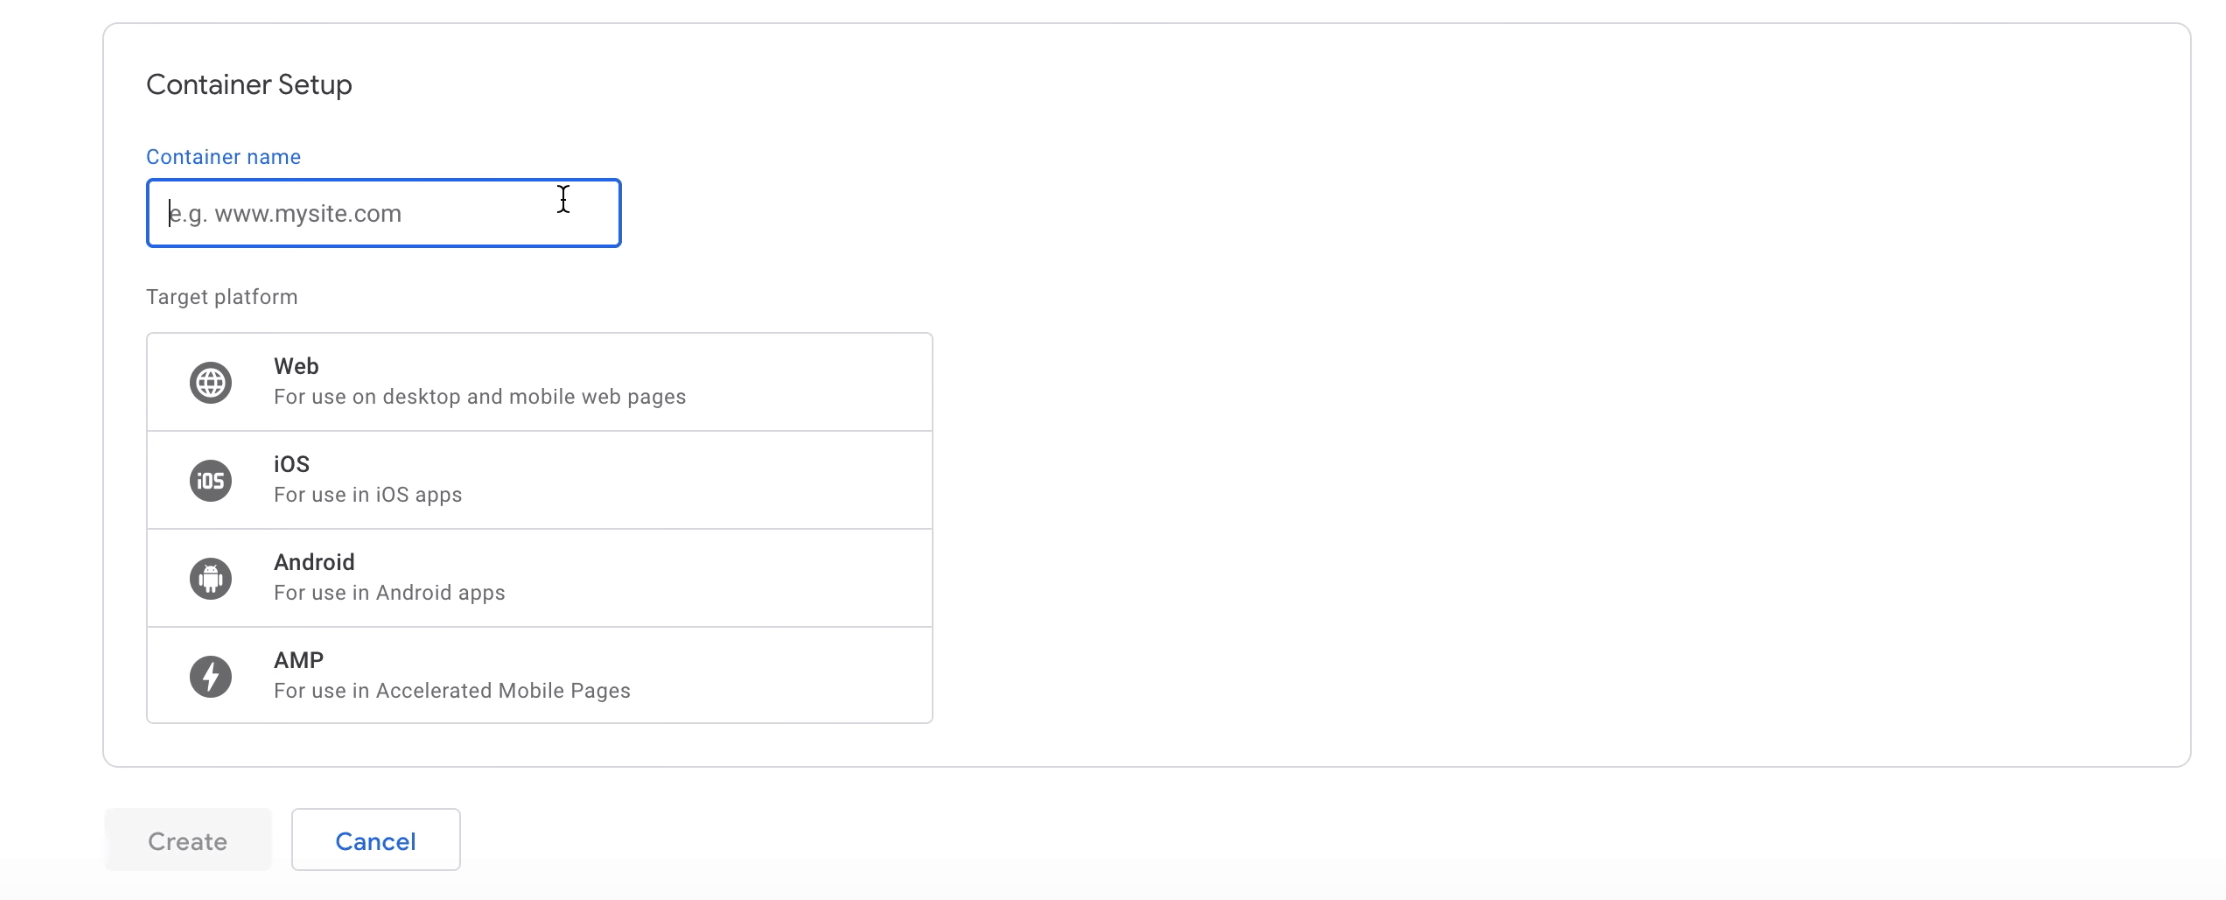
Next, set up a new Container. A container consists of a set of macros, rules, and tags. You can also choose your container’s platform — in this case, on the web.
After you agree to the terms of service, you’ll be prompted to “install” Google Tag Manager — i.e., add a new tracking code for your container to your Webflow site.
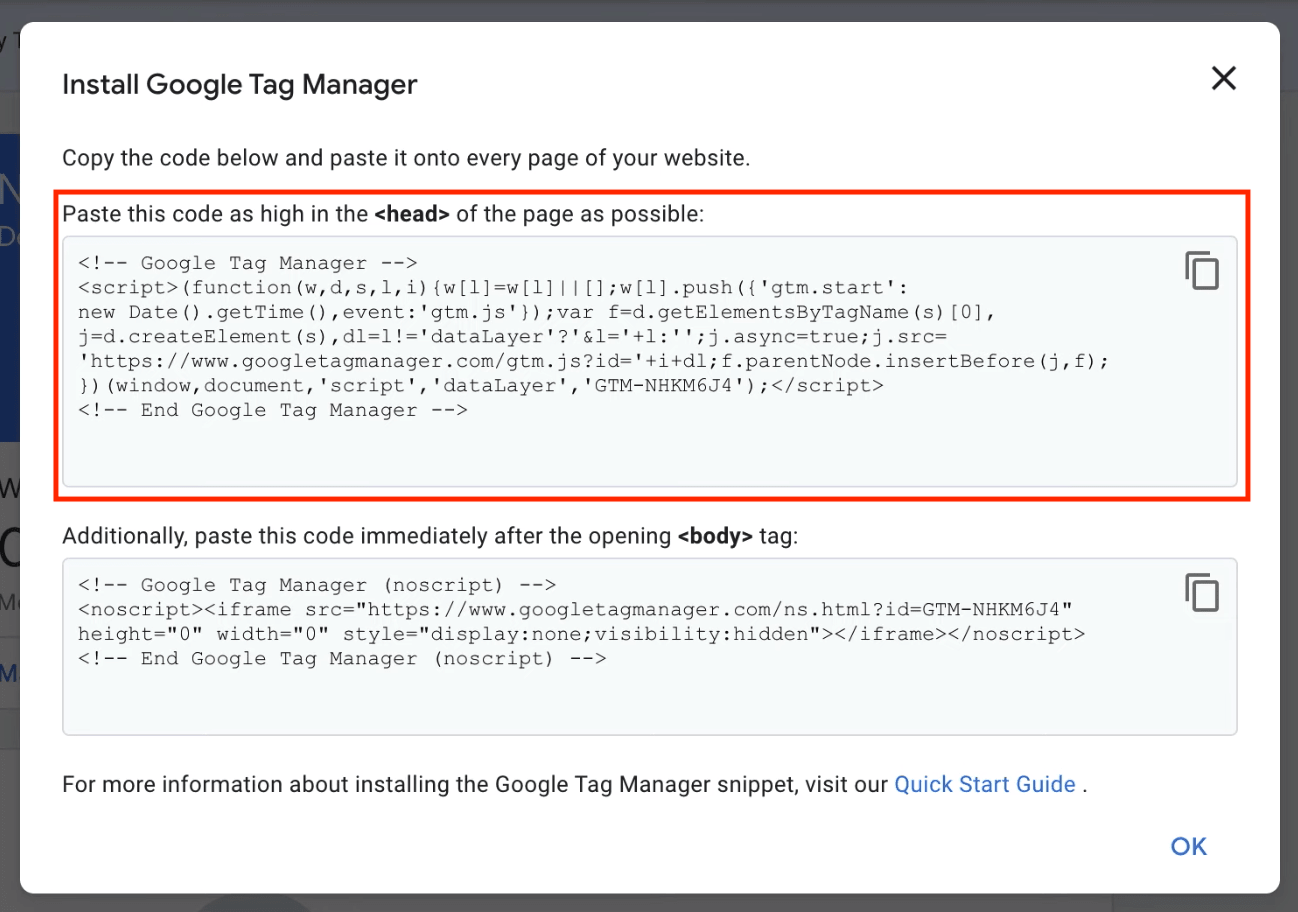
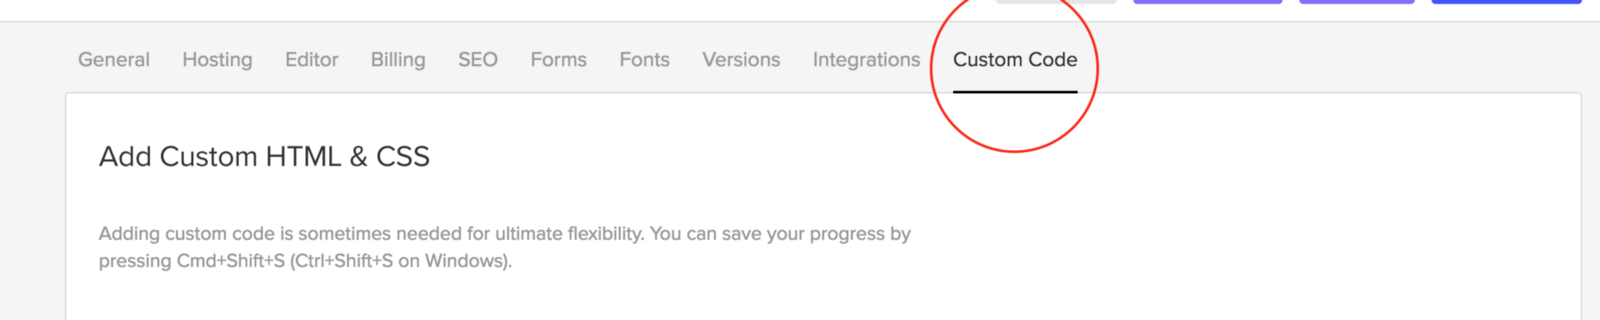
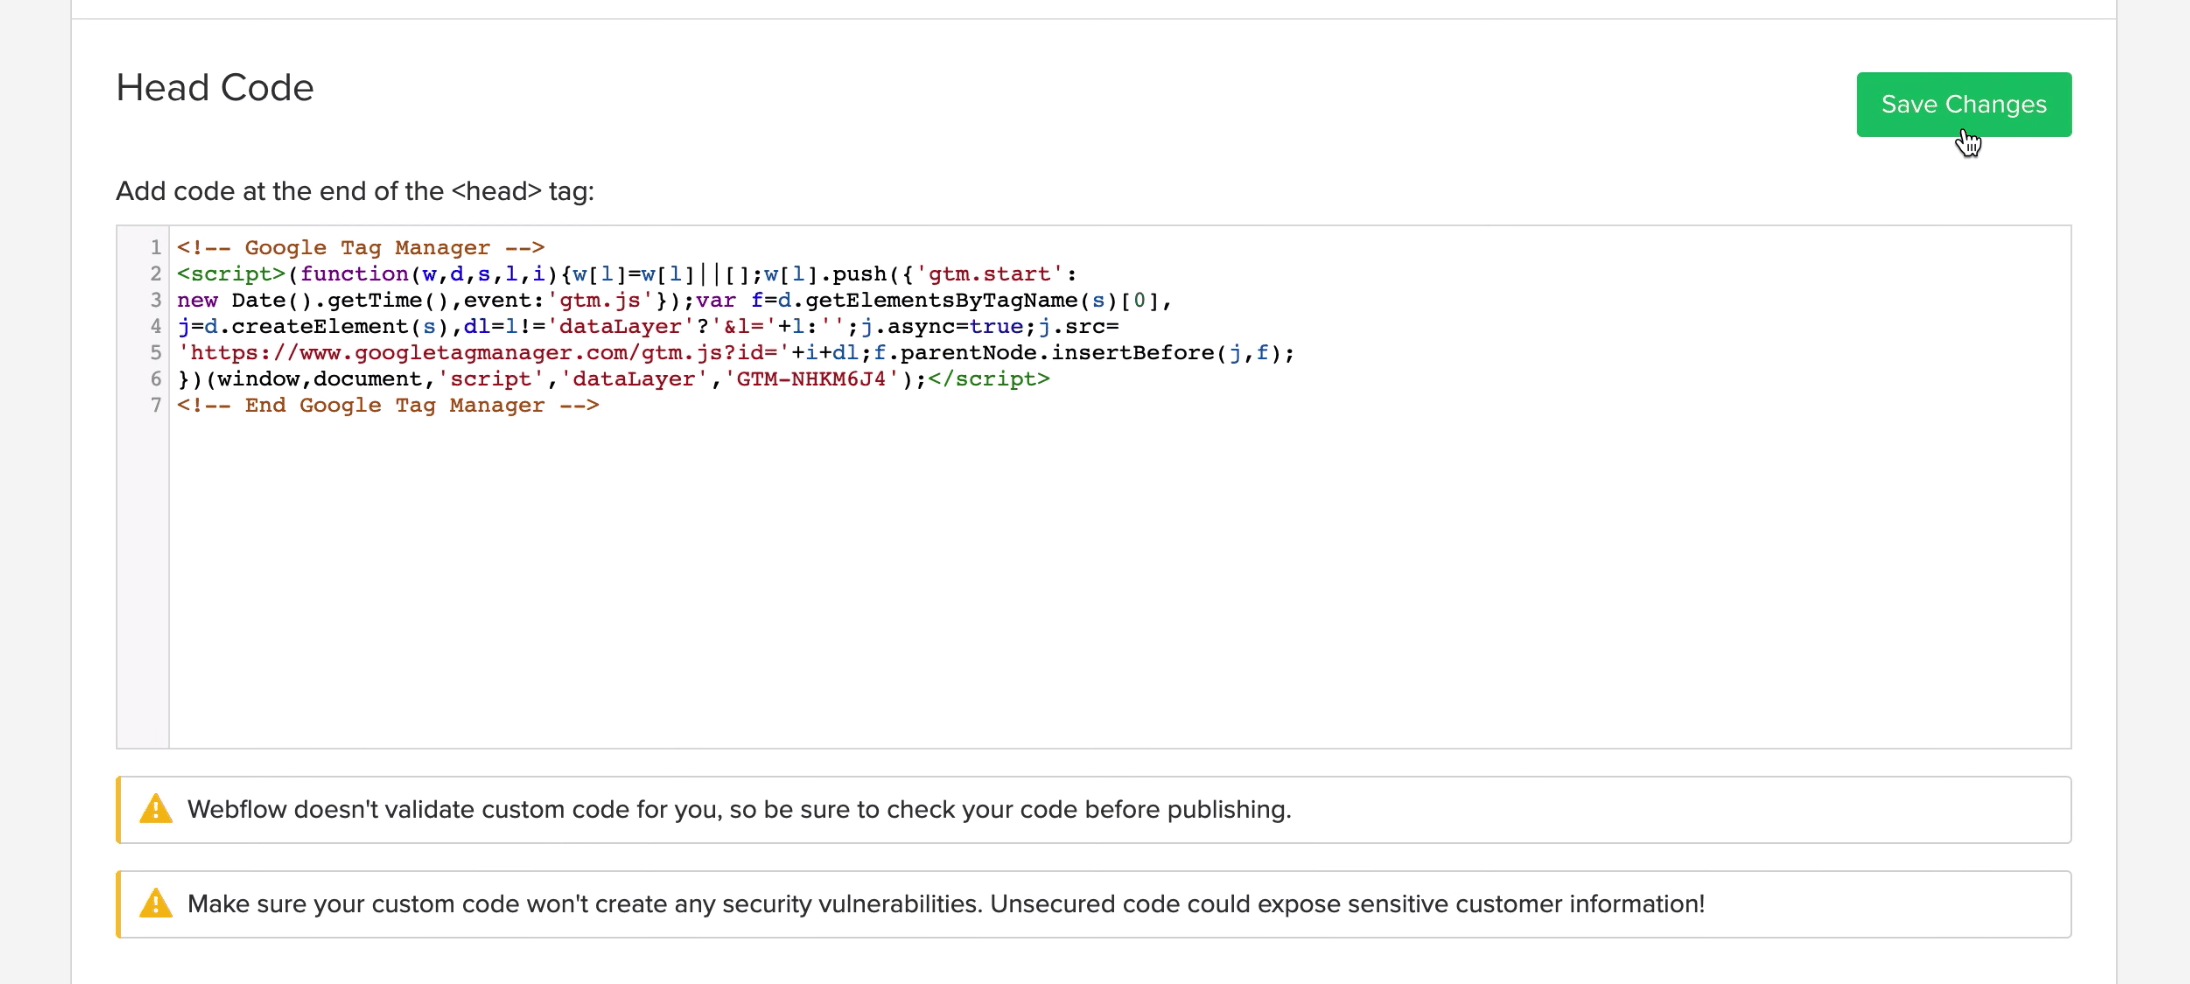
You'll first want to copy the <head> code to your clipboard. Next, head back to Webflow. Log in, then jump into the Project Settings for the site you’re working on, and go to the Custom Code tab.
Add the first GTM tracking code to the head code of your Webflow website, and save your changes.
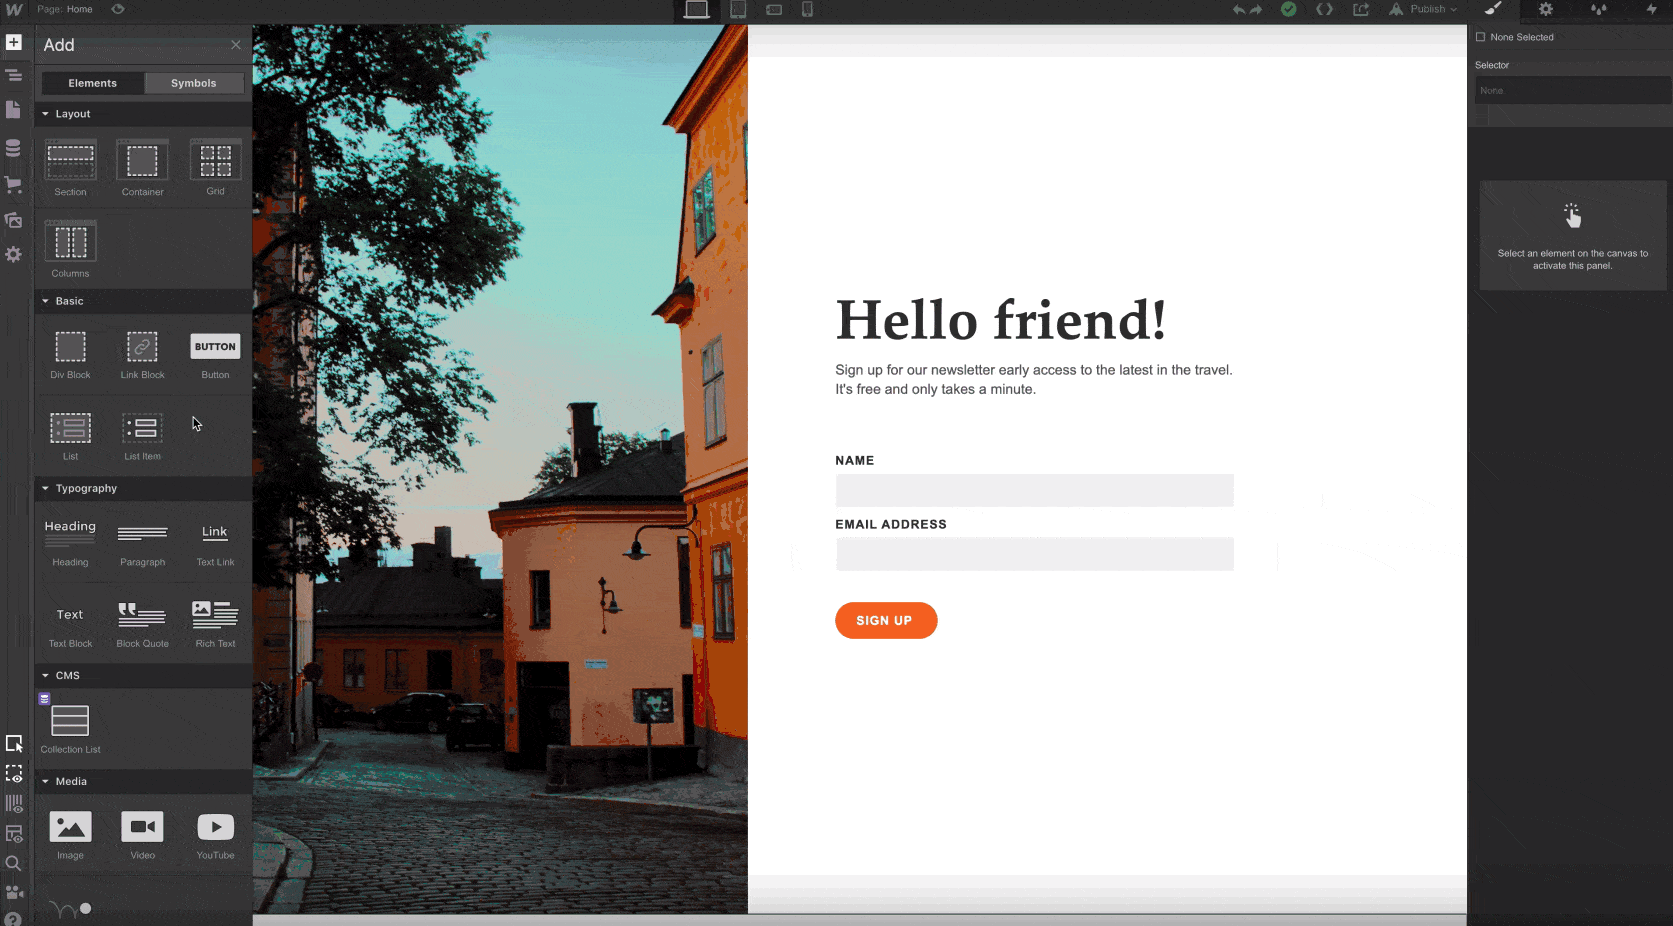
Next, you want to head over to the Designer in your Webflow project, and you'll want to add a custom code embed element. Make sure when you add the custom code embed element, its the first thing under the Body. See below:
Now, go back to Google Tag Manager and copy the <body> code to your clipboard.
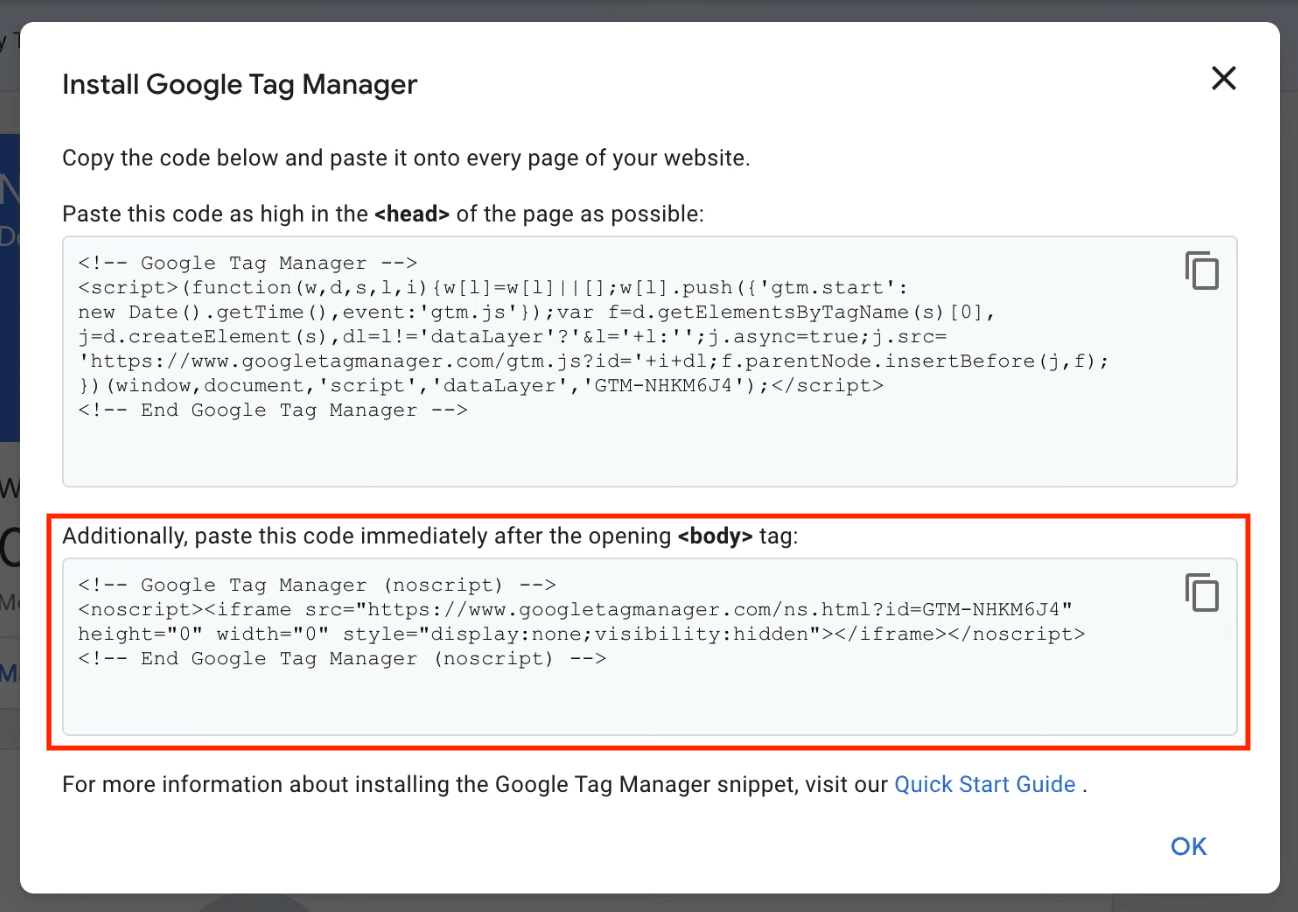
Then, go back to your Webflow project that has the HTML Embed Code Editor open and paste in the <body> code you copied from GTM.
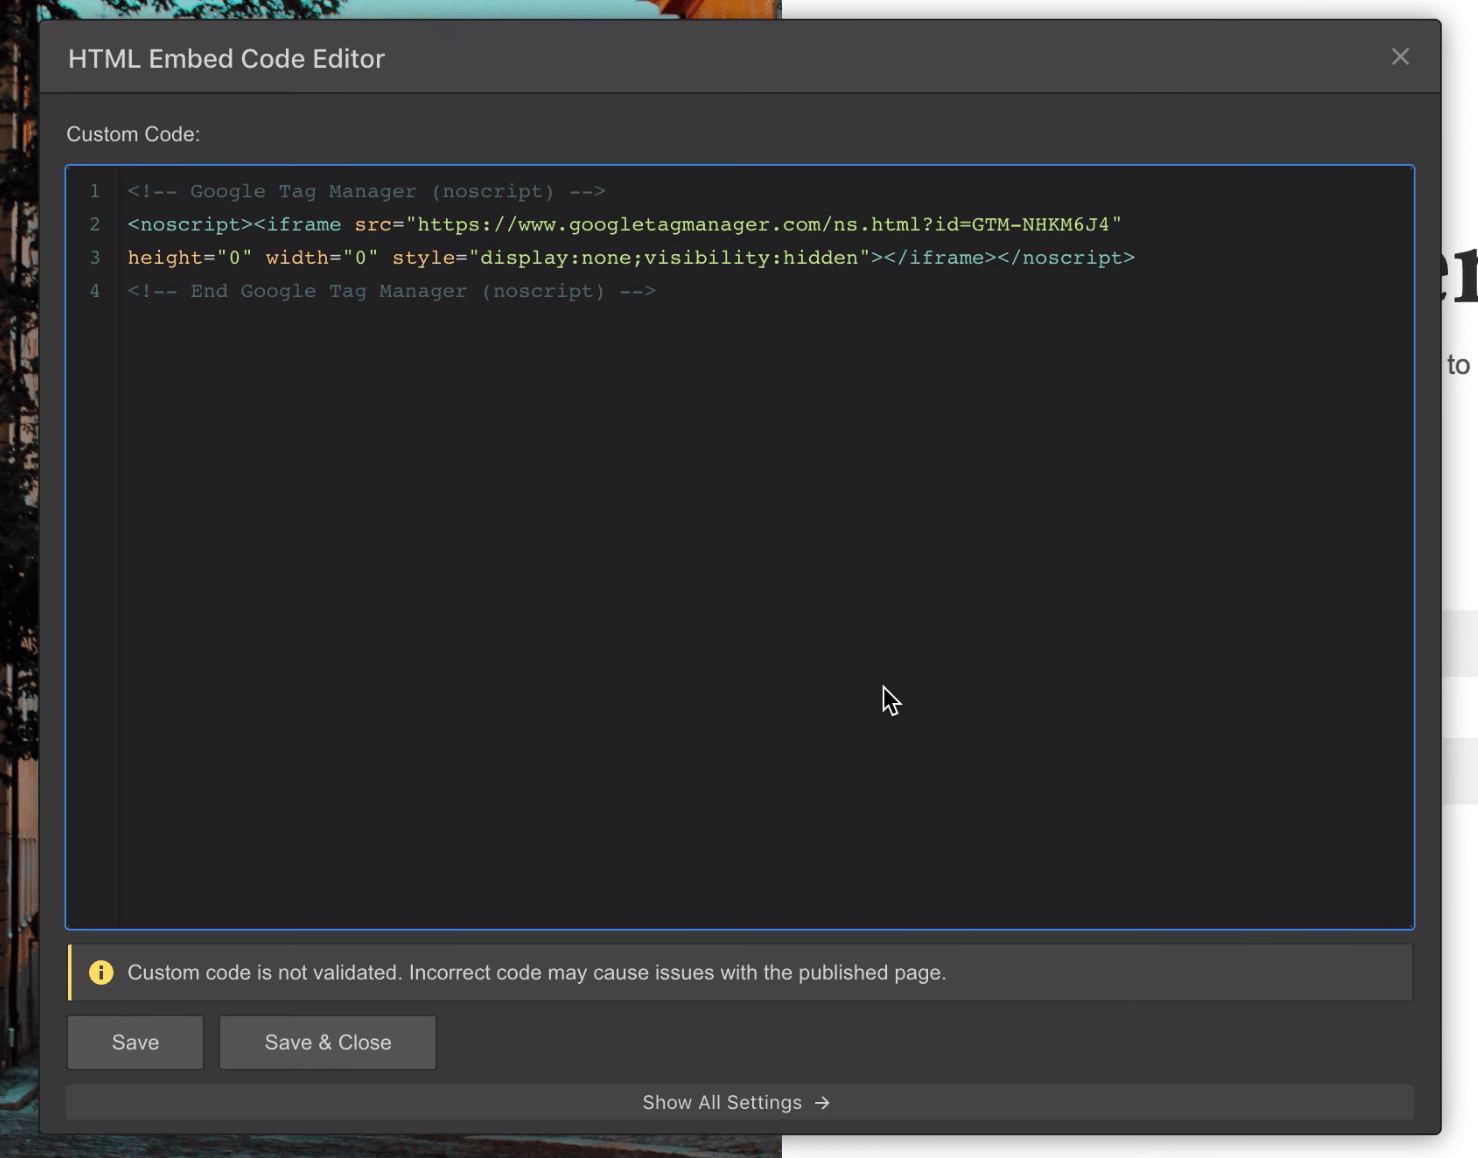
Then, click Save & Close — that's it. Now, you can copy the HTML Embed element and add it to any page on your Webflow site that you want to use Google Tag Manager. A good practice, if you want to continue to reuse the HTML Embed element, is to turn it into a symbol.

Now you can easily add your symbol to every page instead of creating a new custom code embed and pasting in the GTM code in each time. The great thing about symbols too is that if you need to update the GTM code, for whatever reason, it will reflect on all pages that have the symbol. For more info on symbols, check out our guide on Webflow University.
Add new variables
Now to start really making use of GTM.
I recommend you start by adding variables that will be used across your different tag integrations. This allows you to avoid duplicating important tracking data and makes it easy to label the tracking settings across different tags.
For more advanced setups, you can also define custom fields, use custom dimensions, or set up cross-domain tracking.
Note: Google's UI for this has been updated, but the directions are still as follows
Initially, you’ll probably want to add your Google Analytics Tracking ID. You can do this by setting up a new user-defined variable.
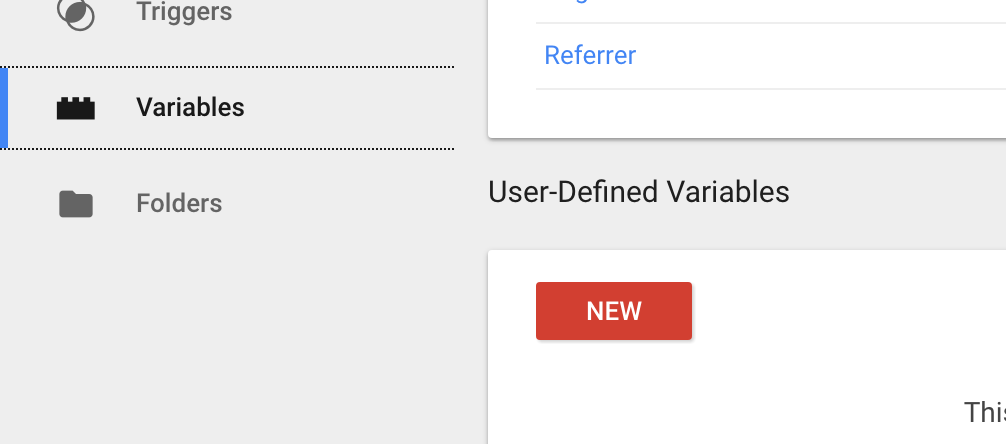
Here’s how to create your first user-defined variable:
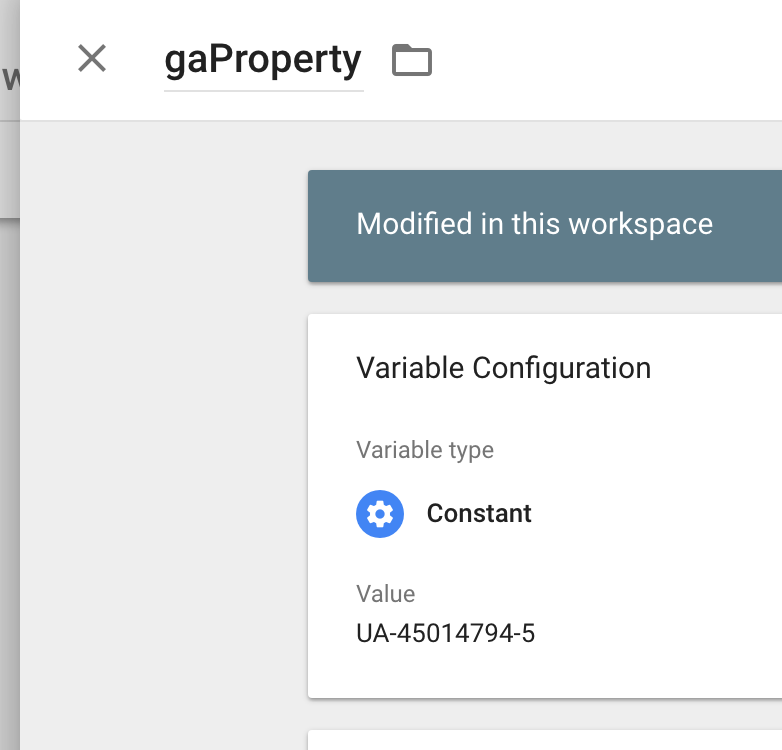
- Click Variables > New and add a new Constant called gaProperty
- Add your Google Analytics tracking ID. You can also add the gaDomain with a value of auto.
- Finally, publish the workspace change by clicking Submit

We won’t dig in too deep here, but you can learn more about variables in the Help section of Google Tag Manager.


Design interactions and animations without code
Build complex interactions and animations without even looking at code.
Add new tags
Now that you have the Google Analytics variables set up, you can start adding tags that will be embedded into your website.
In the world of Google Tag Manager, a tag is a piece of code that sends information to a third party, such as Google Analytics.
Start by clicking Tags > New…
Then, set up a new tag with Classic Google Analytics. Add the Web Property ID using the existing gaProperty variable. Make sure the track type is set to Page View, which tracks the pages your users visit.
You can also set up events if you want to measure a specific interaction, such as a button click on a promotion.
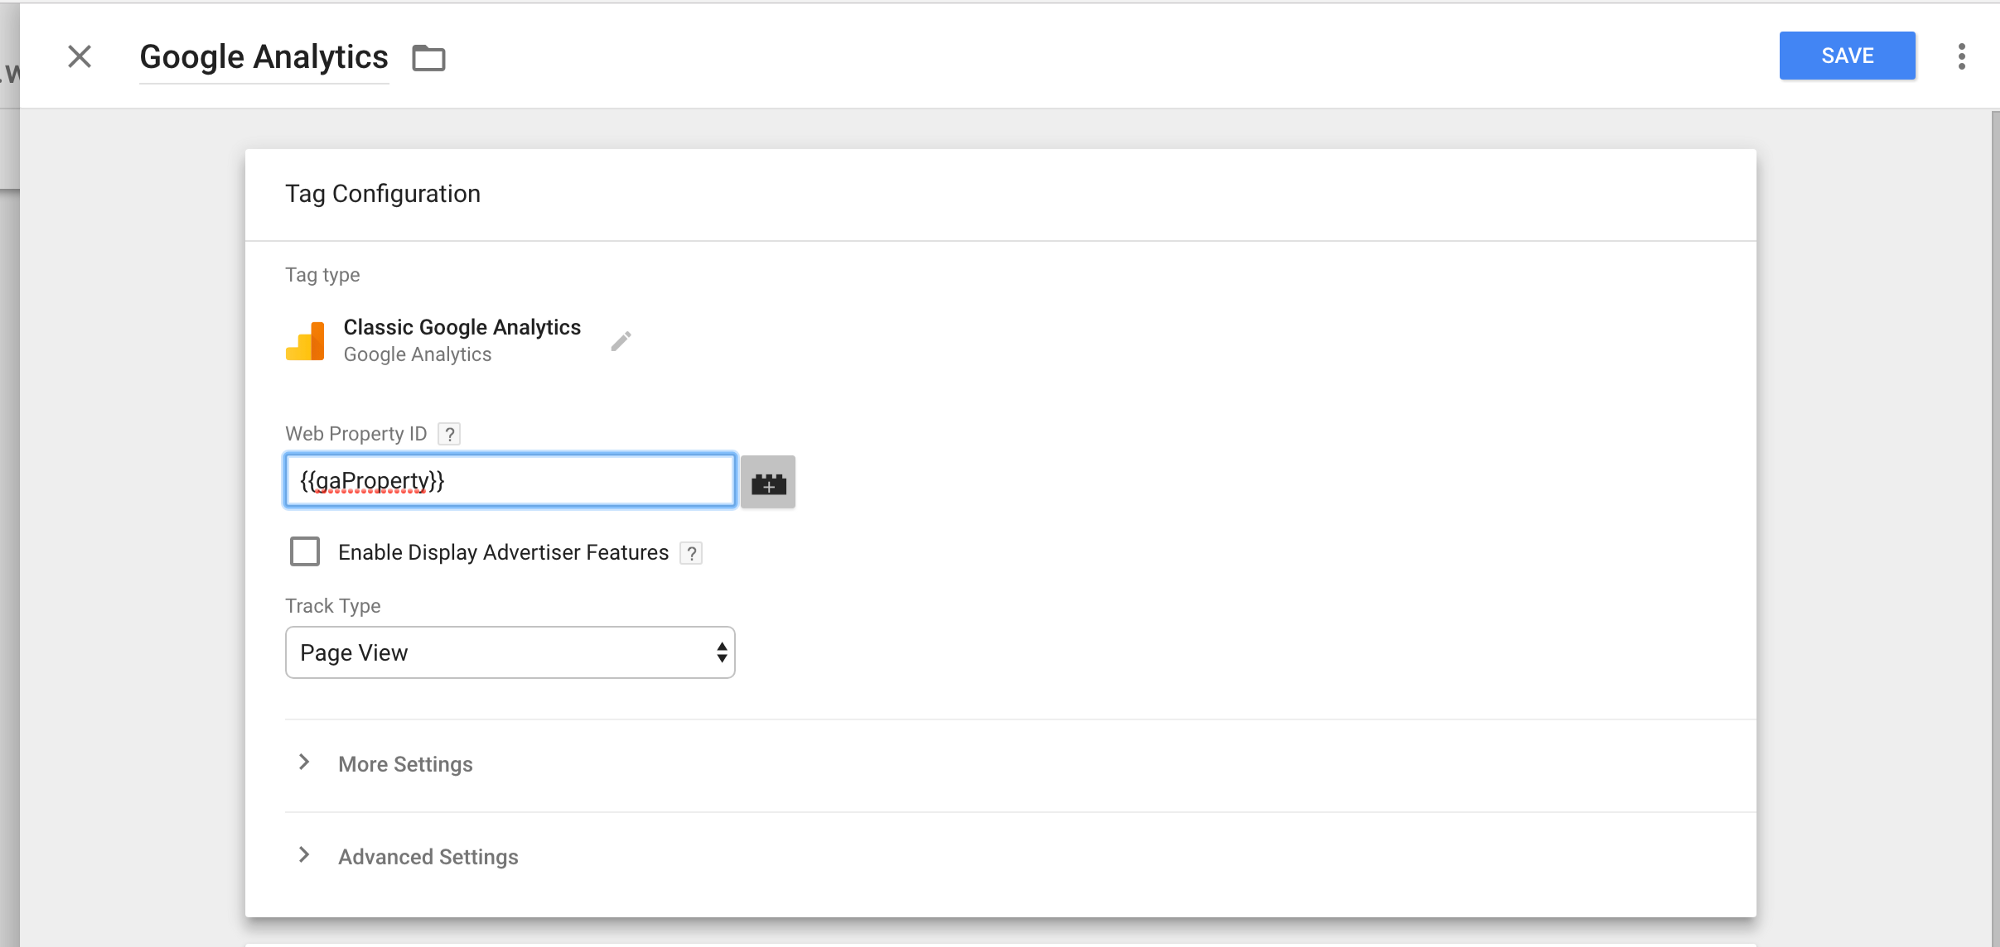
Finally, publish the change and give it a title of Added GA Tracking Tag.
You should have a new version with a tag and a variable integrated.
Limit staging traffic
Finally, you’ll want to exclude any traffic from the staging URL Webflow provides (the webflow.io subdomain version). This will keep your traffic analytics specific to your production URL.
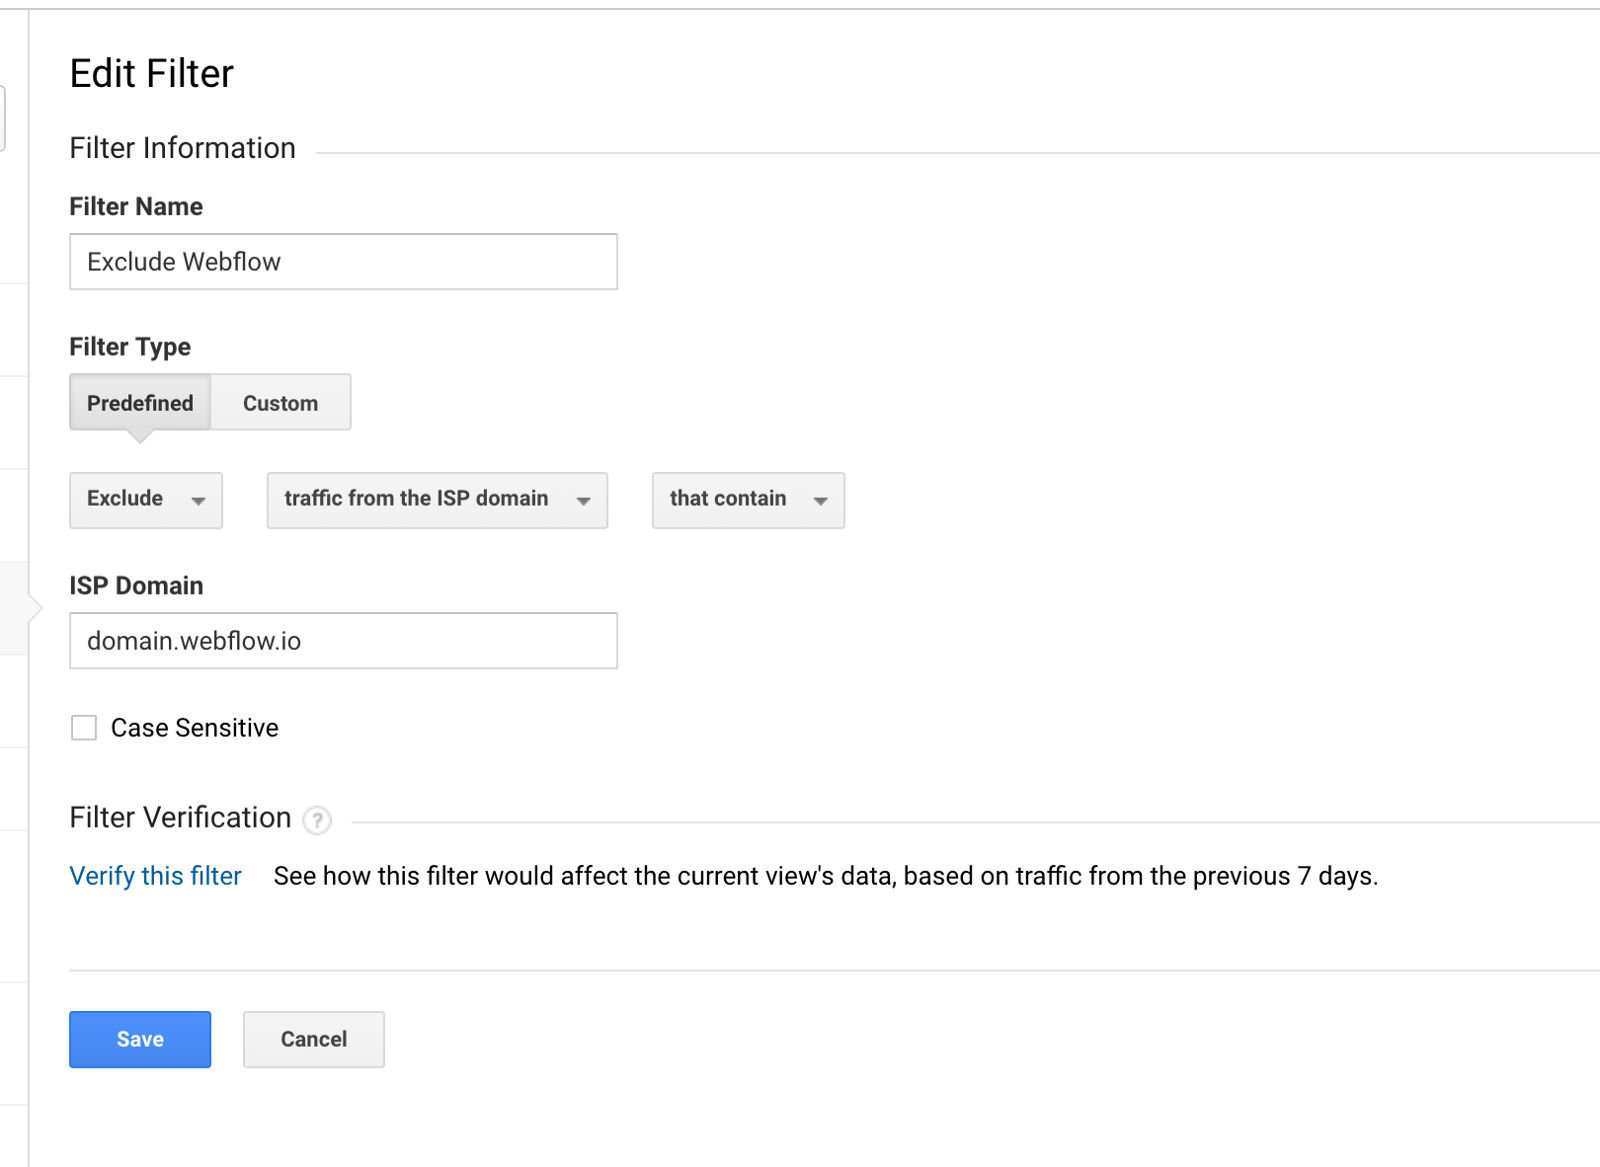
To do that, you’ll to create a Filter in Google Analytics.
Go to Settings > Property > View. If you already have a Default View, you can use that. Otherwise, click create a new view and set up a new Default View.
Next, go to the filters section and click Add Filter. Name it “Exclude Webflow” or something similar. You’ll need to set a Predefined Filter Type to:
Exclude > traffic from the ISP domain > that contain > your Webflow staging domain (e.g., domain.webflow.io)
Then save your changes.
And you’re done!
Now you should have a fully integrated GTM Container embedded in your Webflow website that’s only tracking traffic to your production website URL.
Take your analytics further
While we’ve only covered the initial setup for tracking Page Views, you can expand your GA tracking in myriad ways, including using custom events, remarketing, ecommerce, and cross-domain analytics.
The benefit of using Google Tag Manager is that you can continue to expand on your marketing analytics integrations without writing any code. You can use GTM to install any number of marketing tools to help you build a better website and increase performance online. All with a single tag.
If you’ve used Google Tag Manager in any unique or powerful ways, let us know in the comments!