

To bring their ideas to life web developers use text-based programming languages, such as JavaScript, CSS & HTML.
You know, cracking open an editor and creating a new page like this:
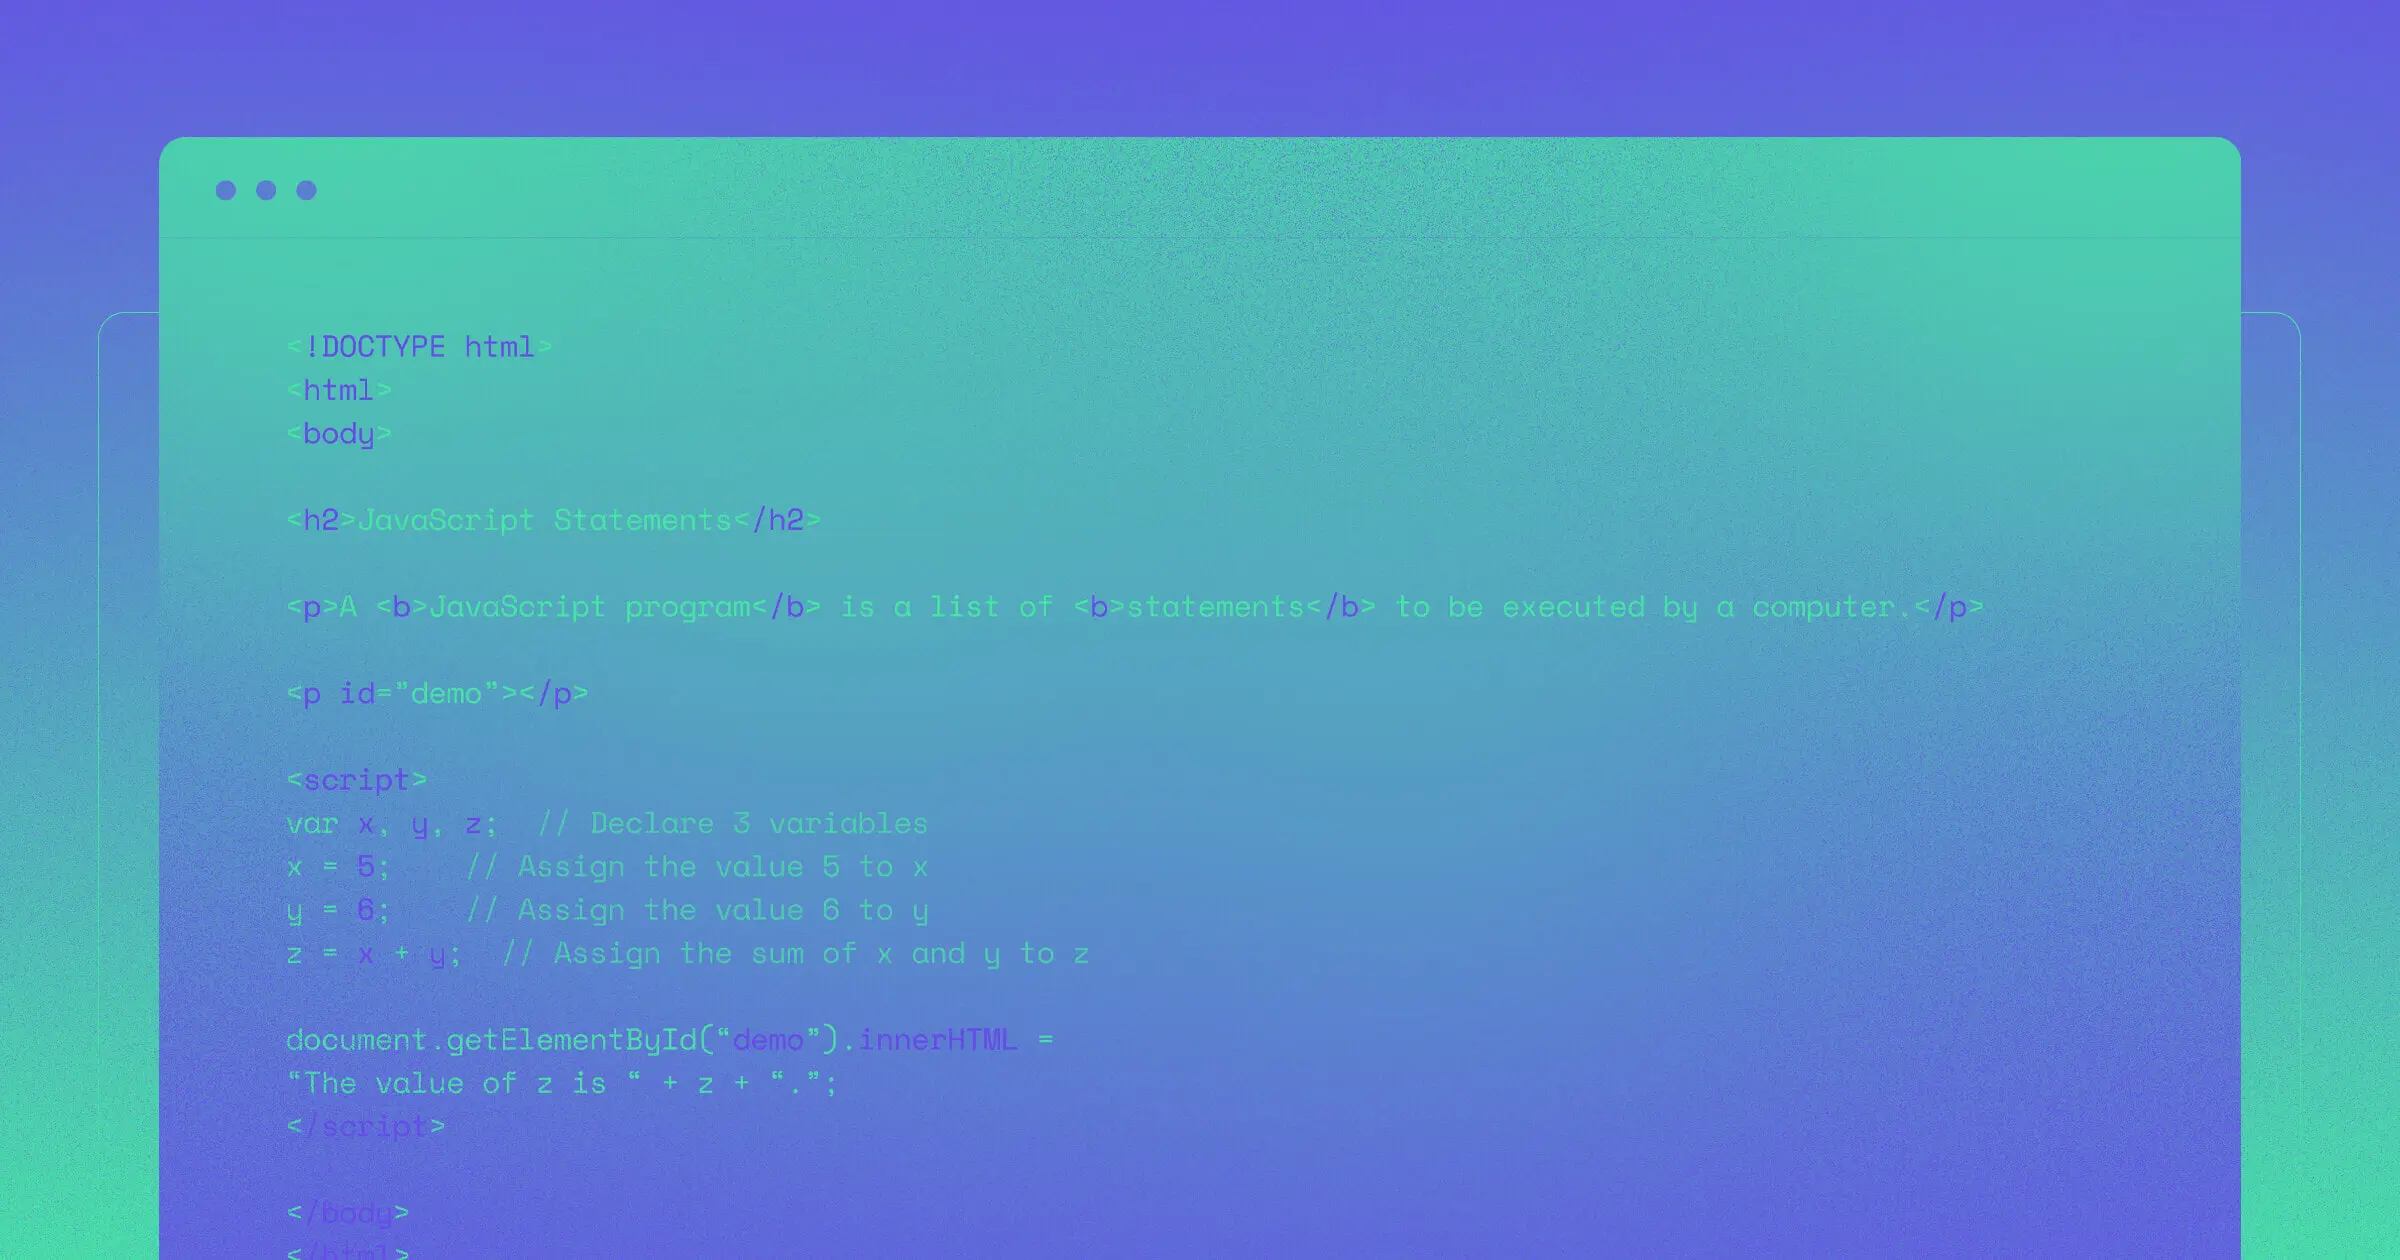
<!DOCTYPE >
<html>
<head>
<meta charset="UTF-8">
<title>Hello, World!</title>
</head>
<body>
<h1>Hello, World!</h1>
</body>
</html>More realistically, you're using a UI library like React, and creating a reusable component. Something like this:
import * as React from "react";

export const HelloWorld = () => {
  return <h1>Hello, World!</h1>;
};
Having the skills to express your ideas in code is a superpower and you’ve worked hard to unlock it. However, text-based coding isn't the only way to bring these ideas to life.
Our mission at Webflow is to bring these development superpowers to everyone, but not everyone wants to type arcane symbols into a keyboard and bang their head against the wall until they find that missing ;. Some people want to realize their ideas visually by directly making changes to the result with a rapid feedback loop.
Text-based development requires you to edit your code in one tool and then build and run it separately to see how your changes look. It’s indirect manipulation and the feedback loop is long. Even with state-of-the-art hot reloading, if there’s an error in your program, you won’t see anything but an exception!
Here’s what an error looks like with hot module replacement:
State-of-the-art tooling still has a long feedback loop.
And this is where visual development steps in. You edit the results directly and the feedback loop is immediate, offering a more intuitive way to bring ideas to life. Even if your program is incomplete you’ll always have a result to work with. Here’s what editing visually looks like:
Visual development provides immediate feedback, always.
To edit a program from its result, you need some guarantees. For starters, there’s always got to be a result, even if the program isn’t complete or has errors. If the program crashes or can’t run there’d be no way to fix it! You also need to be able to evaluate independent pieces of the UI (subtrees) efficiently or the latency of running “the whole program” creates too much lag for visual editing. You can’t have untracked side-effects like memory mutation either, otherwise re-evaluating those subtrees loses their state and causes unexpected behavior. This is what makes hot module replacement so tenuous when it comes to JavaScript. Beyond that, JavaScript has all sorts of “syntax sugar” for text-based developers that make it a difficult target for projectional editing.
To unlock visual development for the web we have to solve problems like these and we don’t want to sacrifice the power and flexibility of the web platform in the process. We want everyone to have the same superpowers that traditional developers do. Webflow is often called a "No Code" solution, which is a bit of a misnomer because our Designers are doing a form of "coding" every day, they're just doing it visually. Now before you get all hoity-toity and say <smug-voice> "They're not really proooo-gramming" </smug-voice> you should know our visual developers are creating components, calling functions, declaring variables, defining types, looping, making IO calls, creating abstractions, and so much more... The amazing and humbling thing is our visual developers often create things that I can't even imagine creating using my text-based programming skills!
To solve these problems we created a programming language that is authored visually. We call it Webflow Design Language (WFDL) and this is our first time sharing it with the world.
Here’s a deeper dive into what it is, and how it works.
What is Webflow Design Language?
Webflow Design Language (WFDL) is a programming language designed to be used visually. It is a projectionally edited, purely functional programming language that powers the Webflow Designer with a visual-first authoring experience. In even more computer science-y terms, it maps closest to a structurally edited, lambda calculus with a Hindley-Milner type system supporting higher rank and row polymorphism.
We take sites built with this language, interpret them and produce websites. Like the one you're reading this on right now. Here’s a diagram of the high level evaluation and rendering flow:

To break it down, I'll introduce you to WFDL using the age-old programming tradition, "Hello World!"
Hello World!
Let's dive in and look at some of the features our Webflow Designer offers and the WFDL that our customers (visual developers) are creating. Here’s how a user creates a “Hello world” text block:
Dragging a text block to the Webflow Designer Canvas and updating it to say “Hello world!”
When a user drags an element onto the Webflow Designer Canvas like this we create the following WFDL to represent the element:
<Basic::Block> {
  children: [
    <Basic::String>
      "Hello world!"
    </Basic::String>
  ],
} </Basic::Block>
I'm showing you WFDL projected to its human-readable syntax, however, our tools work with the Abstract Syntax Tree (AST) structure directly. WFDL has some additional information such as scope-unique identifiers for each syntax node which are used for generating "source maps" that power visual editing. I've omitted them for brevity.
Here we are creating two elements.
Basic::Blockelement to represent the wrappingdivwithBasic::Stringprovided as childrenBasic::Stringwith"Hello world!"as its value
Basic::Block and Basic::String here are fully qualified names. This is a fancy way of describing a unique ID we can use to look up the backing implementation of whatever is being referenced. Qualified names are how we implement name spacing throughout WFDL.
Basic::Block and Basic::String are also element types. They tell us what components these elements are instances of. So here we have an instance of Block and an instance of String provided by the Basic module.
This is how our visual developers add new elements to their site — with each element representing an instance of a component. To ground this in something that’s more familiar, if we were to do the same thing in React as code it’d look something like this:
import { Block } from "./basic";

export const page = () => <Block>Hello world!</Block>;
Components
Now that we’ve covered elements we have the foundation for something far more interesting, components. Visual developers want to package up reusable parts of their UI and use them throughout their site. Let's explore how this is done in the Webflow Designer.
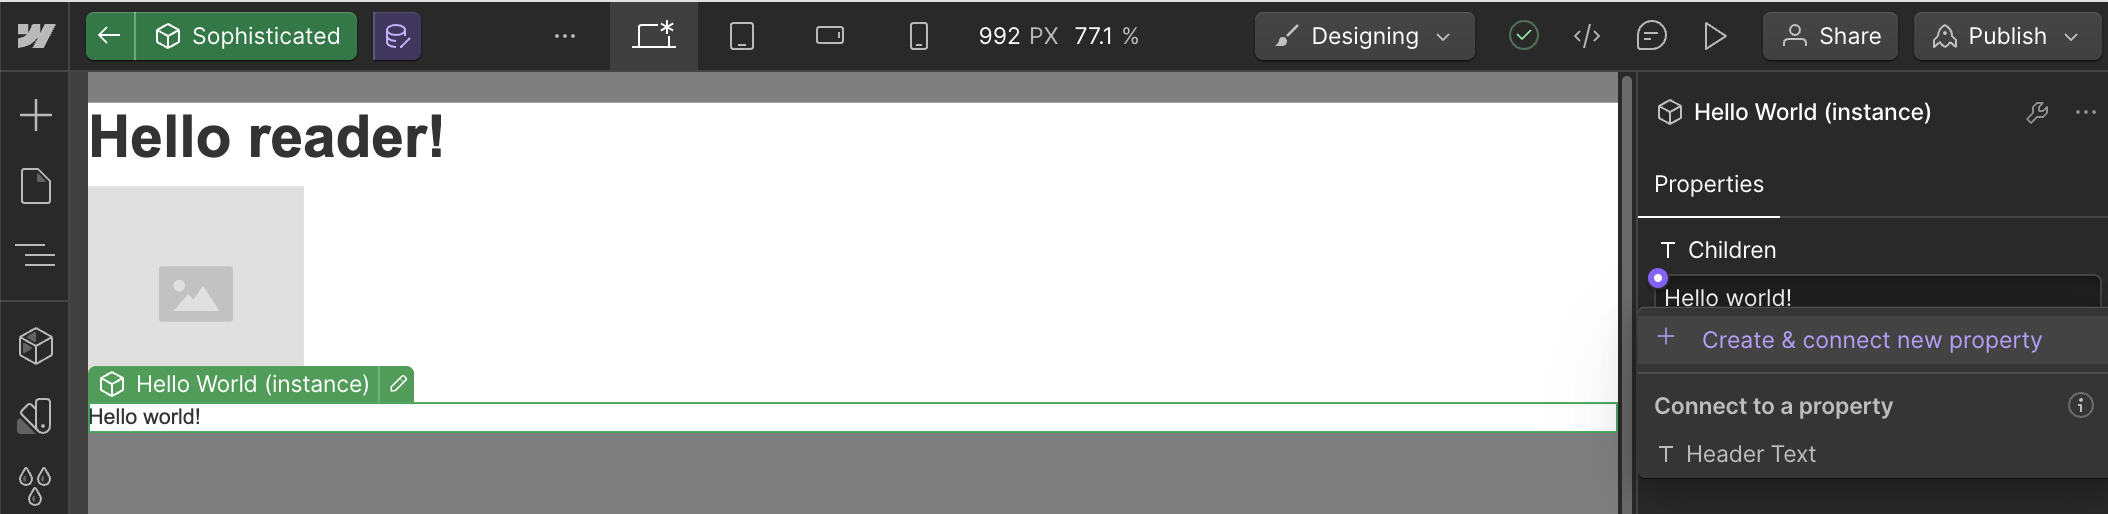
In this video, we turn our "Hello world!" element into a component named "Hello World." Then we create another instance of that component right below it using copy-paste:
Converting our element into a component using component creation UI.
When the visual developer changes the component, all the instances are updated. Notice how when we change the component from "Hello world!" to "Hello reader!" both instances are updated on the Webflow Designer Canvas.
Editing a component updates it everywhere.
When a component is created two things happen to the underlying WFDL:
- We extract the parts of the UI that are meant to be reused into a new component and export that component from a WFDL module.
- We replace the element with a new component instance element that points to the new component we extracted in step 1.
What’s happening to the WFDL under the hood in this video is an extraction of our Basic::Block to a new HelloWorld component, which we then exported from our Site WFDL module:
// Extract component to a module named Site
// Qualified name Site::HelloWorld is used to access this component
export HelloWorld = {
  name: "Hello World",
  render: <Basic::Block> {
    children: [
      <Basic::String>
        "Hello world!"
      </Basic::String>
    ],
  } </Basic::Block>
}
Second, we replaced the <Basic::Block> element we just extracted to a component with an instance that points to our new component, then we added another instance below it:
- <Basic::Block> {
-    children: [
-      <Basic::String>
-        "Hello world!"
-      </Basic::String>
-    ],
-  } </Basic::Block>
+ <Site::HelloWorld> { } </Site::HelloWorld>
+ <Site::HelloWorld> { } </Site::HelloWorld>
When we are rendering an element and encounter the type Site::HelloWorld, we retrieve its backing component from the Site module and then locate its HelloWorld export, retrieve its render expression, and render that. In this case our initial Basic::Block -> Basic::String -> "Hello world!" tree.
If we did this in React we would extract our component to a new module:
// Extract component to a new module, site.js
import { Block } from "./basic";

export const HelloWorld = () => <Block>Hello world!</Block>;
And update the page to import and use that component.
import { HelloWorld } from './site';

<HelloWorld />
<HelloWorld />
Properties
One of the key aspects that distinguishes a component from an include or a symbol is the ability to provide props or options. Properties describe the settings interface for the component which allows each instance to provide different values.
Creating properties in components
In this video, the visual developer edits the underlying component to add a property named Children:
Creating a text property on a component that is bound to the elements Text field.
This property creation process involves two main actions:
1. Updating the render expression: The render expression is updated to include a variable bound to the new property. This allows the component to dynamically render content based on the provided property value.
2. Creating a configurable default value: A default value is established by extracting the prior content and storing it on the type. This default value ensures that a value is always rendered whenever the property isn't provided.
The underlying WFDL changes to our component look like this:
// Site::HelloWorld
{
  name: "Hello World",
  render: <Basic::Block> {
+    children: data.Children // Now a variable binding!
-    <Basic::String>
-      "Hello world!"
-    </Basic::String>
  } </Basic::Block>,

+  // We'll talk about this later, this is a data type.
+  dataType: {
+    Children: {
+      name: 'Children',
+      type: List<Element>
+      defaultValue: [
+        <Basic::String>
+          "Hello world!"
+        </Basic::String>
+      ]
+    }
+  }
}
Notice that the "Hello world!" element was extracted and replaced by a variable binding to data.Children and prior content is stored as a default value.
One challenge for direct manipulation is that the program must always succeed, or else there is no result to edit! So in cases of missing values we still need to produce something. To deal with missing values we either provide a default value or leverage typed holes as placeholders.
Providing property values in a component instance
Now that a developer has created a property for the component, they can provide values to customize the behavior and appearance of a specific instance. This allows the component to be tailored to specific use cases, making it more dynamic and versatile.
Providing a property’s value visually looks like this:
Providing differing values for each instance updates just that instance.
Here, we are editing the instances of the component to provide different property values for each instance. You'll notice that the settings panel on the right shows the property value that we can also edit directly on the Webflow Designer.
The underlying WFDL changes look like this:
<Site::HelloWorld> {
+  Children: [
+   <Basic::String> "Hello friend!" </Basic::String>,
+  ]
} </Site::HelloWorld>
<Site::HelloWorld> {
+  Children: [
+   <Basic::String> "Hello reader!" </Basic::String>,
+  ]
} </Site::HelloWorld>
If this were React code, it would involve updating our component to include a new typed prop, providing a default argument, and replacing the content with a children identifier:
import { Block } from "./basic";

export const HelloWorld = ({
  children = "Hello world!",
}: {
  children: React.ReactNode, // Specifying the type of the children prop
}) => <Block>{children}</Block>;
Types
When we create a new property, we have to know its type so we can provide a consistent visual editing experience for this data throughout the Webflow Designer.
When we created and bound the Children property above, our component got a new dataType field associated with it that describes the property:
// I told you we'd talk about it later. Later is now!
dataType: {
  Children: {
     name: 'Children',
     type: List<Element>,
     defaultValue: [
       <Basic::String>
         "Hello world!"
       </Basic::String>
     ]
  }
}
Creating a property in the Webflow Designer automatically determines the property's type based on the context in which it was created. For example, if you create a binding using the "Text" field of the Basic::Block component, the Webflow Designer infers the type from that field. In this case, the Basic::Block component has a data type for the "Text" property defined as List<Element>, so the new property will also be List<Element>.
Visual developers can create properties of different types to enhance their components. For example:
- Visibility (
List<Boolean>): Allows developers to control whether specific elements are rendered based on a property. - Image (
Record): which allows developers to upload and provide references to images that are hosted on a CDN and made responsive automatically through our Assets panel.
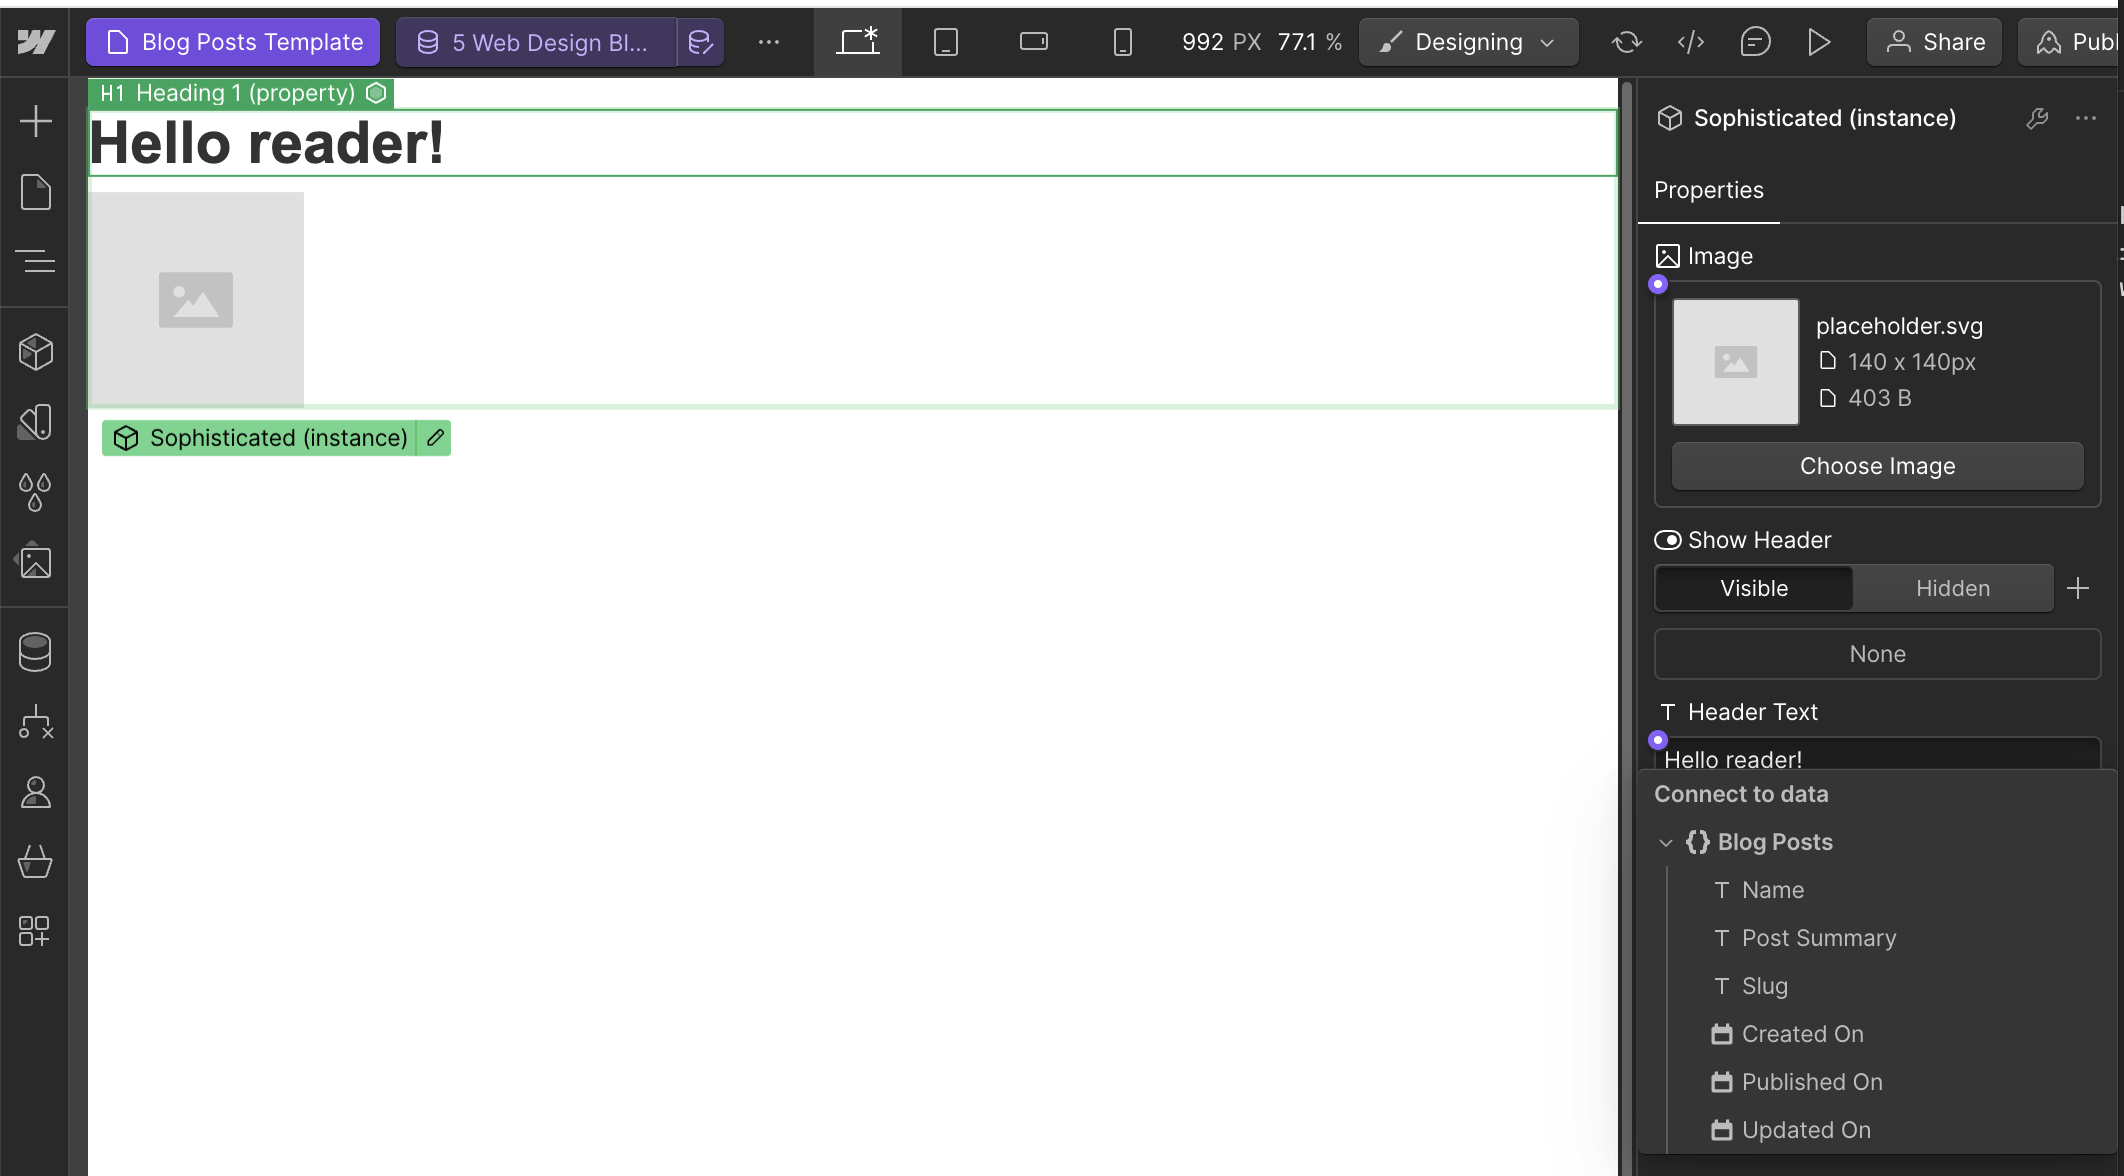
In this video, the visual developer has created three properties of different types:
Three properties of different types creates a settings interface that reflects them.
Which produces a component data type that looks like this:
{
  Header: {
    name: 'Header Text',
    type: List<Element>
  },
  Image: {
    name: 'Image',
    type: Image // (aliasing Record)
  },
  Visibility: {
    name: 'Show Header',
    type: Visibility // (aliasing List<Boolean>)
  }
}
Types are qualified and extensible using WFDL modules as well, however, I've omitted the namespaces for brevity.
Notice how when we see a field of type List<Element> we provide a text box and allow Webflow Designer Canvas editing. When we see an Image, we provide an image editing experience. Our engineers can provide any number of types with different interfaces like this and WFDL glues them all together. With Webflow's entire settings interface being driven by types, our dynamic variable binding experience is driven by the same typing system as well.
For example, if we put our Site::HelloWorld component inside this new component which offers a List<Element> Header Text property we can connect it to our Site::HelloWorld Children field because its type is also List<Element> property:
We provide this experience by running type inference on the current scope along with a typed hole, and if the type matches up, we present it as an option for filling in the hole using a binding. Holes are a type of expression that allow evaluating incomplete programs,which is vital for live editing. If the word "hole" came out of nowhere and you're still curious I'd recommend reading this paper. It's requirements like this that led us to create WFDL as a pure functional language, rather than using a JavaScript AST subset.
This binding approach is conceptually similar to how a text editor provides intellisense, only a step beyond that. Imagine being able to put an "_" anywhere in your code and your editor provides a dropdown with all the values in scope that could validly go there. The values don't have to exclusively come from component properties either, they can come from many sources! Here you can see the power of type unification presenting “Blog Posts” options provided by our CMS:
In this image, you'll also notice that you can bind to date fields provided by the CMS. This hints at other WFDL features around function calling, implicits & type aliases. WFDL has many such features that bridge the gap between code and no code, to name a few:
- Foreign function interfacing to interoperate with JavaScript. This lets Webflow provide code that our customers can visually consume. For example, date formatting functions or other JavaScript values.
- Host extensible type system with typed holes and inference that enables our team to provide unique custom visual editing interfaces that offer bindings out of the box with full support for type aliases that provide tailored editing experiences for the same underlying type. A good way to visualize this is a phone number editing experience being different than that of an email, but they're both ultimately strings.
- Pure evaluation which enables many of our interactive live evaluation and debugging experiences.
- Holes which enable us to support live editing, even if values are missing or corrupt.
- Replaying without executing effects again and so much more.
We’ve focused on how WFDL unlocks visual front-end development and shown how it produces HTML, CSS & JavaScript but that’s not all we use it for. WFDL evaluates to an intermediate representation that we turn into other outputs as well, for example, a JSON representation of the site for use in site-search indexing. We also compile WFDL to React components which powers a feature we call DevLink:

We also use it to power Site Search indexing:

An overview of what we've covered:
We decided to create a new visual-first programming language because editing JavaScript & JSX Abstract Syntax Trees (ASTs) directly didn’t offer the properties needed for a first-class visual experience. On the other hand, editing a haphazard JSON data structure didn’t offer the full power of code. We didn’t make this decision lightly because we knew it was no small undertaking.
- We needed a small AST to target for projectional editing. The JavaScript AST is massive and contains a lot of redundancy from syntax sugar and years of cruft with lots of different types of syntax nodes.
- Efficient subtree evaluation requires controlled side effects without mutation. Unlike JavaScript, WFDL is pure which allows us to provide efficient incremental reevaluation.
- JavaScript has no solution for partial program states to support projectional editing. WFDL uses a combination of default values and typed holes to ensure you always have a result to edit. Projectional editing ensures you never have an error you can’t recover from.
- By targeting our abstraction we can do more than just render and edit React. We can compile to other frameworks or even platforms. Everything is statically analyzable which creates rich build time optimization opportunities we wouldn’t have with the dynamic flexibility of JavaScript.
- TypeScript’s type system doesn’t guarantee “complete” type inference. We needed complete type inference to determine which values could be presented as an option to specific parts of the program.
- Editing a simple JSON tree structure without programming language principles didn’t bring the full power of text-based programming to our visual developers.
- We server render all our sites and the security risk surface area for JavaScript is massive. We needed a solution that allowed us to constrain our user-provided risk while still enabling us to bridge the power of code with FFI. This enables Webflow engineers to add new value to visual developers in the form of plugins which I didn’t get to cover here.
At Webflow, we're on a mission to bring development superpowers to everyone. It takes a lot of code to No Code. If you're interested in learning more about WFDL let us know, or who knows, come build with us!


We’re hiring!
We’re looking for product and engineering talent to join us on our mission to bring development superpowers to everyone.