The most effective brand design systems are practical, functional assets.
Technically you could create a brand design system with pen and paper. You could describe the colors used, how layouts should look, and explain how users interact with elements. But this wouldn’t be especially useful. Different readers might imagine the outcome differently, others might not be able to picture it at all, and the materials created from that guide would be wildly inconsistent.
Software like Figma allows designers to create a visual explanation of their design. The design system created with this software will have illustrations and visual examples. It might even have a mocked-up prototype showing how the pieces fit together. But there is still a gap between the design instructions and the fully realized end result because a website isn’t an image you look at or a page you read.
A website is a moving, changing, interactive experience, and that experience can’t be entirely conveyed by a static set of guidelines. When a designer creates a design system in Webflow, the result is a fully realized representation of their vision. Think of it this way — with design software like Figma, designers create instructions for how to make a website. With Webflow, designers create the actual website.
The ultimate intention of a design system is to create a shared visual language that allows a brand to create assets at scale while remaining consistent. A design system created as a website in Webflow is a much richer representation of the final product because it fully illustrates how your brand’s content looks and feels. It communicates the full picture of what your design intentions are, which will help create assets that are consistent and true to your vision.
Webflow features that help build a brand design system
A design system should be convenient, centralized, and evolving. It should be efficient and easy to use for the designers working with it, and it should create a final product that is clear and functional.
These features are what makes building a brand design system in Webflow so effective:
Real, working structure
The most impactful benefit of building your design system in Webflow is you are creating not just a visual guide to your website but an organized library of reusable assets and elements (what we call Symbols and classes — more on that later).
Then, when it’s time to build the company website, these elements can simply be dragged and dropped into the new site design, automatically applying all of the presets you’ve crafted. The entire design system site can even be cloned and used as the basis for beginning to build new pages.
When you want to make aesthetic changes to the company website, you can go directly into your design system, change whatever element needs to be updated, and that change will cascade through the entire company website (not just your design system). This process is easy, fast, and maintains meticulous consistency across your entire web presence.
No-code design
With a no-code interface, designers can create a website visually without having to rely on programmers to execute their designs. This empowers designers to work independently and own their process. Eliminating the need for intermediaries has a number of benefits.
Faster build and faster changes
With Webflow, you avoid both coding and handing off tasks between departments, which significantly speeds up your process. When changes or updates need to be made to your brand, designers can quickly go in and make those changes themselves without having to go back and forth with programmers.
When you reduce how heavily designers have to lean on your engineering team, it also has the add-on benefit of freeing programmers for the tasks that require more of their expertise.
See the results of your designs in real-time
You can see the impact of the design decisions you’re making more clearly when you prototype that design. A working prototype is even better. When you can make changes and instantly see the result, you are able to refine your vision. You no longer have to rely on imagination or a static sketch. This immediate feedback (and easily reversed changes) encourages experimentation and creative risks.
Easier access for more teams
Webflow is also accessible enough that members of other teams — editorial, marketing, sales, etc. — can add their contributions directly to your design system. A design system is more helpful if it also contains information on your brand and its voice, not just visuals. This could mean adding brand guidelines, messaging, style, tone, or accessibility standards.
Interactivity
A great website will have animations, dynamic elements (like buttons that click, and menus that hide, expand, or drop-down), and transitions as you move from page to page. Include these details to elevate your design system. When you make your design system as a site in Webflow, viewers can interact with the moving elements you have designed, so you can show how they work in a fully functional website.
For example, to show how a button changes on hover or press, you could include three static illustrations of a button — one in its resting state, one when a cursor hovers over it, and one when it’s pressed. Or you could put a button in your design system that can be hovered over and pressed, allowing the user to experience the button’s reaction to interaction. The second option would give a user a better idea of how the button will function on the actual site.
Reusable elements
Webflow works from a system of reusable structural and aesthetic elements that repeat across your site, keeping your design consistent.
Symbols and classes
Symbols are reusable components you apply your design standards to. This could be something like a button, a heading, or a navigation bar. You apply settings (color, size, shape, etc.) for how you want these elements to look and act, then make them a Symbol, organized in Webflow by name. The resulting Symbol can be dragged and dropped anywhere in your design. Classes have a similar effect, allowing you to apply styling decisions to as many elements as you want and then change them simultaneously as needed.
Site code
The code for your site is also a reusable resource. When you design visually in Webflow, clean, semantic code is being written in the background. That site code can be cloned and reused as the skeleton for any new Webflow page you build. Additionally, the CSS from your design system can be downloaded wholesale and used by your company’s programmers wherever they need it.
Downloadable assets
You can make your design system more helpful by including assets, such as logos, fonts, and images that can be downloaded directly. This can be a helpful resource for anyone making materials for your company. If someone on the marketing team is creating a newsletter, they can go to your design system, where they can select and download the correct version of the logo. You can also make your color choices consistent by including their hex codes directly on your site — both in the working settings and in the color name.
A publishable result
In the end, you’ll have a design system you can publish in one easy step. That published site can be shared with the world (for bragging rights) or made only accessible inside your company. Why not showcase the incredible work your designers are doing? Your design system will explain the why and the how of your brand to a wider audience if you want to share it.


The modern web design process
Discover the processes and tools behind high-performing websites in this free ebook.
Examples of effective design system sites
Here are some examples of different publicly published design systems built in Webflow. They each take different approaches. These sites show how their designers have made their design system sites unique and reflective of their brands.
The Webflow design system itself

- Webflow’s branding is clean and simple but playful. The site is built the same way.
- A pared-down approach focuses on what is important and makes our design system easy to use.
- We have included downloadable resources like different versions of our logo, photos of team members, and fonts.
- Webflow’s general approach is fun and irreverent, and we’ve brought some of that playfulness to the way we’ve put together our design system (the color names are simultaneously amusing and effective — notice how we’ve included tints and hex codes). Having your design system reflect the tone your company in your materials helps communicate better than just describing it would. Instead of just saying “be playful,” we show what that looks like.
- We’ve also included information about the voice and tone to use in communications as well as our accessibility guidelines. You can use your design system to unify not just your look but also your approach and what your company stands for.
Zendesk
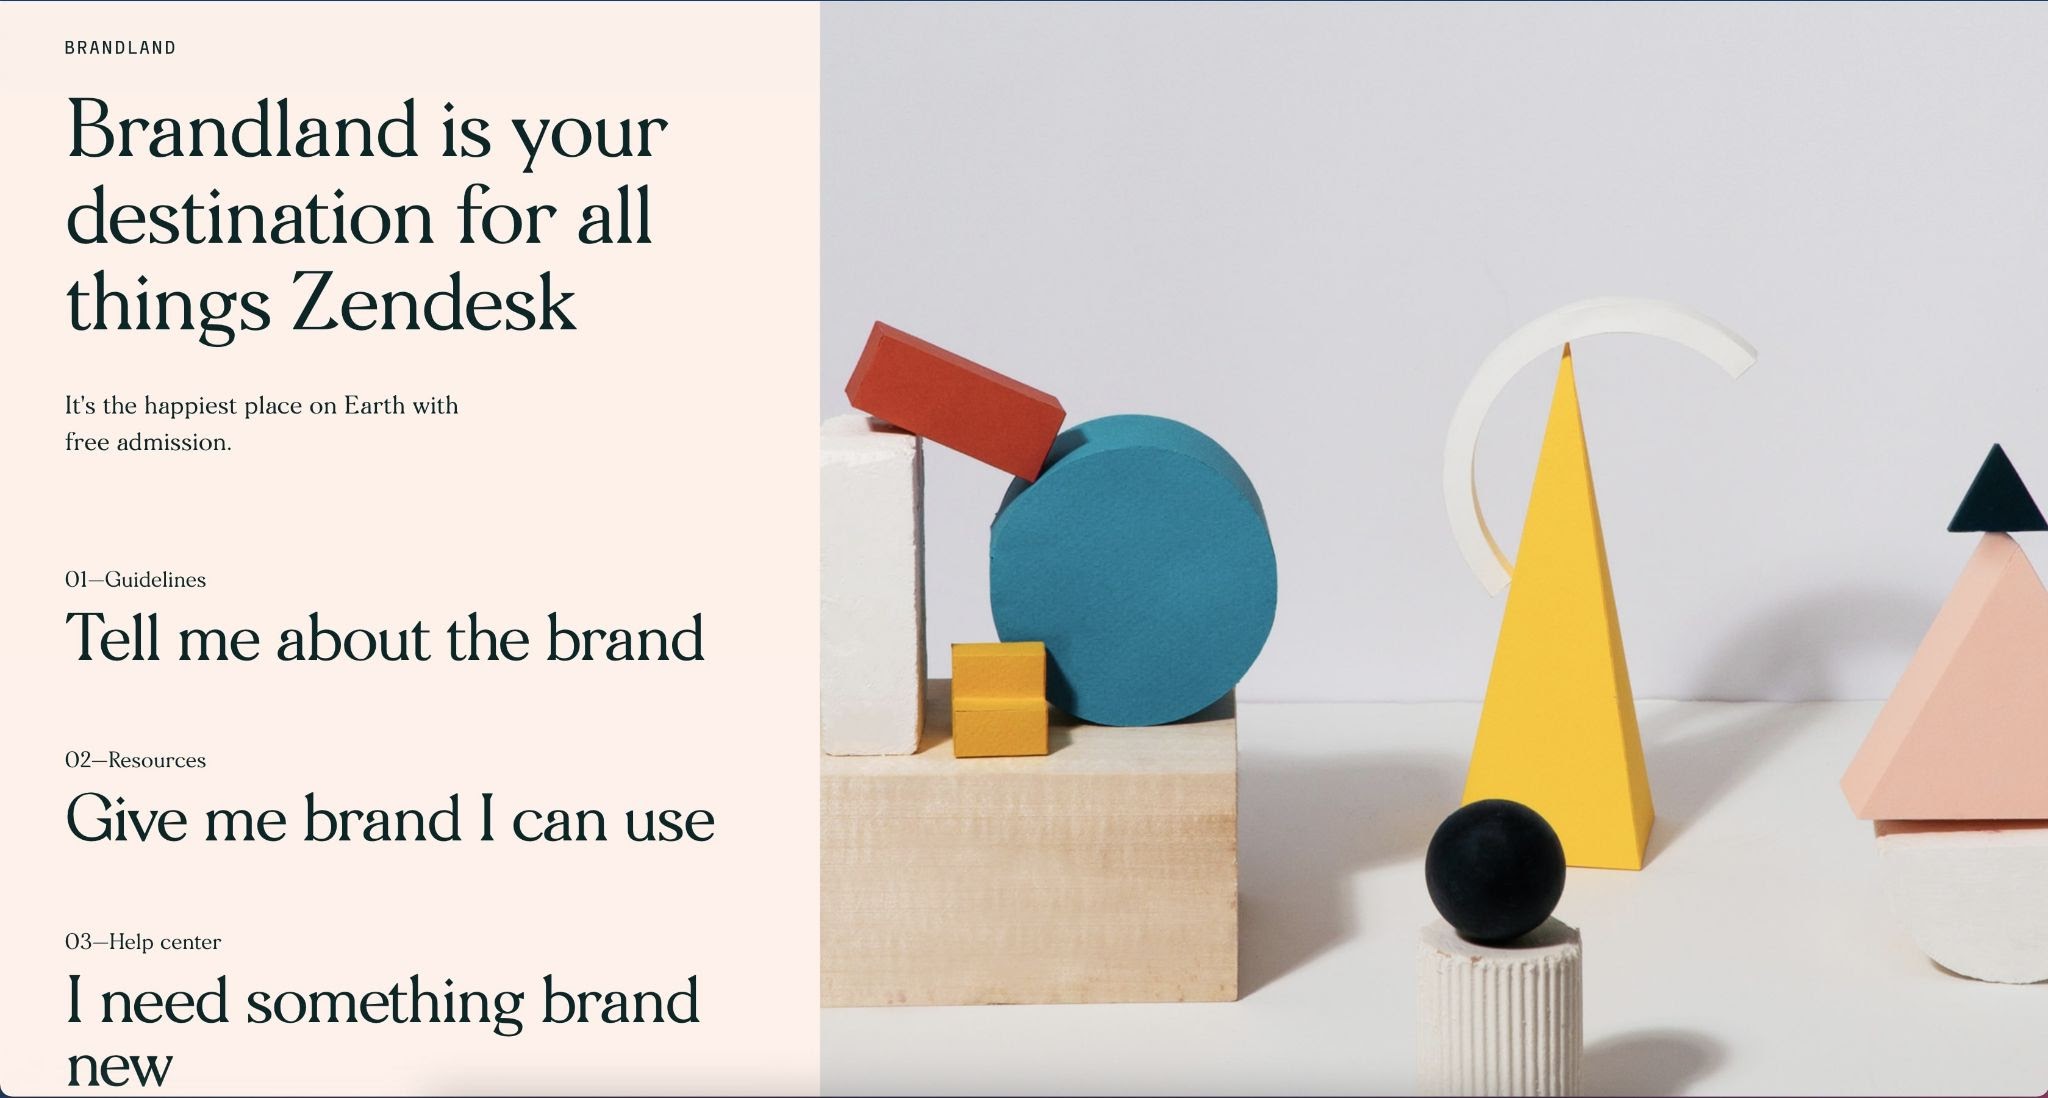
- Zendesk’s design system is colorful, elaborate, and layered.
- They use lots of images, animations, and interactions.
- Their design system is broken down into four sections — Brand, Design, Presentations, Writing.
- Notice how they include explanatory use cases for the right and wrong way to use their design elements. This is helpful!
- They’ve given information on the design of the logo and how to use the geometric shapes that are their signature visual queues. Notice they explain what the different versions are, why they look the way they do, and when to use each version.
- Including information on the philosophy and brand attributes helps communicate the why of their brand.
- This type of complex brand design system site might be best for a company whose design identity is broader and more complex or a brand that uses lots of visuals, photos, illustrations, and interactions.
Startr
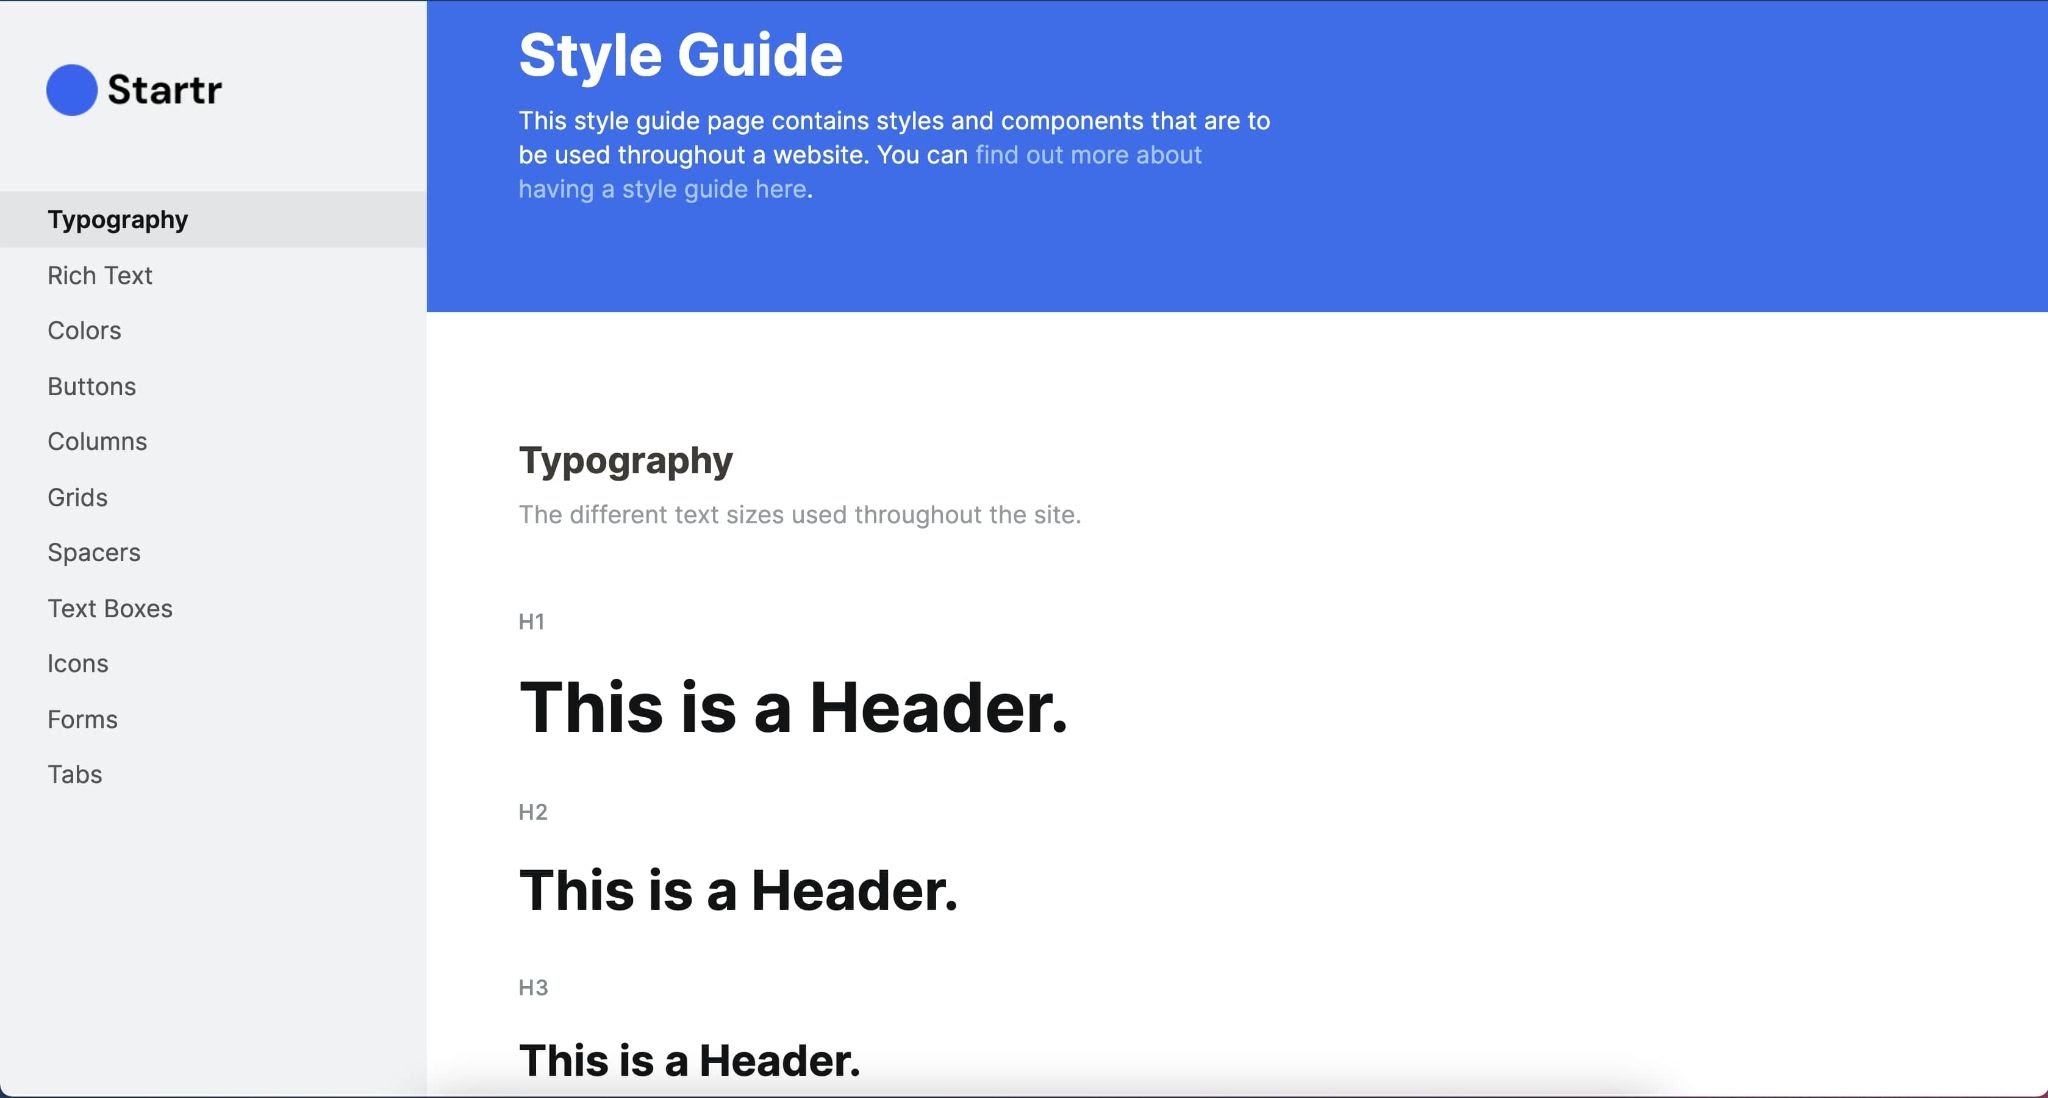
- Startr has a design system that is simple, straightforward, and usable — like their main site.
- This is a great format for a company that has a fairly focused online presence and simple, direct branding.
- This is a good example of showing simple interactions. Look at the section for buttons — the viewer can see and contrast exactly what it looks like when users interact with different types of buttons.
Dezin
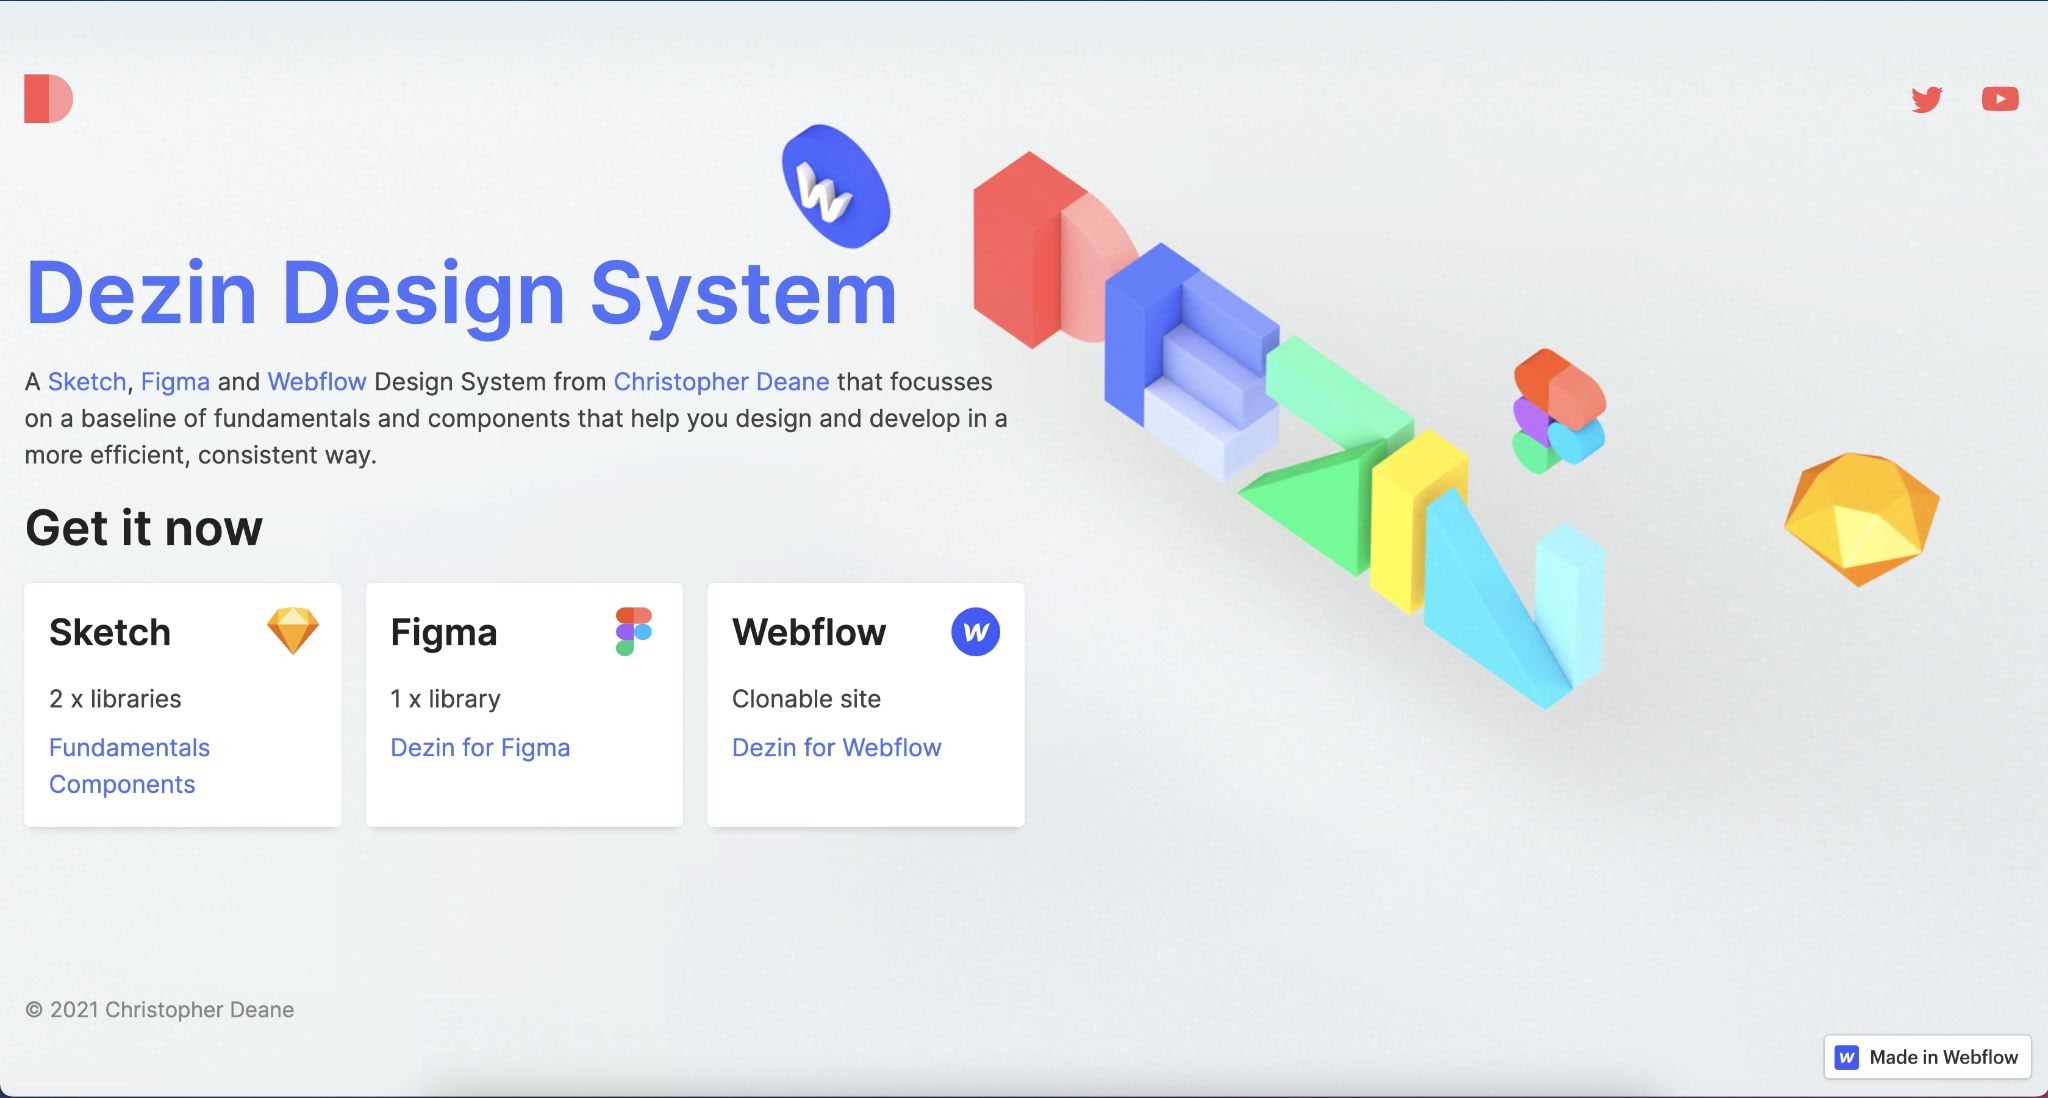
- Dezin’s design system is an example of one that focuses more on being usable than being illustrative.
- They break their design system into three parts — content libraries, Figma system, and cloneable Webflow site template.
- This system was clearly created by designers for designers — they use Sketch, Figma, and Webflow for different purposes and have even made their assets shareable. You’re not stuck in Webflow if you decide to make your design system live there. You can still use whatever other tools you find helpful and then use Webflow as the central place where everything comes together.
- If you look at the Webflow template, you can see they’ve even made their site cloneable so anyone can download and play around with their design.
What it looks like to work with a design system in Webflow
Webflow is a visual design tool, which means it can be used by non-programmers, but it still has a bit of a learning curve if you haven’t used it before. Designers will have worked with similar visual canvas-based programs in the past (such as Figma, Photoshop, or Illustrator), and this background will help them pick up the workflow quite easily.
If you have a design team that isn’t already comfortable working in Webflow, they’ll have plenty of support to get started. Webflow University has lots of comprehensive resources for everything from learning the program from the ground up to more advanced or specific tutorials. There is also a large library of site templates that can be cloned if it is easier to start with the elements in place and customize from there.
Here’s an overview of what it looks like to create, use, and make changes to your design system when working in Webflow.
Build it
The first step is to create the guidelines that will live in your design system.
Determine the characteristics that define your brand:
- Color - Primary and secondary brand colors along with tints, shades, backgrounds, and text colors. Where is each used and how should they interact with each other? What color text is acceptable on what color background?
- Typography - Which fonts do you use and when? What do they look like? What are your case standards for titles, headings, etc.? When do you use all caps, bold, or italics?
- Sizing and spacing - Headings, subheadings, paragraphs, buttons, pull quotes — what sizes are these text elements, and how do these sizes interact with each other?
- Layouts and elements -Set standards for how images and illustrations fit into different types of pages and determine how elements like grids and columns should be used.
- Components - Buttons, navigation, forms, tables, etc. — how do they look, how do they function, and how do they interact with each other? Are there animations? Do states change on hover or press?
- Logos - Explain when and how to use different versions of your logo (small, large, text-based, brand marks, etc). Which do you use on dark vs. light backgrounds? Do you want to include downloadable versions?
Begin assembling your site, crafting your overall approach to reflect your brand identity. Populate it with visual examples and explanations on the why and how of using your guidelines. It’s important to build in a clean and organized way using Symbols and classes during this process because that is what will make your design system repeatable and useful. When it’s done, you have the choice of publishing it publicly to show it off or keeping it as a hidden or password-protected page for exclusive use within your company.
Use it
The resulting design system can be used to create content in two ways. It’s useful as a visual guide. Flyers, posters, newsletters, presentations — if any team within the company needs to create materials that feel unified and consistent with your brand identity, they can simply pull up your brand design system site, download the assets they need, and use the explanations to guide their design.
Your site is also a usable template for crafting web pages. As explained before, you can begin creating a new page by cloning your design system as a template or by using the Symbols and classes contained within it as building blocks to assemble new pages. This is a faster and more consistent way to build because your design settings are applied automatically.
Maintain it
Making changes to your branding is easy in Webflow. Designers can simply make a change to the settings of a Symbol or class in their design system in order to change the settings of any materials created with Webflow. The change is instant and simultaneous throughout your site.
This is one of the major benefits of creating a living design system in Webflow vs. a static design system the traditional way — manually or in a program like Figma. When using Figma or other design software, any changes need to be made in the software and then re-coded by programmers into CSS in order to go live on the site. In Webflow, designers can just go in and make the change themselves, and it goes live immediately.
Making changes this way also allows designers to instantly see the effect of their design choices — how does it work with the rest of their design guidelines? Does it conflict with anything they’ve already set?
Create something real
A design system is not an abstract, conceptual ideal. It’s a deeply practical tool that will be used by both your design team and by people across your company. Ultimately, the greatest benefit to building your design system in Webflow is that while you’re crafting it, you are creating an actual, usable asset.
While describing your design and the thinking behind it, you are beginning the process of bringing your design to life in a very real way. When that design system is finished, you are that much closer to building all of the web assets your company will create from that design.
Your design system is a starting place for creating content. No more starting from a blank page — you have created a usable structure and elements that any team can reach for and assemble materials with. Both your team and the public can use the website to understand your brand. Your work creates consistency for your brand that ripples outward through everything created with your system.