
Offering share links and other articles to your visitors is always a good idea — especially for a blog. In this tutorial, we’ll create a sticky menu that sits beside the main content of a blog post and stays with visitors as they scroll.
Here’s a live demo of the sticky aside we’re going to build.

Step1: Add the CSS snippet
Begin by placing an HTML embed widget on the canvas and paste the following CSS snippet inside the modal window:
<style>
.sticky-aside {
position: -webkit-sticky;
position: sticky;
}
</style>
Note: You can put this snippet in the Header Custom Code section in project settings, but you won’t be able to see the effect unless you’re on the published site.
Step 2: Add the menu and content
Place a Container on the canvas and within the container place a Div. Give it a class of “Flex Row” with the following settings:
Display: Flex, Horizontal, Justify: Left, Align: Top

Place another div inside the newly created flex row and give it a class of “Main Col” with the following settings. This is where your page’s main content will go.
- Flex Item: Expand
- Padding (Right): 50px
- Max Width: 70%

This is a good time to add content. In our case we have some dummy blog post content, but of course you can use this as part of your CMS powered site.

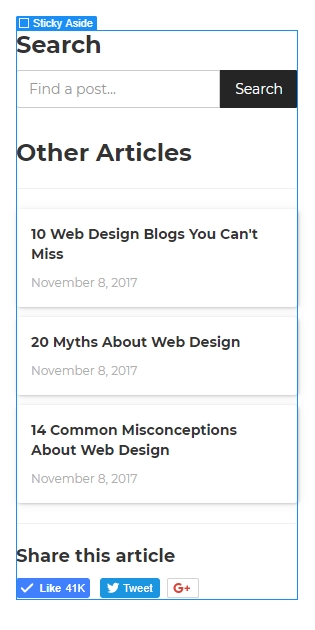
Add another div beside the Main Col div, and give it a class name of “Sticky Aside” with these settings:
- Position: Absolute, Top
- Min Width: 30%
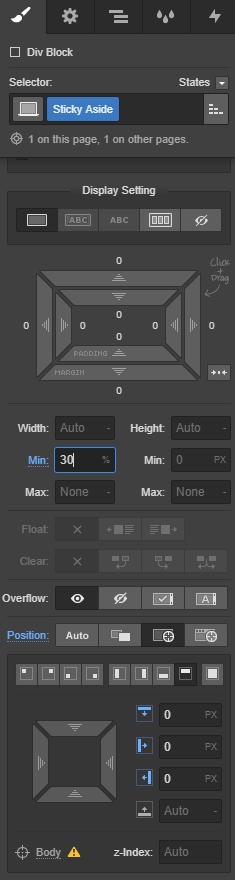
This is where you’ll put the content you always want in view. We’ve added a search bar, three of the latest blog posts, and social share buttons — you can put whatever you want in yours. A breakdown of how to style the elements added to the aside menu will need to be saved for another day.
Publish and test it out!
Step 3: Smooth it out with interactions
If your website has fixed navigation like my demo site, then you’ll probably find the sticky aside gets caught behind it. To fix this and add a little bit of pizazz, we’re going to add some interactions!
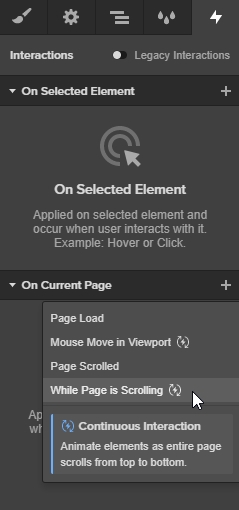
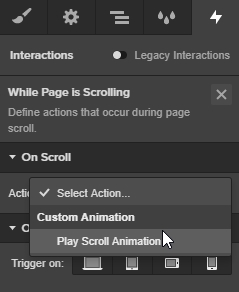
Open the interactions panel and, in the On Current Page section, click the plus icon. Select While Page is Scrolling from the dropdown menu.


Design interactions and animations without code
Build complex interactions and animations without even looking at code.
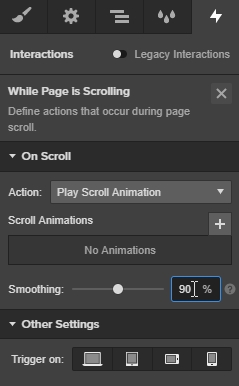
In the On Scroll section, select “Play Scroll Animation” from the dropdown menu. Change the smoothing to 90% and click on the plus icon.
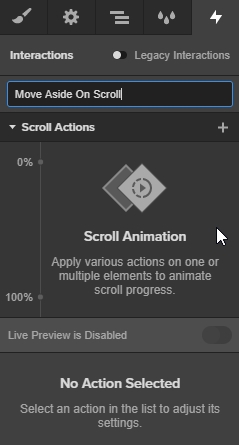
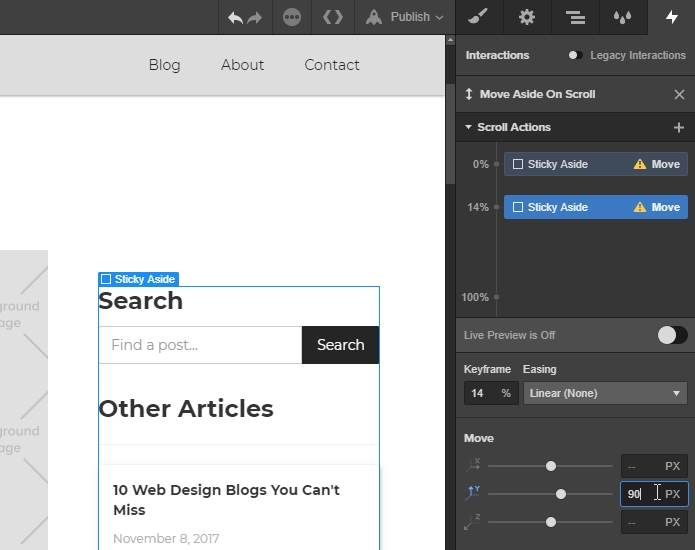
Name the interaction “Move Aside on Scroll,” navigate to the canvas, and select the Sticky Aside element. On the interactions panel, click the 0% marker and select the “Move” action from the dropdown menu.
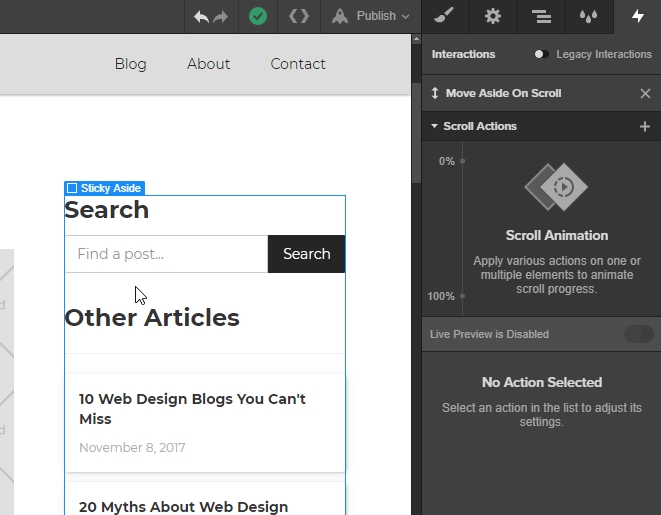

On the first instance set the Y Axis to “0px.”

At 100%, select and change the Keyframe to “14%.” In my example I’m moving the Sticky Aside down by 90px, but you may have a larger header or navigation to clear. You can experiment with how far you need it to travel.
Done! Publish and test!