


If you’re working on an ecommerce site with more than a handful of products, you’ll need a way to organize them. The organizational method involves adding product labels and allowing site visitors to navigate quickly across product lines. Let’s look at how to do this.
Somewhere in the multiverse, this type of navigable organization got the tasty title of breadcrumbs. Because sometimes, just like our friends Hansel and Gretel, we want to follow the digital trail with delicious stops along the way. Here’s a peak at the result:

There are three main steps to creating breadcrumbs:
- Defining the relationships
- Making the connections
- Designing with data
The traditional recipe
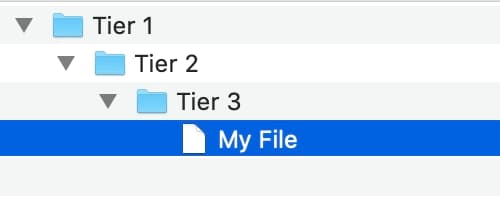
For this adventure through the magical forest of Webflow Ecommerce, let’s start by thinking about nested data. You can think of it as folders within folders within folders. This is called nesting — or dependencies — because each level has a parent/child relationship. It’s a very traditional model of hierarchy in computing.
For the sake of this tutorial, let’s use the example of a sweet shoppe (or shop, as we call it in the U.S., unless we’re trying to be quaint).
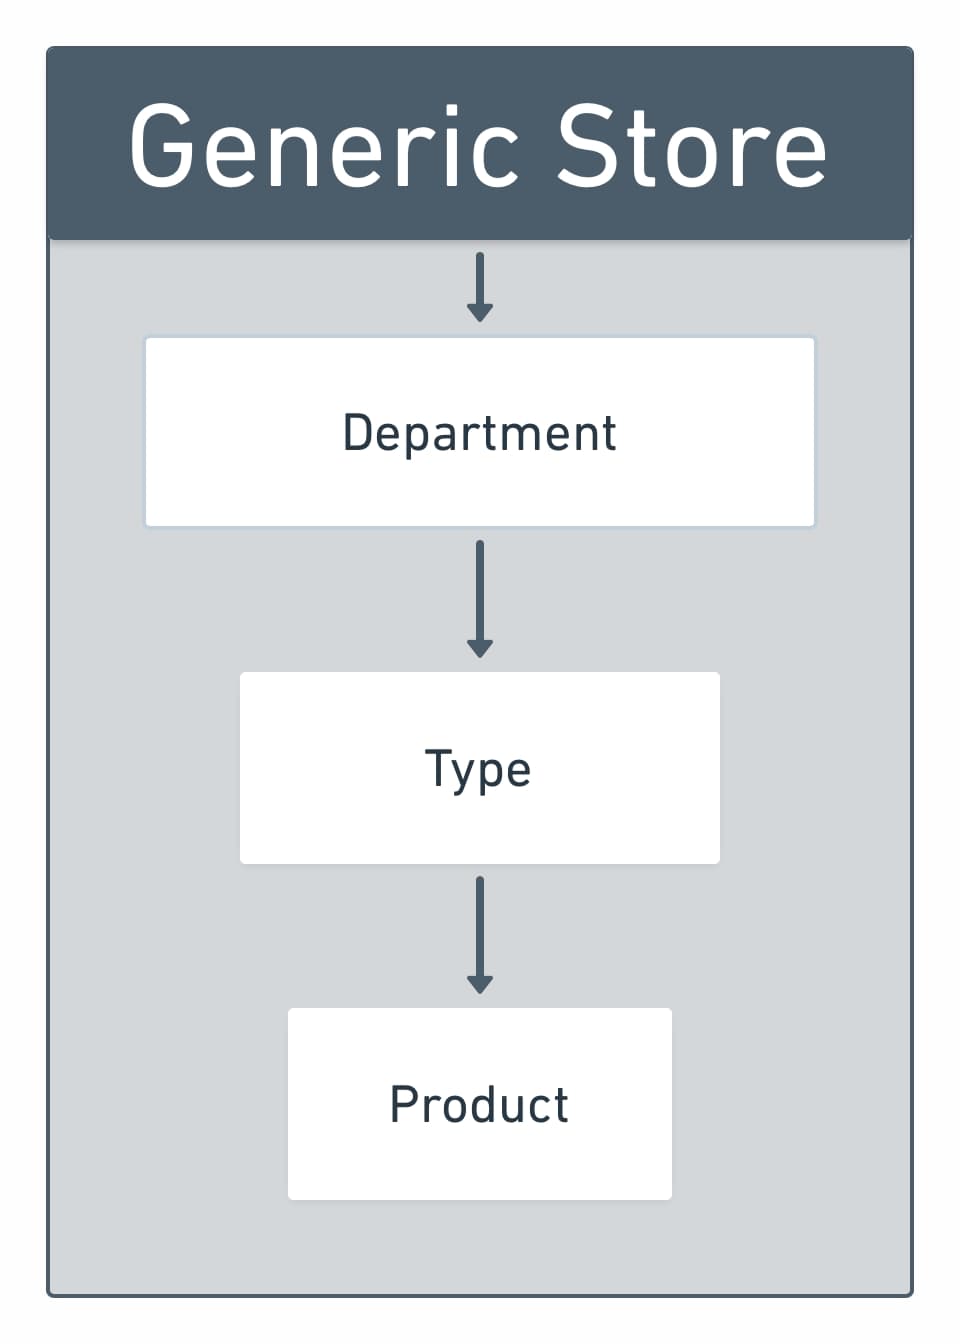
This little Sweet Shoppe has various sections called Departments. Inside each department, sweets are divided into Types. Using traditional nested relationships would give us a URL structure of sweet-shoppe.com/department/type/product.
Here’s what that structure looks like visually:
The Webflow recipe
In Webflow, we design with dynamic data using CMS Collections as databases. This means we can define the relationships at every level, not just the parent-child level. We have references that are more akin to sibling relationships than parent-child relationships. This allows for lots of options when we decide to connect things later on.
It’s worth noting the relationships can go deeper than three levels — we’re just using 3 Collections for simplicity. This method can be implemented for any number of Collection relationships above two. Just add Collections as needed and define the new relationships at each level.
These connections are called references. Each reference creates a direct, one-way relationship between two CMS items, which is perfect for allowing us to bind data wherever we desire it.

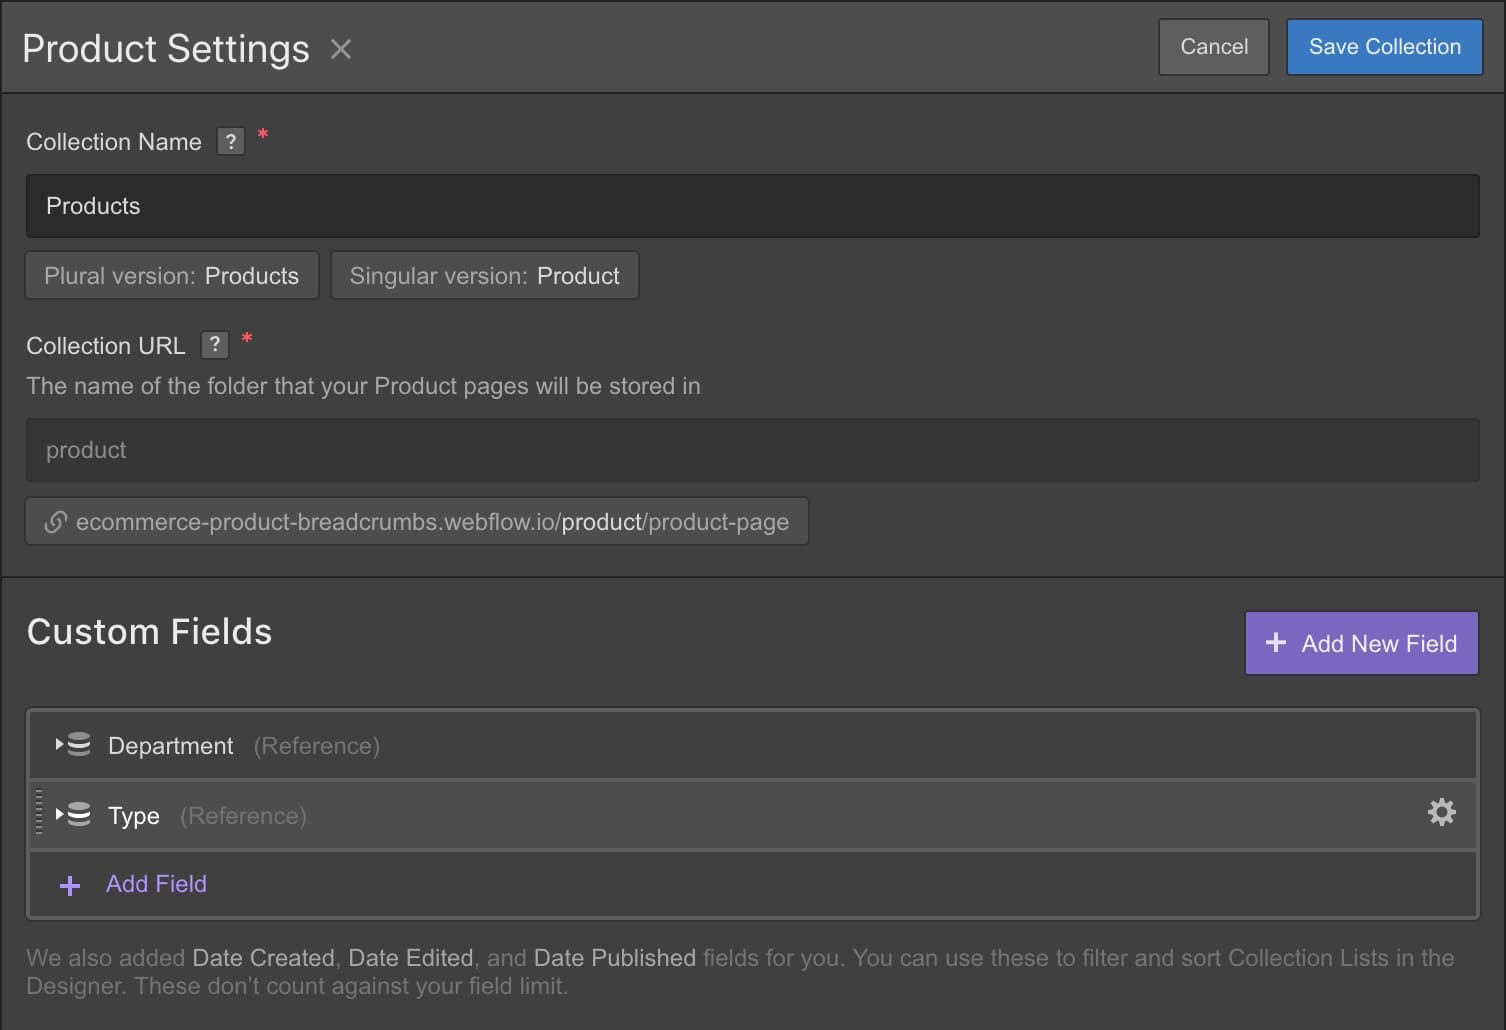
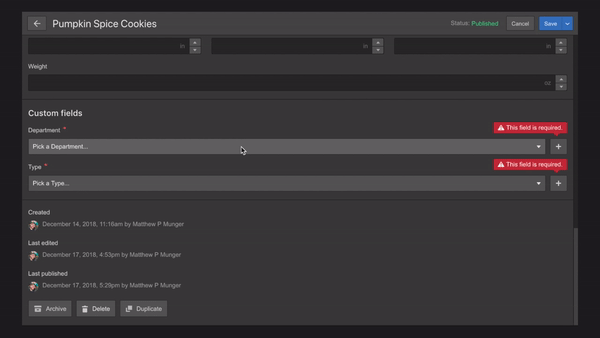
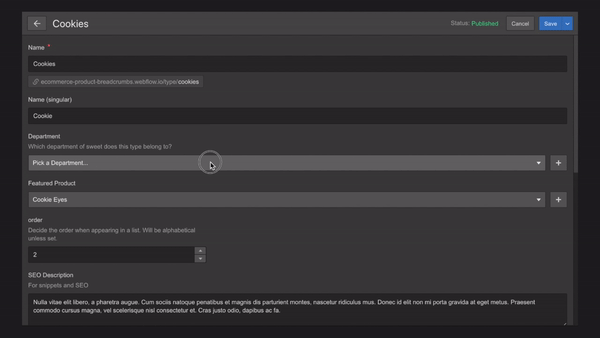
We have to define relationships for each Collection — and not only at the product level. This is because each Collection is a direct child of the site. Now we define the relationships between the Collections. Each Product collection item is connected to a single Type item and a single Department item. And each Type Collection item is connected to a single Department item.
Or to put that a little more schematically:
Homepage or storefront (static page)
Department Collection (CMS template page)
Type Collection (CMS template page)
- reference to Department Collection

Product Collection (ecommerce template page)
- reference to Department Collection
- reference to Type Collection
Here’s how our structure looks using Webflow CMS and Ecommerce:
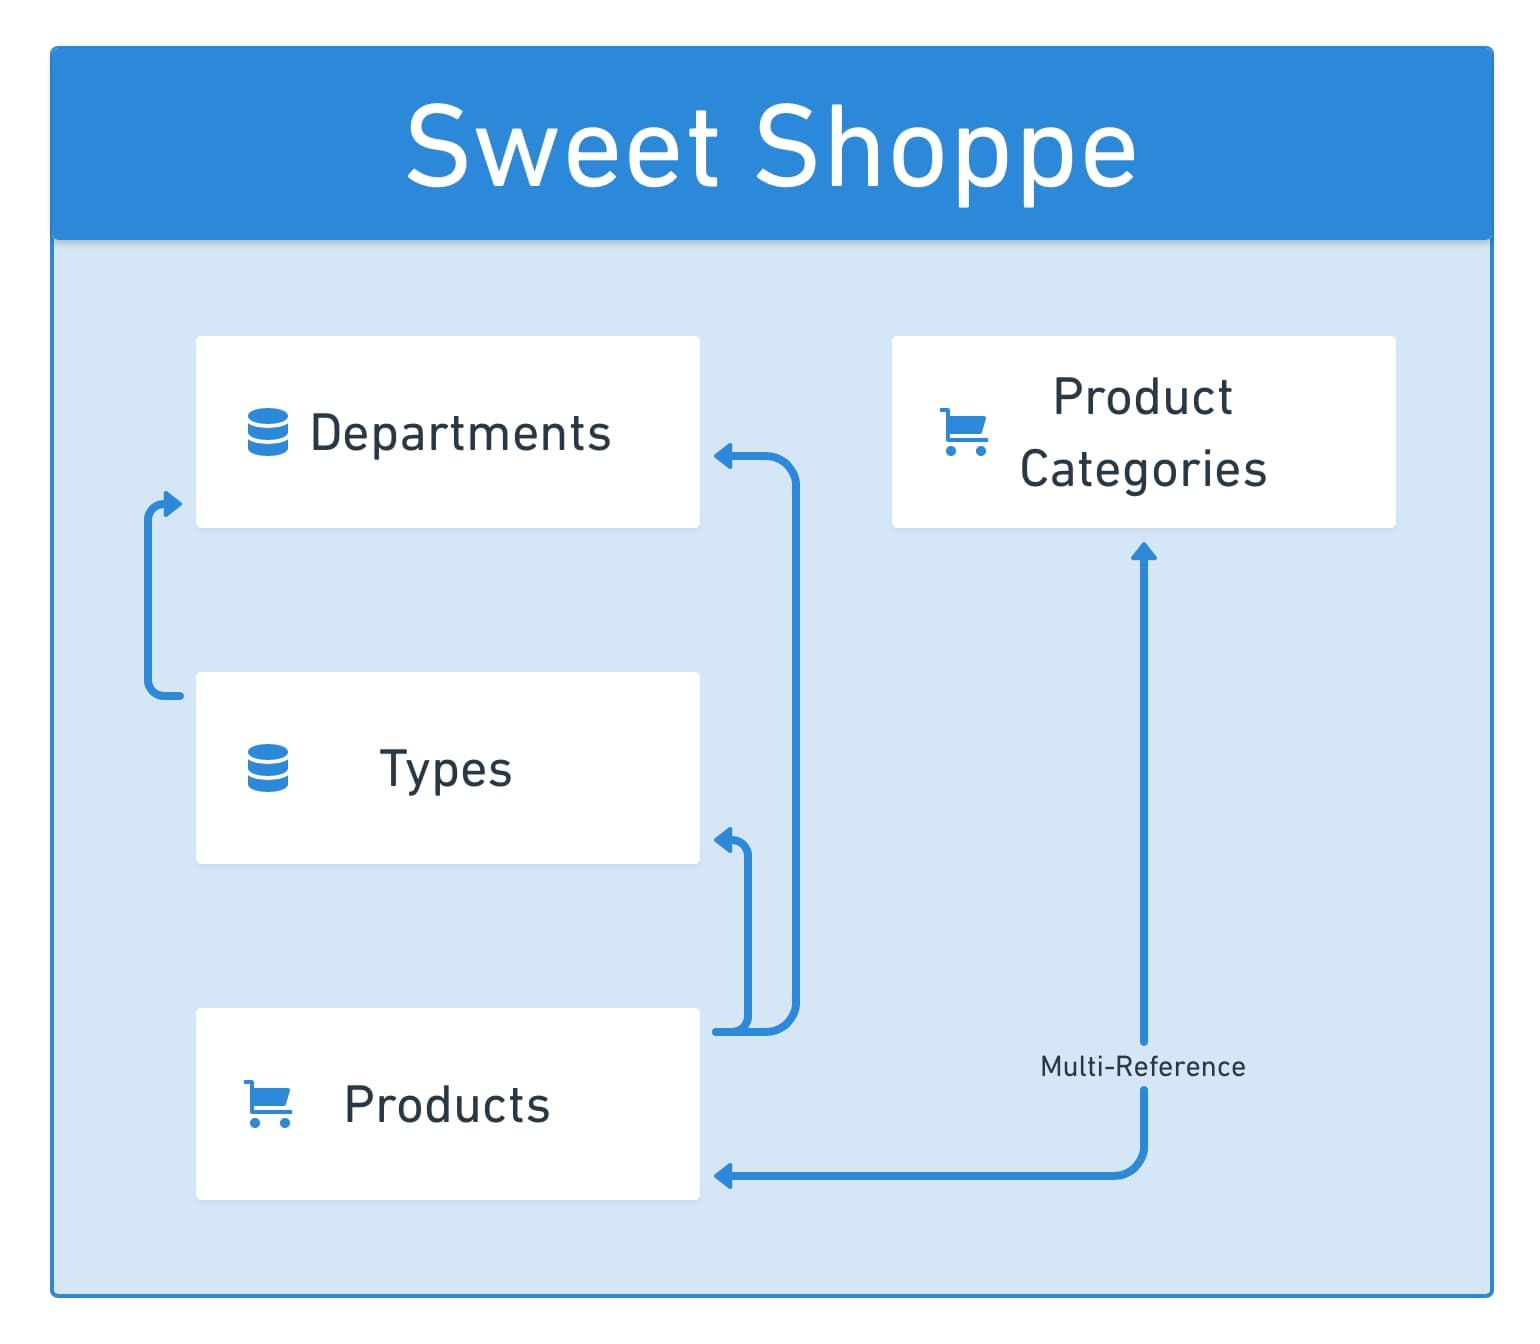
You might notice a new Collection off to the side called Product Categories. This Collection is created automatically when you enable Ecommerce. The Categories Collection is an example of a multi-reference field, which is like a two-way street (as opposed to the reference’s one-way street). Multiple products can be assigned a category, and multiple categories can be assigned to a product.
This kind of multi-reference relationship is great for what I like to think of as quick Collections — easily grouping products because they’re similar or go well together. This happens on the category template pages or using CMS Collection lists on the product template pages.
Let’s not get lost staring at the goodness that is multi-references. Back to the product breadcrumbs.
Make the connections
Now that we’ve defined our Collections and their relationships, let’s populate the products and CMS Collections with items.
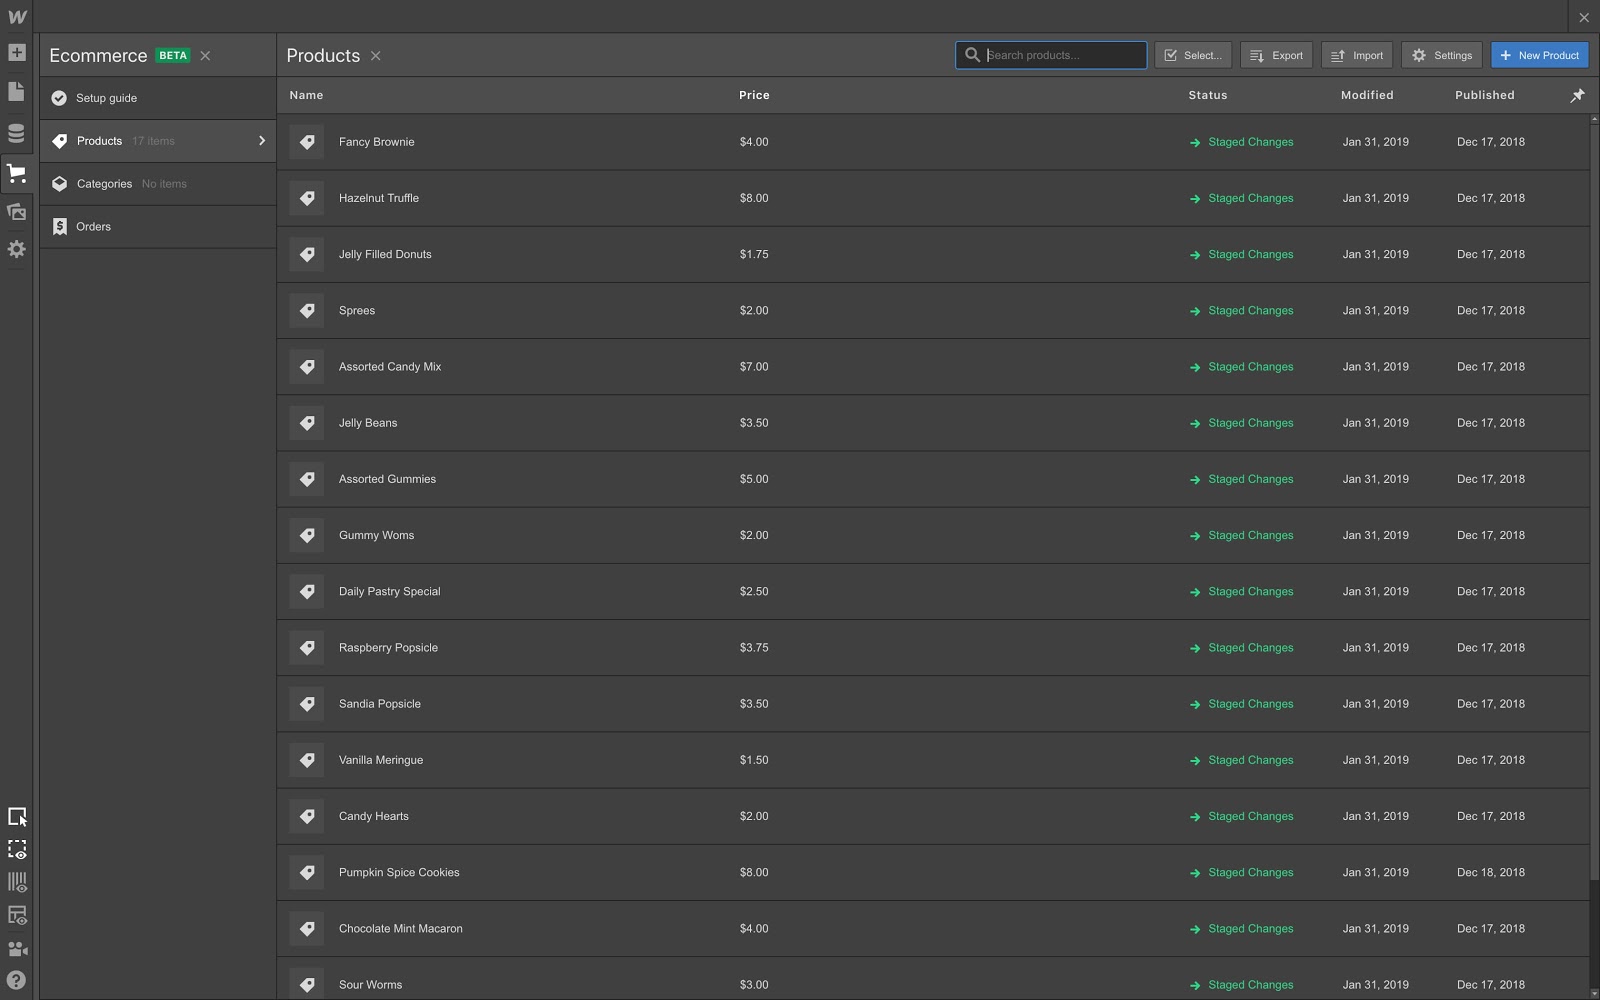
Next, make sure to connect each product to its Type and Department.
Then, connect the Types to their Department.
The departments don’t need to be connected to anything, because their parent is the storefront or homepage.
Build completely custom, production-ready websites — or ultra-high-fidelity prototypes — without writing a line of code. Only with Webflow.
Build completely custom, production-ready websites — or ultra-high-fidelity prototypes — without writing a line of code. Only with Webflow.
Design with data
Now, designing with dynamic data is a breeze, because we've defined the relationships from the bottom to the top at each level. On the product template page, let’s create a horizontal flexbox container to hold our breadcrumbs.
Now, I’ll add three text links and a text block separated by arrow icons.
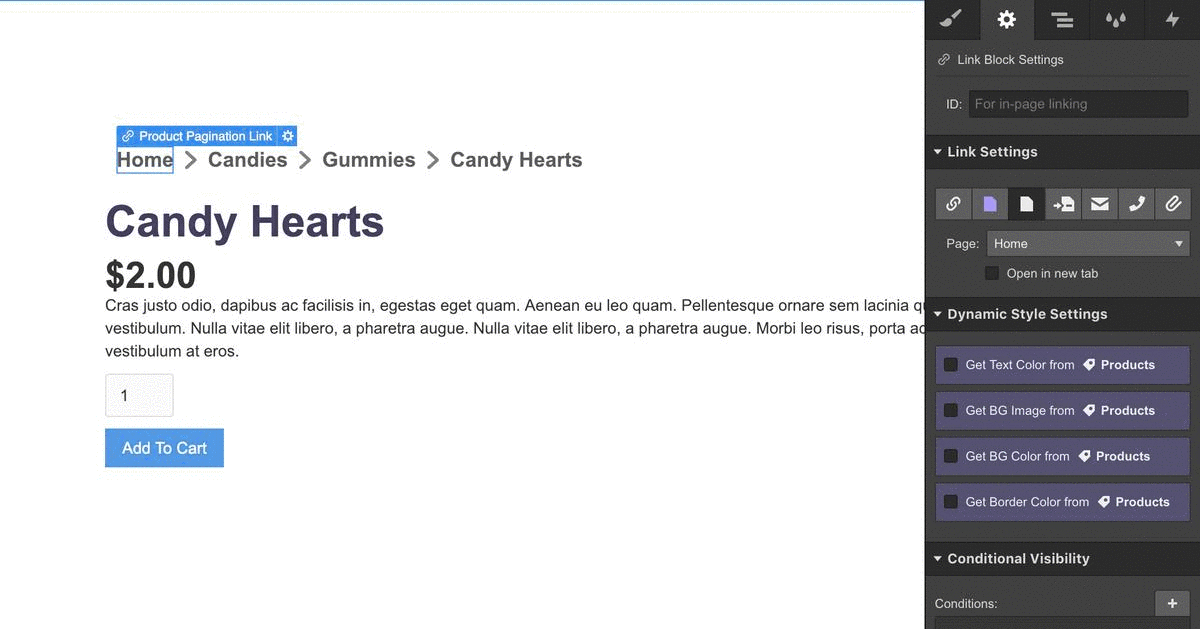
- Select the first link and connect it to your storefront, naming it Home or Store, as appropriate.
- Select the second link and choose to get text from the referenced department name. Then in the link settings, choose the reference for the department page.
- Repeat the same process to connect the next text link for the type.
- Optional: connect the final text block to the product name, but don’t link it. (Including it probably creates the best user experience, but it’s up to you.)
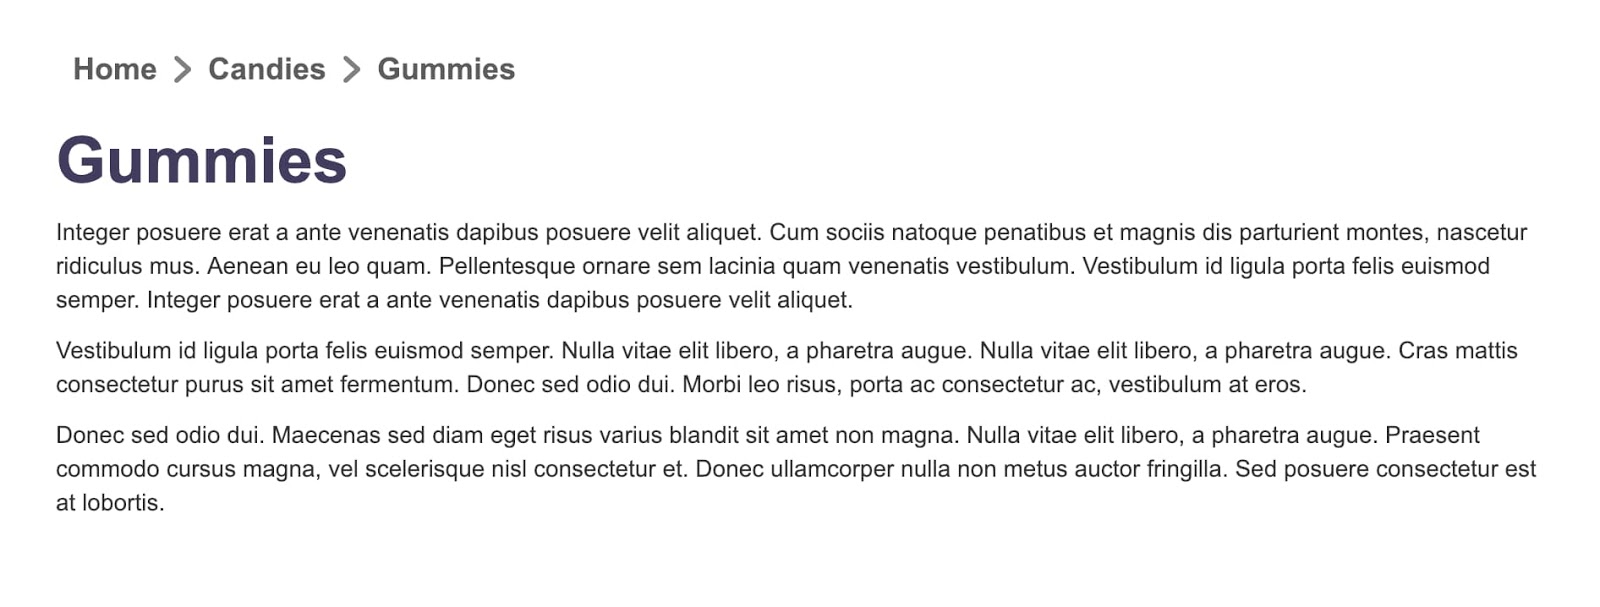
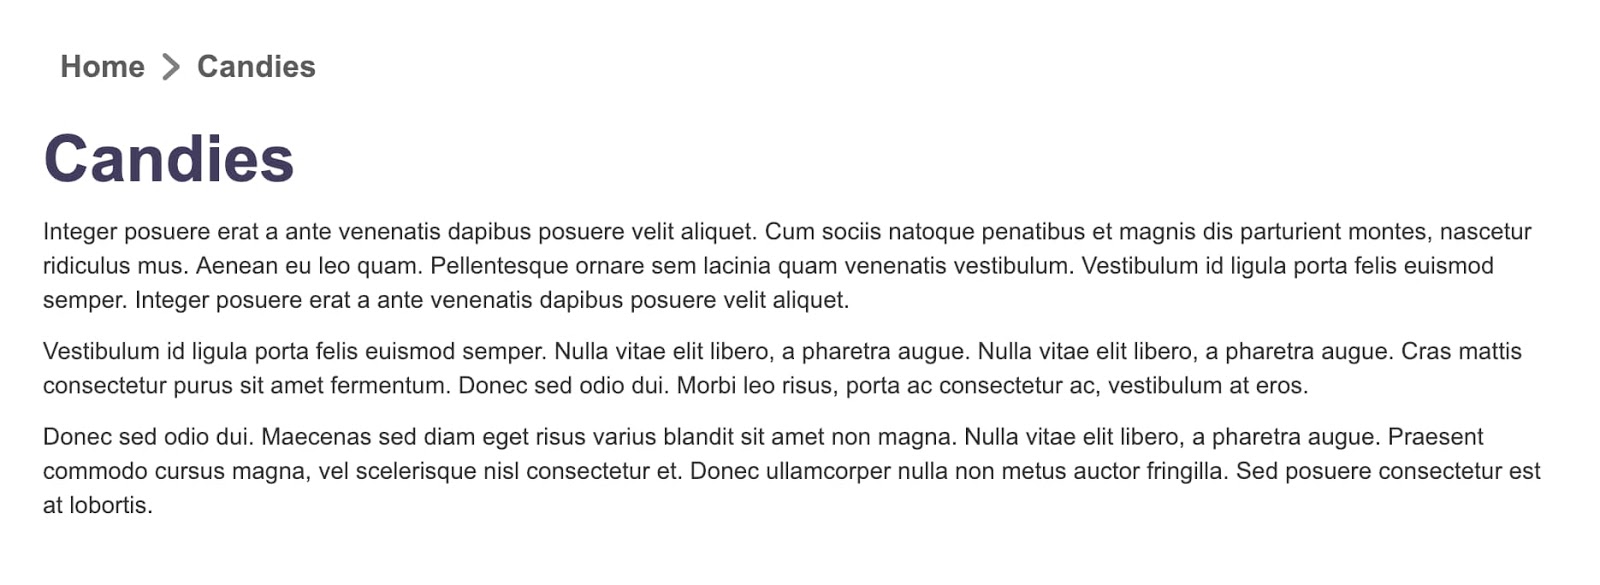
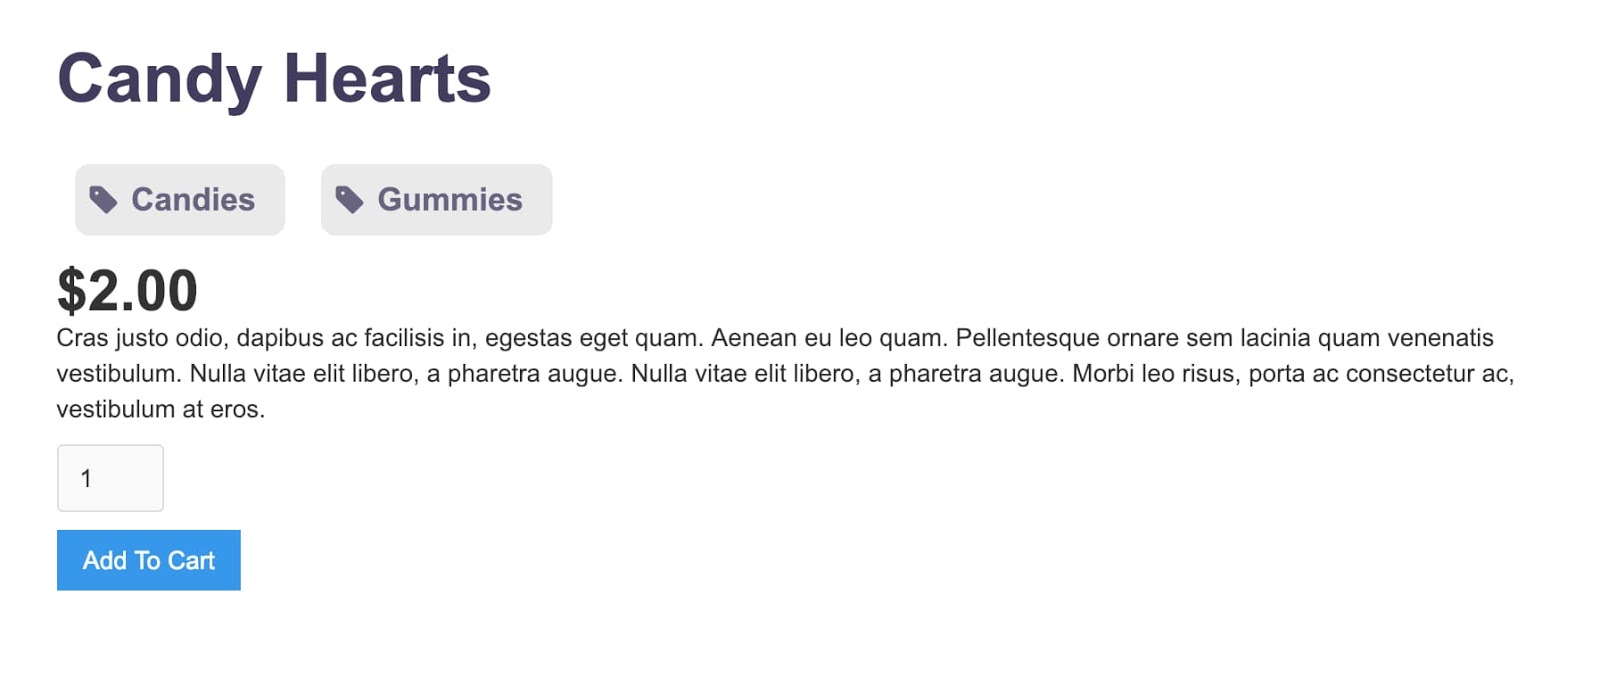
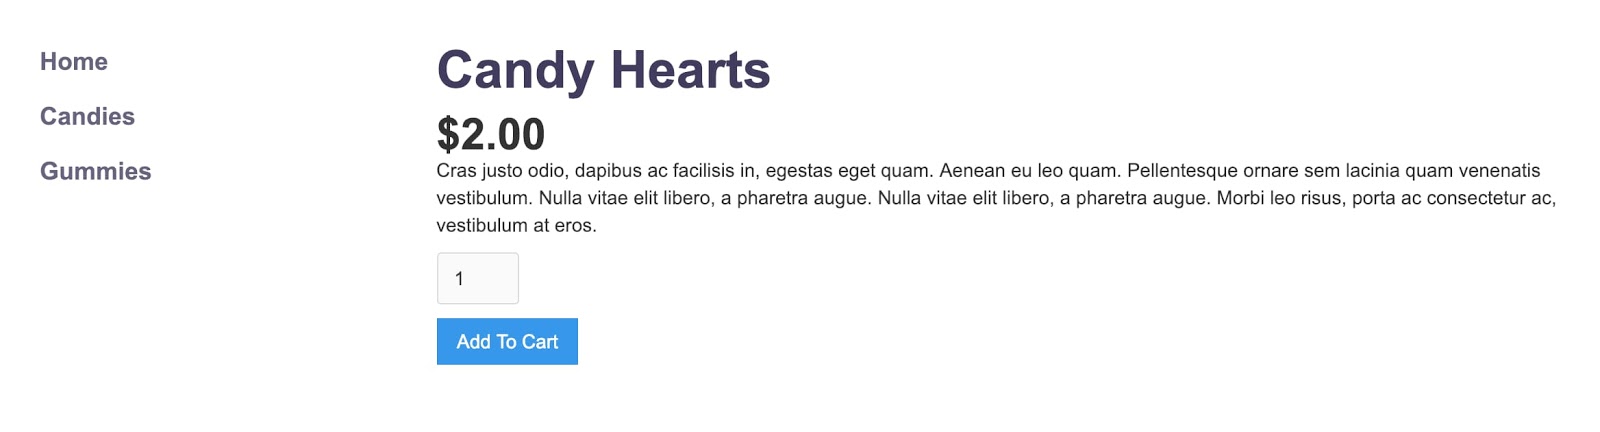
Now, let’s take a look at our breadcrumb navigation component.

Using the steps above, we can create breadcrumb navigation on the Departments and Types template pages to complete the trail back to the main store page. The “closer” you get to the storefront, the fewer links you’ll need.
You’ve got lots of design options here. Maybe you want to use buttons or link blocks to create more visual breadcrumbs with interactions. For example:
- Page load trigger to reveal breadcrumbs in a cascade
- Hover trigger to highlight the hovered link with a change in color or size
Remix the batter
You can apply the same method to create a dynamic sidebar sub-navigation, or to create product tags. The design possibilities aren’t limited by the dynamic data. After carefully setting up our data relationships, we can take full advantage of Webflow to truly design with data in a way that suits our site.
Options. Sweet, sweet options.
This approach works for more than just Ecommerce product Collections. You can apply this methodology to blogs or any CMS Collection that requires more than just a category or tag for organization.
So many more components can be created from these dynamic relationships — like related types of products, dynamic mega menus, color or design defined by product type, and so much more. Exciting prospects!
You can even inspect or clone the Sweet Shoppe project. There’s also a video version of this tutorial if you learn better that way.
Alas, we’ve come to the end of this tutorial and it’s how some like their chocolate — bittersweet. But the power of designing with dynamic data in Webflow is definitely sweet.


