

Earlier this week, we featured some beautiful form design patterns and got a lot of requests to demo the natural-language form. So I decided to put together a quick how-to so you can build one for your own Webflow site in no time.
Follow the steps below, and check out the final design in Webflow here.
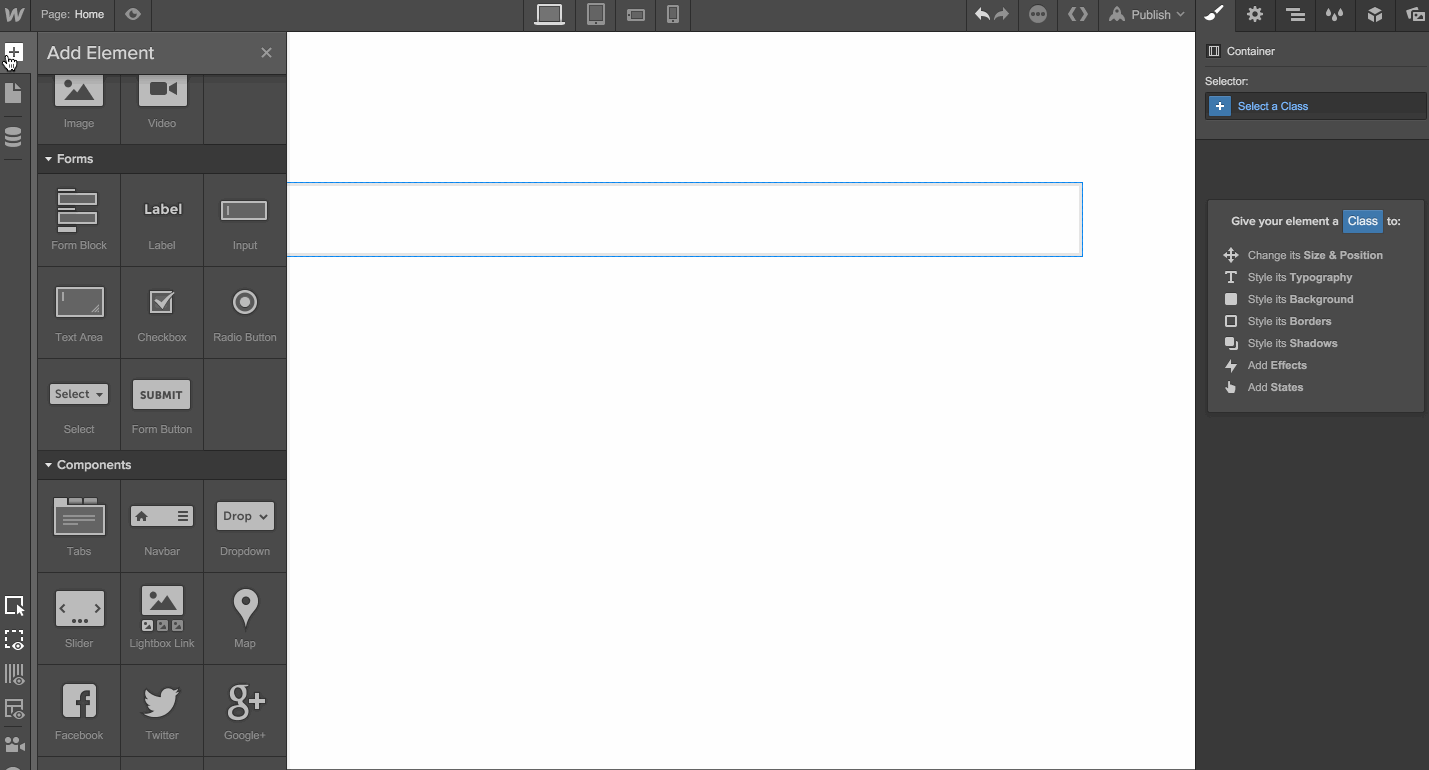
Step 1: Add the form element to the page
First, add the form element to your canvas. Simply drag the Form Block element from the Add panel into the space you want it on the site.
Step 2: Add classes and style
Now we need to add classes to the individual form elements so we can style it them.
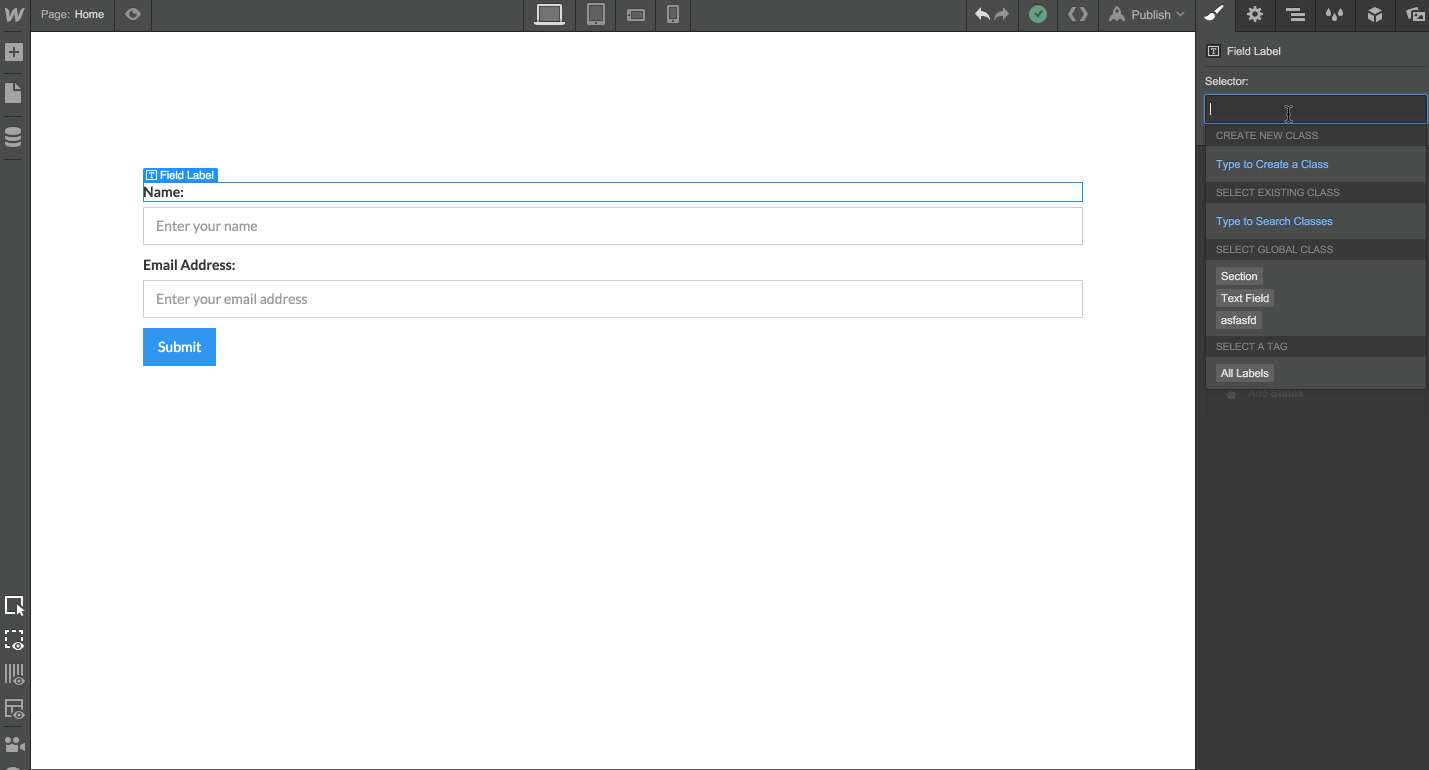
I’m going to add a class to the field label and give it these styles:
Class Name: Field Label
Display: Inline
Font Family: Lato
Font Weight: 300 - Light
Font Size: 40px
Line Height: 40px
Note that you can adjust the visual styles all you like, but the display setting is key to the functionality here.
I’ll also add a class to the text field, and style it like so:
Class Name: Text Field
Display: Inline
Width: 240px
Height: 50px
Font Family: Lato
Font Weight: 300 - Light
Font Size: 40px
Line Height: 40px
Bottom Border: 2px #adadad
Opacity: 50%
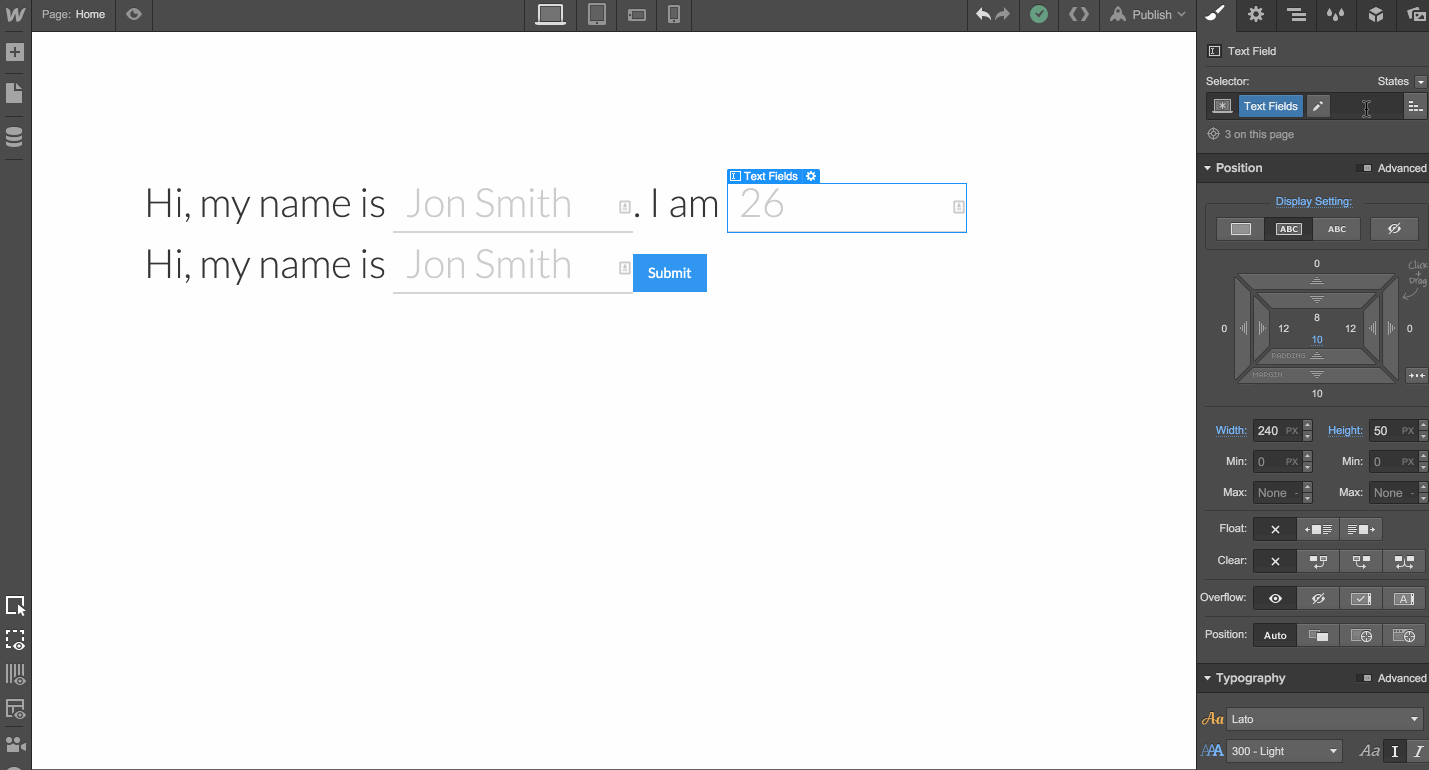
Step 3: Add more field labels and text fields
We now have one field label and one form field (I deleted the extras to clean things up a little). Now I’ll simply copy and paste more fields using Command/Control+ C and Command/Control+V. For this example, I need five form fields.

Step 4: Tweak the form fields' widths
Because each of the form fields asks for a different piece of information, we can adjust the width to better match the content. For example, it doesn’t make sense for the age field (which will most likely have only two characters), be as long as the name field (which will have many).
To account for that, I’ll add another class to each field so I can adjust the widths accordingly.
Step 5: Design the success message
The form is ready to go! But we want our users to experience a pleasant success message once they’ve completed it. To design this, just click on the form to select it, and open the Settings Panel.
Click the Success button to see the form in its Success state.

Any styles and classes we add here will only show up when the user submits the form. Here are the styles I used:
Class Name: Success Message
Background Color: #1ab07a
Padding Top & Bottom: 50px
Class Name: Success Text
Color: #ffffff
Font Size: 34px
Line Height: 50px
Now go build your own natural-language form
Of course, this is just one way to create a natural language form in Webflow. If you had trouble following the above steps, you can inspect the natural-language form in Webflow.
Do you have a unique form that you’ve created in Webflow? Share it with us (and the rest of the community)!


Get started for free
Create custom, scalable websites — without writing code. Start building in Webflow.