


One of the more interesting aspects of Webflow to me is the CMS.
It lets you create collections of content to fit any need and then display it within your site. Even more interesting are the APIs that allow you to fully CRUD (create, read, update, and delete) your content via the programming language of your choice. The obvious use case for this are many — from synchronizing content with external providers to automating your Webflow content.
Today, I’m covering another interesting possible use of the APIs — creating more APIs. Specifically, I'd like to take the awesome content of my Webflow site and make it available to others using a public API hosted on my site. In my case, a simple "read only" API but one that allows other sites and app developers to make use of my content. This could be embedded via JavaScript, used by low/no-code platforms, and more. The important thing is that the data will be available and usable by anyone and everyone. Here's how I accomplished it.
What's our content?
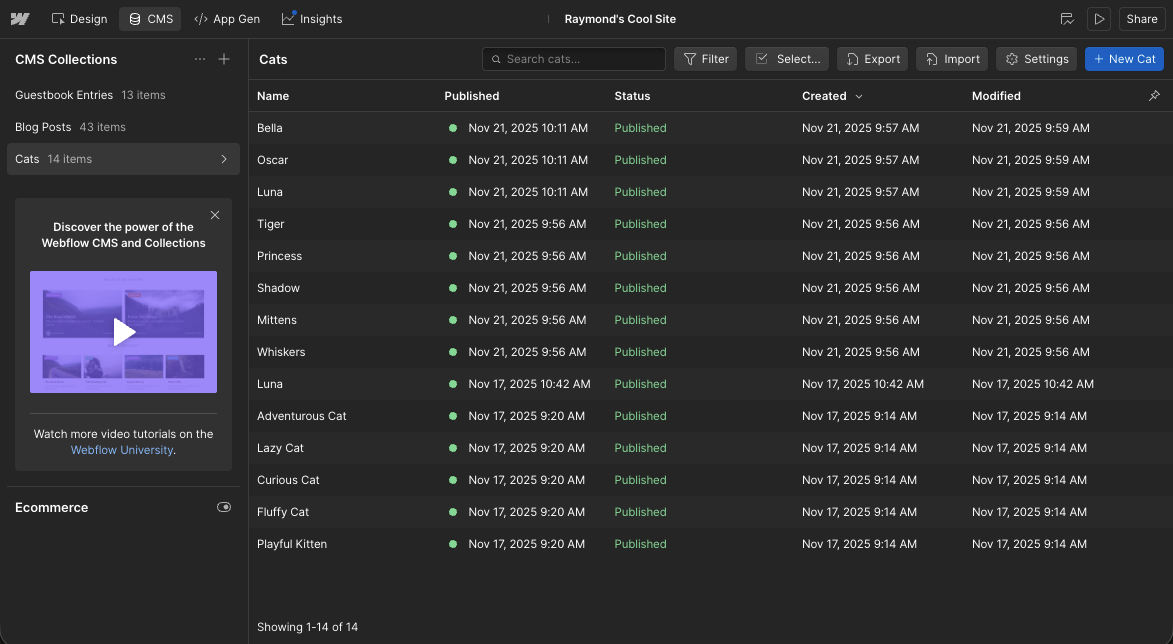
For my demo, I created a new CMS collection named Cats. This collection consists of a few simple properties:
- Name (a string)
- Slug (a string)
- Gender (a set of options: Male, Female)
- Breed (a string)
- Picture (an image)
I also used Webflow AI to generate some sample content for me.
Given this set of content, my goal now is to expose it publicly in raw JSON form. To make this happen, I'll turn to another Webflow feature, Webflow Cloud.
To the cloud!
Webflow Cloud lets you host a Next.js or an Astro full-stack application on Webflow's platform, intimately tied to your Webflow site. This is incredibly powerful, allowing you to access the flexibility of Astro or Next.js. You also get automatic cohesion with your site, specifically in terms of the site’s design system. So if you've designed a lovely Webflow site, the same layout can be used in your application.
I followed the Getting Started directions and selected Astro as my framework. I also set up a new GitHub repository to host my application code as part of the process. Webflow Cloud’s deployment pipeline makes it simple for CI/CD, as I can simply commit my changes and Webflow will pick them up and redeploy them automatically.
For my API, I made use of Astro's Endpoints feature. This lets you generate a custom API route with any name or extension that's dynamically built. With this in mind, under my Astro project pages directory, I created cats.json.js. This file is responsible for a few things:
- Getting a list of
Catitems using the List Live Items CMS API. - Reshaping the result to make more sense for external consumers
- And for fun, supporting name filtering via query string parameters.
Let's break this down bit by bit. Here's the initial version I built, and I'll explain what each part does in detail:
const CATS = "691b3bd2bb9b164290a66b91";
export const config = {
runtime: "edge",
};
export async function GET({ params, request, locals }) {
let url = new URL(request.url);
let qs = Object.fromEntries(url.searchParams);
let name = qs.name || "";
let KEY = locals.runtime.env.CMSKEY;
let filter = '';
if(name !== '') filter = '?name=' + encodeURIComponent(name);
const catsReq = await fetch(`https://api.webflow.com/v2/collections/${CATS}/items/live${filter}`, {
headers: {
"Authorization": `Bearer ${KEY}`,
}
});
const catsData = await catsReq.json();
const cats = catsData.items.map(c => {
return {
...c.fieldData,
id:c.id
}
});
return new Response(JSON.stringify(cats), {
status: 200,
headers: {
'Content-Type': 'application/json'
}
});
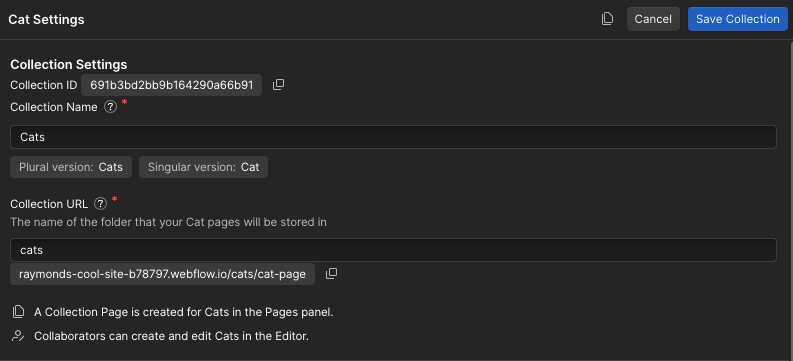
}The very first line is simply the ID of my CMS collection. You can get this via an API call (List Collections), but it's even easier to just open your collection in Webflow Designer:
The next part, the config export, came from our documentation related to Astro apps in Webflow Cloud and API routes. I just copied that as is.
Now let's turn to the GET function — the real meat of an API. I begin by checking the current request to see if the person calling the API wants to filter by name. They would do so by adding ?name=X to the URL. A few lines down from there we see if the value had something, and if so, add it to a filter variable that will change our CMS API call.
Make note of this line: let KEY = locals.runtime.env.CMSKEY; In order to work with the CMS API, you need a key (one can be generated in your site settings), and instead of embedding it directly in the code (almost always a bad idea), I made use of an environment variable instead. The developer documentation also explains the different ways of using environment variables in your Astro code. As a reminder, when you create keys, you have the option of limiting the scope of what that key can do. I strongly suggest doing so and creating a key that can only read from CMS data.
Alright, at this point, we can hit the API. From the List Live Items API docs, you can see that the collection ID is the only required value, and it's embedded in the URL. I also added the name filter which will return items with an exact name match. (Fuzzy matching is on our enhancement list!)
I'll point out that while the official CMS APIs support pagination, the custom API endpoint here can handle a better implementation with certain tradeoffs. It could handle the pagination itself (use a loop to keep calling the API until all data is done) or it could return the information to the caller itself. It's entirely possible the person or site using our API only wants a subset. In the same vein, we could support sorting and sort order as well. For this simple implementation, I kept it to the bare minimum. Keep in mind though that the power is in your hands!
Before returning the data, I do a bit of manipulation. Here's how items are typically returned from the API:
{
  "items": [
    {
      "id": "62b720ef280c7a7a3be8cabe",
      "lastPublished": "2022-06-30T13:35:20.878Z",
      "lastUpdated": "2022-06-25T14:51:27.809Z",
      "createdOn": "2022-06-25T14:51:27.809Z",
      "fieldData": {
        "name": "Senior Data Analyst",
        "slug": "senior-data-analyst",
        "url": "https://boards.greenhouse.io/webflow/jobs/26567701",
        "department": "Data"
      },
      "cmsLocaleId": "66f6e966c9e1dc700a857ca3",
      "isArchived": false,
      "isDraft": false
    },
    {
      "id": "62c880ef281c7b7b4cf9dabc",
      "lastPublished": "2023-04-15T10:25:18.123Z",
      "lastUpdated": "2023-04-10T11:45:30.567Z",
      "createdOn": "2023-04-10T11:45:30.567Z",
      "fieldData": {
        "name": "Product Manager",
        "slug": "product-manager",
        "url": "https://boards.greenhouse.io/webflow/jobs/31234567",
        "department": "Product"
      },
      "cmsLocaleId": "66f6e966c9e1dc700a857ca3",
      "isArchived": false,
      "isDraft": false
    }
  ],
  "pagination": {
    "limit": 25,
    "offset": 0,
    "total": 2
  }
}
I want to return just the items, and as fieldData is the relevant info, I want to return just that, along with the ID. My map call manages that. And again, I could choose to return more, for example, lastUpdated or createdOn; I just chose not to for this sample.
The last bit simply returns everything using the application/JSON content type.
Not too difficult, right? Once the cloud app is deployed to my site, I can then hit this endpoint at: mysite.com/app/cats.json. Filtering by name is just as simple: mysite.com/app/cats.json?name=Luna. When I ran this, it worked great! But I noticed something odd in my results:
{
    "gender": "e0331b12f028facd7e22b5e4246a882c",
    "name": "Bella",
    "breed": "Abyssinian",
    "slug": "bella",
    "id": "69208bfc6563afc5d003d48f"
  },
{
    "gender": "18e9905214ba268d86ae1222acd66ad8",
    "name": "Oscar",
    "breed": "American Shorthair",
    "slug": "oscar",
    "id": "69208bfc6563afc5d003d48d"
},
See how the gender value is an ID? If you remember, I set the collection schema up with an option of two values, and behind the scenes, this is stored as an ID value. That way, if you change the value, all collection items would have the right value. (Standard data normalization stuff.) So what do we do?
The option problem
There's a couple of different ways we can skin this cat (ok, maybe not the best expression here), and each differs in terms of how simple and how future-proof of a solution we want.
The easiest solution would be to figure out the two values in our options, Male and Female, determine the ID values, and just replace them in the data. This would be hard coded and would not be future-proof if another option was added. That being said, you can be reasonably assured about these types of things if you know your data well.
A more complex solution could be to fetch the collection details via an API call. This returns information about each field in your collection. From our docs, you can see this in one of the fields:
{
    "id": "6f7e8d9c0b1a2e3d4c5b6a8f",
    "isRequired": false,
    "type": "Option",
    "displayName": "Item Type",
    "isEditable": true,
    "slug": "item-type",
    "helpText": "The type of item.",
    "validations": {
    "options": [
        {
        "name": "Survival Gear",
        "id": "66f6e966c9e1dc700a857ca3"
        },
        {
        "name": "Gadget",
        "id": "66f6e966c9e1dc700a857ca4"
        },
        {
        "name": "Other",
        "id": "66f6e966c9e1dc700a857ca5"
        }
    ]
    }
}
However, this solution would require, or at least strongly suggest, some caching so you aren't constantly getting details for the collection on every call.
I went with a somewhat hybrid approach. First, I needed to get the details using the collection details API listed above. As I mentioned, you can get the collection ID via the Designer, but field details are only available via API. I did so for my cats collection.
Next, I added this to my code:
// I take an array of raw CMS items and attempt to correct options
// This is a work in progress and could be improved. For now, I use a hard coded
// set of mappings
const optionMappings = {
  "gender": [
    {
      "name": "Male",
      "id": "18e9905214ba268d86ae1222acd66ad8"
    },
    {
      "name": "Female",
      "id": "e0331b12f028facd7e22b5e4246a882c"
    }
  ]
}

const mapOptions = item => {
  for(let k in item) {
    if(optionMappings[k]) {
      for(let o of optionMappings[k]) {
        if(item[k] === o.id) {
          item[k] = o.name;
        }
      }
    }
  }
  return item;
}
I start off with an optionMappings object that has a key based on the field name, and then a set of ID and values. I then built mapOptions, which takes in the "raw" result from my list of collection items, looks to see if a field is in optionMappings, and if so, replaces the id value with the name value. Here's the entire updated code:
const CATS = "691b3bd2bb9b164290a66b91";

export const config = {
    runtime: "edge",
};

// I take an array of raw CMS items and attempt to correct options
// This is a work in progress and could be improved. For now, I use a hard coded
// set of mappings
const optionMappings = {
  "gender": [
    {
      "name": "Male",
      "id": "18e9905214ba268d86ae1222acd66ad8"
    },
    {
      "name": "Female",
      "id": "e0331b12f028facd7e22b5e4246a882c"
    }
  ]
}

const mapOptions = item => {
  for(let k in item) {
    if(optionMappings[k]) {
      for(let o of optionMappings[k]) {
        if(item[k] === o.id) {
          item[k] = o.name;
        }
      }
    }
  }
  return item;
}

export async function GET({ params, request, locals }) {
  let url = new URL(request.url);
  let qs = Object.fromEntries(url.searchParams);
  let name = qs.name || "";
  let KEY = locals.runtime.env.CMSKEY;

  let filter = '';
  if(name !== '') filter = '?name=' + encodeURIComponent(name);

  const catsReq = await fetch(`https://api.webflow.com/v2/collections/${CATS}/items/live${filter}`, {
    headers: {
      "Authorization": `Bearer ${KEY}`,
    }
  });
  const catsData = await catsReq.json();

  const cats = catsData.items.map(c => {
    return {
      ...mapOptions(c.fieldData),
      id:c.id
    }
  });

  return new Response(JSON.stringify(cats), {
    status: 200,
    headers: {
        'Content-Type': 'application/json'
    }
  });
}
Of note, I call mapOptions in my map now to handle the rewrite. Once deployed, I now get nicer values:
{
    "gender": "Female",
    "name": "Bella",
    "breed": "Abyssinian",
    "slug": "bella",
    "id": "69208bfc6563afc5d003d48f"
},
{
    "gender": "Male",
    "name": "Oscar",
    "breed": "American Shorthair",
    "slug": "oscar",
    "id": "69208bfc6563afc5d003d48d"
},
You can this yourself here: https://raymonds-cool-site-b78797.webflow.io/app/cats.json
One more thing
In theory, we're done, right? As I mentioned above, there's multiple areas of improvement to turn this into a more full featured API, but you get the point. However, I want to throw one more little tweak into the code.
Fairly recently, Webflow released CMS Content Delivery APIs available for all users. This API is focused on live-content retrieval and features improved caching and performance. This is a read only API and only supports getting a list of collection items or getting one item. Duplicate requests are cached for 2 minutes for Enterprise plans and 5 minutes for every other tier. Even better, cached responses are not counted against your site plan’s API rate limits, making this an even better change.
Best of all — the entire change is going from this:
const catsReq = await fetch(`https://api.webflow.com/v2/collections/${CATS}/items/live${filter}`, {
to this:
const catsReq = await fetch(`https://api-cdn.webflow.com/v2/collections/${CATS}/items/live${filter}`, {
Specifically, you only need to change the host and nothing more. The final version of the code may be found in the repo for the app.
Next steps
Webflow Cloud is an incredible addition to Webflow as it pretty much opens the door to just about anything for your Webflow site. As I mentioned, my use here of just one simple custom API route is just one small example of what could be done. Check out the feature yourself, and bring your questions to our Forum if you need help!


