


In December of 2018, Webflow delivered a long-awaited feature for the CMS: pagination. What they didn’t realize was that pagination would also enable me to hack together another long-requested feature: dynamic sliders. In this post, I'll show you how I did it, and how you can too.
With pagination, you can create slides of content pulled from your CMS Collections. So users can easily navigate through project images in your design portfolio or flip through recipes on your foodie site.
In this tutorial, we’ll dig into the basics by showing you how to create a simple, but fully dynamic, slider. But first ...
A word from the editor
This post is not a new official Webflow feature, but an ingenious workaround discovered by the author, Louis Buignet. We know you all want truly dynamic sliders and plan to deliver them, but thought you'd like to know about this nifty hack in the meantime.
Also, several of you sharp readers have noted a potential user experience issue, namely that the page reloads with each new slide. That's the nature of basing the hack on pagination. However, one of our engineers, Forrest Oliphant — aka, he of the coolest last name ever — developed a slick way to make that reload seamless. The Webflow workshop below shows you how:
With all that out of the way, let's back to the topic at hand: using pagination to create a dynamic slider with Webflow.
Pagination: defined
Books are paginated — you can navigate from one page to the next, forward or backwards. In web design, it’s the same concept. Pages of related content can be navigated by clicking to the next page or going back to the previous one.
Which, when you think about it, sounds a whole lot like a slider, no?
With that in mind, I'll going to show you how to build your own dynamic slider — using pagination.
If you’re the kind who learns by tinkering, you can open this CMS slider in Webflow and take a look around. But if you learn by reading, scroll on for the full tutorial!

Create a CMS collection and add slides
First things first: you need to create a CMS Collection. If you don’t know what that is, no worries. Take a deep breath and check out Webflow's video tutorial on CMS basics. Feeling better? Great, let’s move forward!
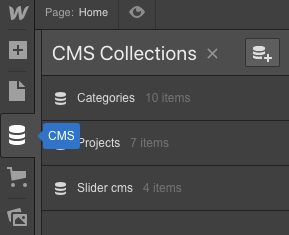
Click the CMS icon in the toolbar on the left. Create a new Collection and title it … well, whatever you’d like. I went with “Slider cms” for clarity.
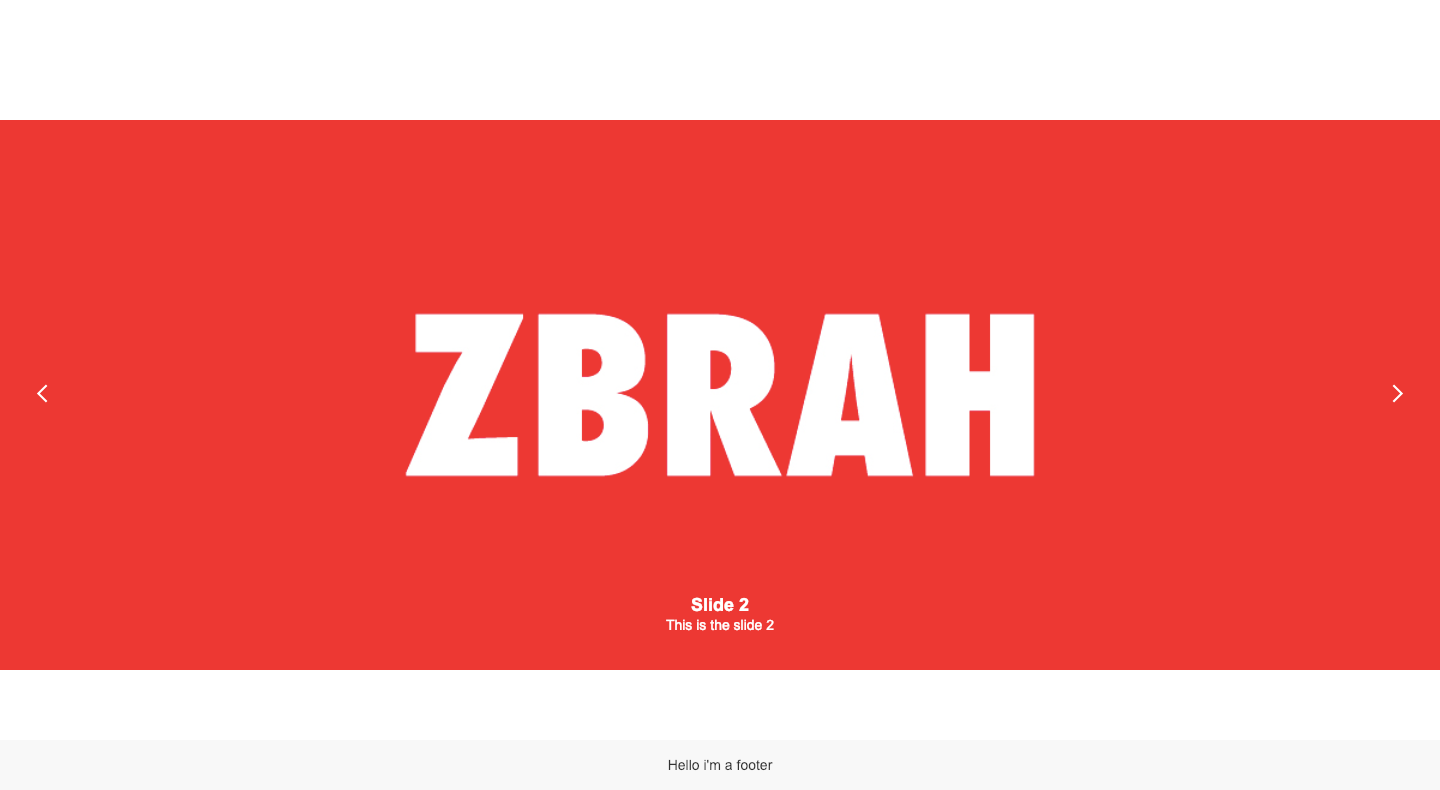
Each slide has three elements: an image, the name of the page, and a page description. There’s also a footer, but it’s not a part of the Collection, so no need to worry about that right now. Take a look at how these elements come together, boldly proclaiming my Webflow handle to the world. In case you somehow missed it, it’s ZBRAH.
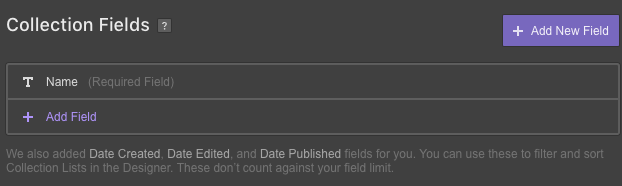
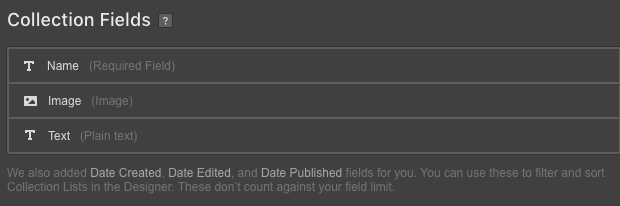
Once we’ve we’ve created the new Collection, we’ll add two fields to it. The Name field is automatically generated, but we’ll add an image field and a plain text field for the page description. (Note: your content team might prefer a rich text field for more flexibility.) This is all done by clicking on the Add New Field button and choosing the appropriate field type.
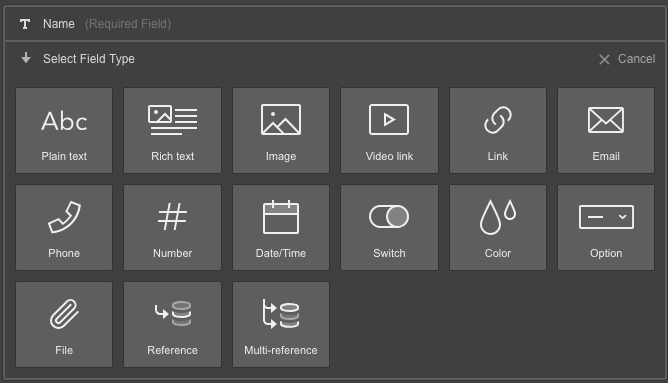
As you can see below, you can include many different types of elements in a Collection, giving you the creativity to build a template for whatever dynamic content you’d like to display.
Here’s how the Collection structure (or schema) looks after you’ve added the additional two fields.
As with all Collections, each Collection item (i.e., slide) follows this same template.

Once we have our field structure set up, we can duplicate this CMS item and all of its content. All it takes is a short scroll down the template you just created and hitting the duplicate button on the bottom right.
This will create a new CMS item, with the same fields populated by the same content. This works well for content that's going to be the same on each page, and you can always change what's in the content fields depending on what needs to be different.

Taking a closer look at an individual slide shows us all of the Collection fields populated with their corresponding content:

Each slide is a different color, with my Webflow handle ZBRAH centered in the middle. Because as Webflow designers we should always be the center of attention, right?
Both the text and block of color are a part of a .jpg image. This image is 1200 x 800 pixels in size. A width of 1200 pixels is the size that many recommend for larger displays. A bit later in this post we're going to show you how to maximize the size of this image in the layout.
If you want to try this out on your own, be aware that smaller images may result in pixelation when scaled up on larger screens. Unless brutalism is your jam, be aware of the dimensions and resolution of the source image.
Build complex interactions and animations without even looking at code.
Build complex interactions and animations without even looking at code.
Building your “slider” — i.e., integrating a paginated Collection into your design
In your projects, you’ll probably have more content than just a slider, but I’ve limited this build to the slider and a footer for simplicity.
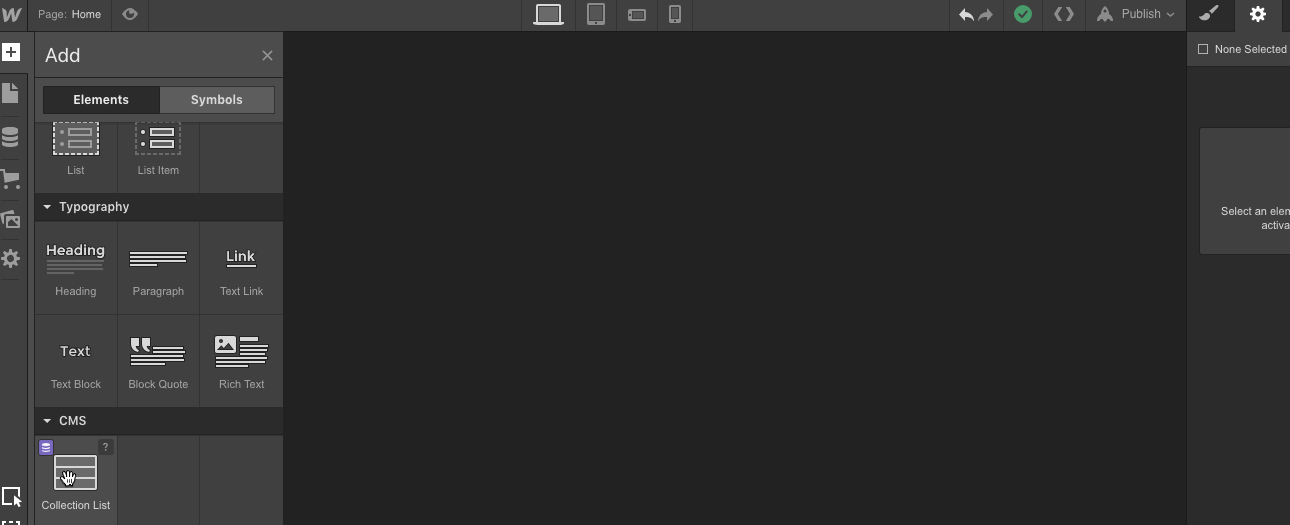
Okay — let’s build the slider! Open the Add Elements panel, scroll down to the Collection list, and add one to your page.
All 4 slides from our Slider cms Collection are now displayed on the page. What’s up with that? Well, we haven’t paginated the list yet!
To enable pagination, select the Collection list on the canvas, then open the Settings panel by clicking the gear icon on the top right of the screen. Next:
- Scroll down
- Check the Paginate box
- Choose to have one Item/page
Boom! These four slides have been paginated!

Making a slide into an entire page
We want each slide to take up the entire page width. The main block of content for each page is comprised of this slide, whose styling is controlled by the Collection list wrapper. The default horizontal width is 100%, which stretches the slide across the full horizontal space. There’s nothing that needs to be done here as the default is how we want it displayed.

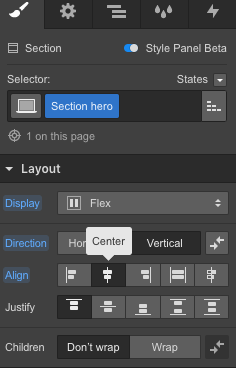
Let’s take a look at the element classed as Section hero. This container holds all of the pieces of the page layout. There’s the CMS slider Collection and the footer. The flex settings for this class are set to center these elements.
Please note: as of the writing of this post, Webflow has rolled out a beta version of its Style Panel. If what you’re looking at is different, no need to worry.
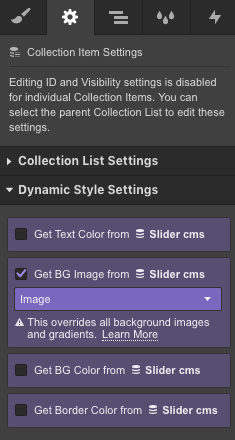
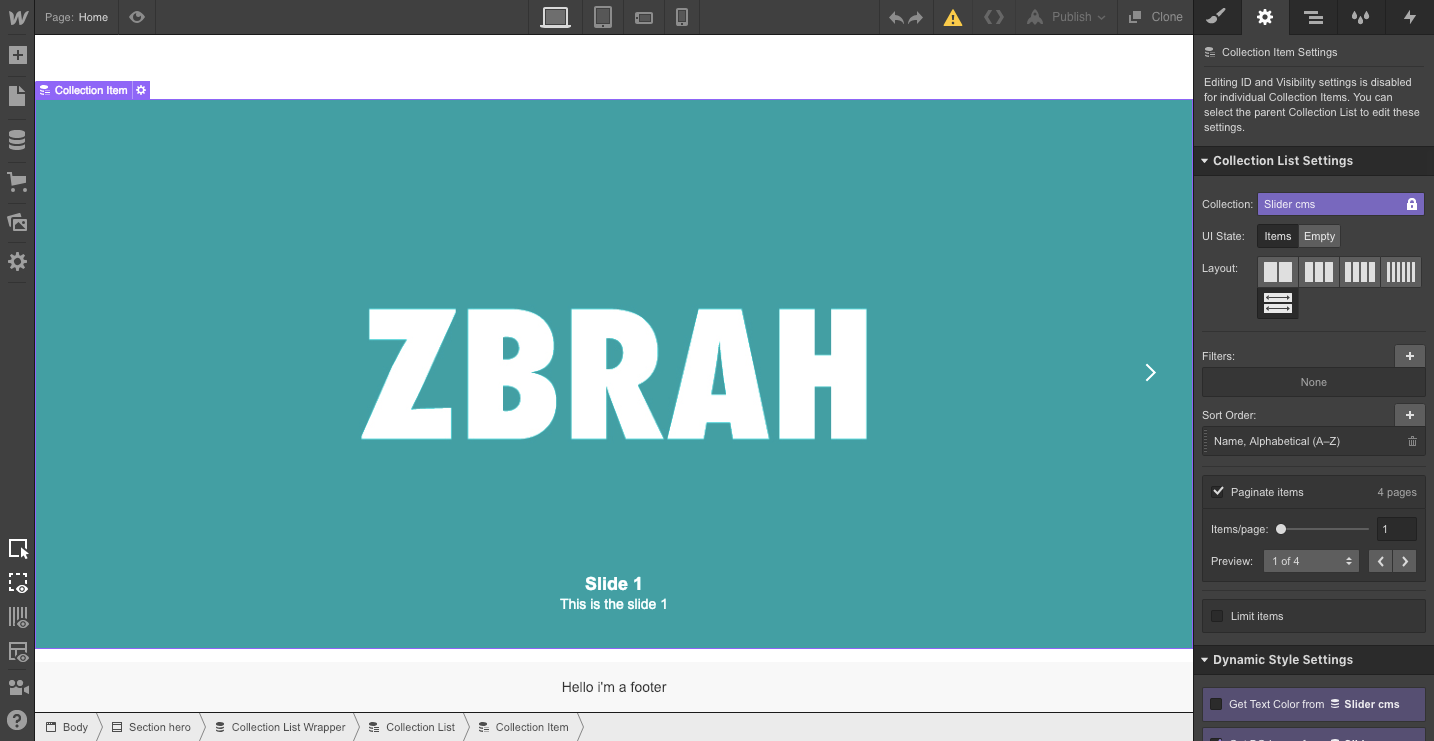
Let’s also take a look at the Collection item settings for our CMS slider. Digging a bit further down in the Collection item settings brings us to the dynamic style settings. We want the background for each slide to be the image from our slider Collection. To do this, check the option to get BG image from Slider cms.
One thing to keep in mind when you enable pagination, is that the words Next and Previous are a default part of the pagination component. To keep things clean and simple in this design, we only want the arrows. Go the the Navigator and find the class for Pagination. Delete the text blocks that you’ll find under both Previous and Next. (You can also do this on the canvas, if that’s easier for you.)

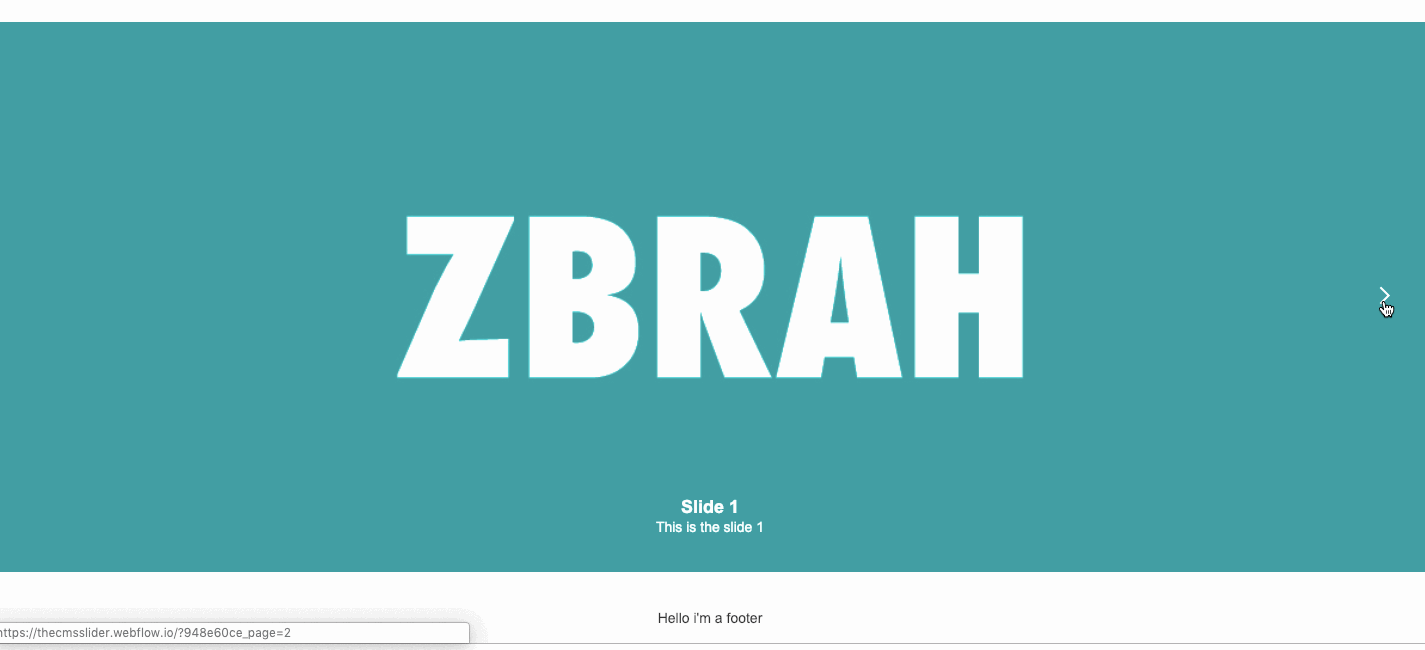
And voila — our first slide in all its glory!
The below animation shows forward navigation using the the arrow pointing right. We use the left-pointing arrow to navigate backwards.
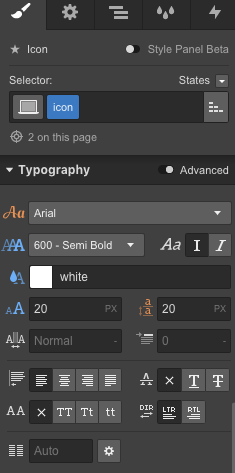
This looks pretty good right? If you’re not satisfied with how the arrows look, select them and adjust the styling for the icon class. You can make adjustments to anything you’d like, including the font, font size, or color.
CMS sliders and beyond
This CMS slider tutorial gives you the basics to get started on your own. Try adding your own creative flair and maybe experiment with different animated transitions. To dig a little deeper, check out the Webflow showcase page and try things out on your own.
Questions? The Webflow community is a great place to start!


