

The key to a streamlined web publishing process is simplifying the tasks. We’re going to discuss everything you need to know to create and launch your next website in just five steps.
The journey from starting a web design and getting your content together to publishing the site may seem like a long one. But when you break things down, that distance is more manageable. Let’s cover the five steps needed to successfully create and launch a website.
5 steps to prepare and publish your website
1. Prepare your website content
The structure and layout of a web design converges around content. The communication of ideas informs everything from navigation to the arrangement of writing and visuals. When you don’t work with the actual text and images, your design is only an approximation. Go over your content and make sure that it’s in great shape before you place a single element in your design.
Make sure your content says something meaningful
In one of the funniest scenes in Billy Madison, Adam Sandler's namesake character delivers a long-winded answer in an academic decathlon. The judge of the contest responds with, "At no point in your rambling, incoherent response were you even close to anything that could be considered a rational thought. Everyone in this room is now dumber for having listened to it.”
Don’t let your web content leave people dumber.
Your content needs to be more than marketing buzzwords and empty generalities. People should leave having learned something or taken away a deeper understanding.
Quality content is guided by research, consulting with experts, and giving your audience the answers to questions they may have.
Map your content
Figuring out a content plan should come before you put together a sitemap or a wireframe. Content maps let you diagram out the major categories of content, as well as the branches of related topics and subcategories.
A content map serves as a framework to base a design on. It lets you take what would otherwise be a pile of docs and notes and gives them order. You get all of the raw materials, placed in a logical succession, showing what you have to build your website with at every step of the way.
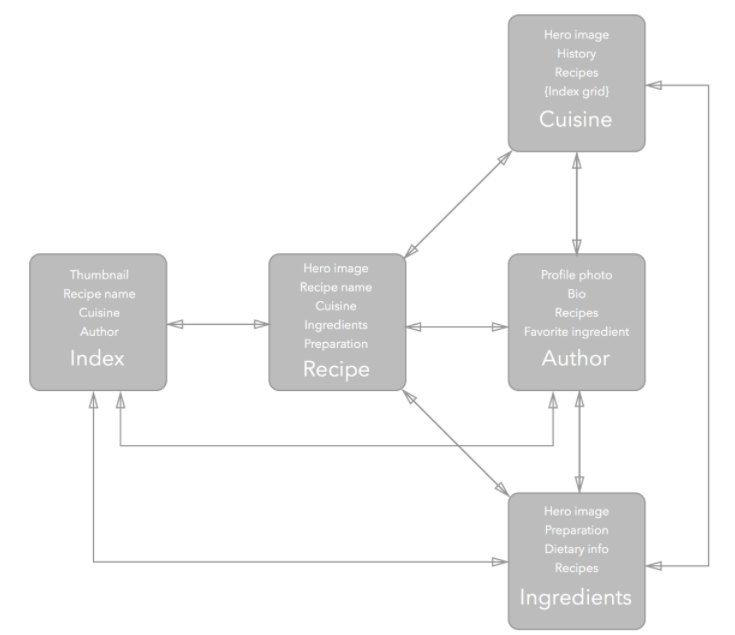
In this content map above from our blog post “Why your design process should start with content,” we see the breakdown of every section, with both the major concepts as well as supporting points. You should definitely give this post a read if you want to go deeper in learning more about content maps and why you should use a content-first approach to web design.
We know that it may be hard to have everything ready to go before you start designing. At the very least, know what each section of the design is going to be about and include the main points or ideas that each section is going to cover in the layout, instead of relying too much on lorem ipsum placeholder content.
Optimize your content for SEO
You can always add in some SEO polish after the fact, but having the content optimized before it goes up takes care of this important job ahead of time. It may also change content length and how the headers are worded. Having SEO in place makes the content you’re working with even more accurate.
Some SEO best practices include:
- Avoid repeating the same exact content throughout a website (this includes everything from meta description to body content).
- Using informative titles instead of broad and generic titles.
- Integrating words and phrases that are common when talking about a given subject.
- Not cramming keywords into every available title, paragraph, or sentence. Not only does this affect readability, but you might get dinged by web crawlers.
Of course, SEO goes beyond these bullet points, and it’s a science all its own. If you’d like to read more about SEO, please check out “SEO and Webflow: the essential guide,” which covers what you need to know.
2. Design and build your website
OK, this is the biggest step in this process. We’re going to discuss the basics, while pointing you to other resources where you can learn more. Let’s go!
Come up with a layout
F-patterns and Z-patterns, split screens, asymmetric schemes — there are many ways to arrange your pages. Whether your content is more text heavy or you’re going to rely on images, you need to find a layout that will tell your story in the optimal way and highlight what’s important.
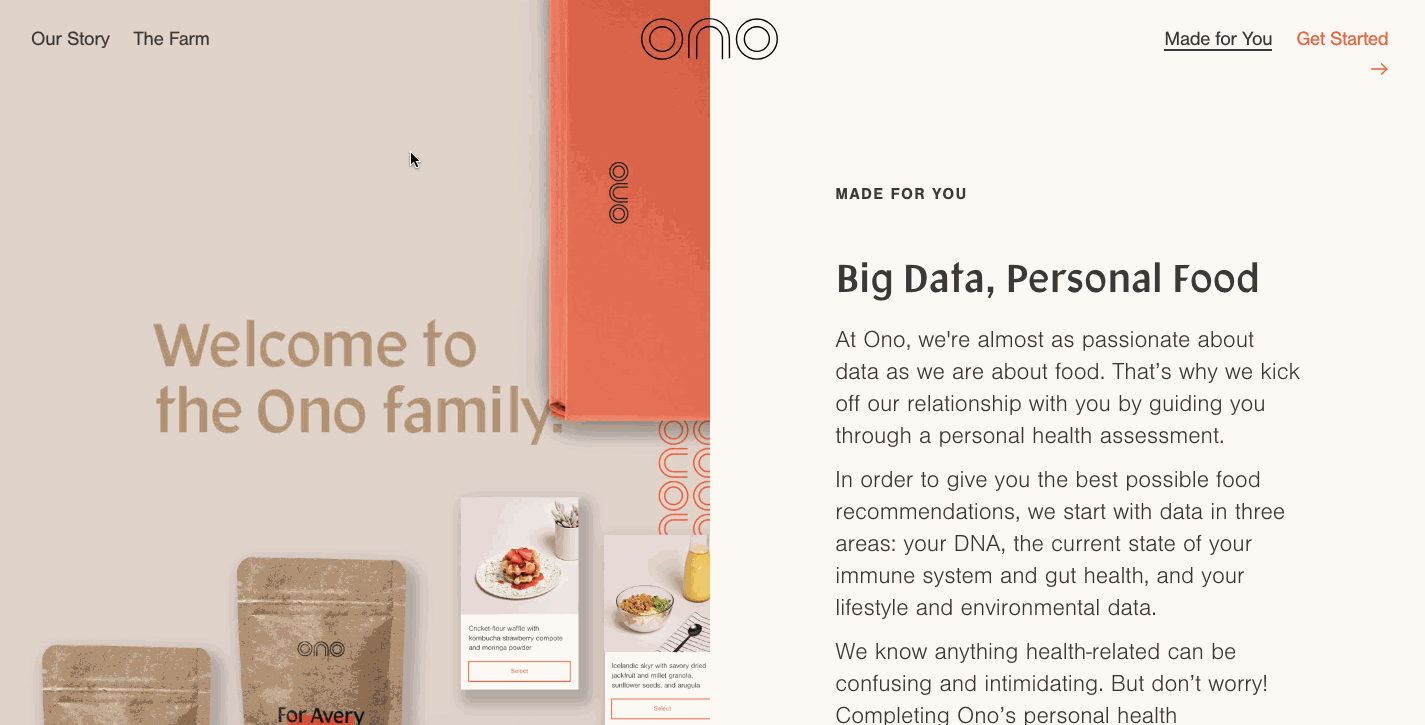
This split screen layout from the food subscription box service Ono works well in rolling out a long block of content with visuals that change with each section of content.
Check out our blog post “Web page layout: website anatomy every designer needs to learn.” It’s focused on business websites but has plenty of great information that applies to all web designs. We’ve also put together a variety of prebuilt templates to help get you started.
Select appropriate typography
For body copy and other longer blocks in a design, the focus should be legibility. Overly decorative or ornate typography only works well in small amounts. Choose practical typography for the more informative sections of your design. Of course you can use custom and more decorative fonts sparingly to help liven up the layout.

Made in Webflow, this design for the scooter company UJET utilizes typography that’s both contemporary and optimized for readability.
Learn more about typography in this chapter from our Web Design 101 ebook, which is packed with tons of great information to help you understand how to use typography better.
Create a user experience
A website without a user experience (UX) is a lot like a cake that hasn’t been baked. All of the ingredients are there. But unless they’re put together with care, with the end user in mind, it’s going to be an unappetizing mess. A user experience brings together all of the elements in a way that’s appealing to someone navigating through it.
The color palette, content, visuals, fonts, as well as the architecture all have a higher calling than being just utilitarian elements. They come together to make a user feel something about what they’re looking at. UX allows a website to transcend being a scroll of text and a set of navigational options.
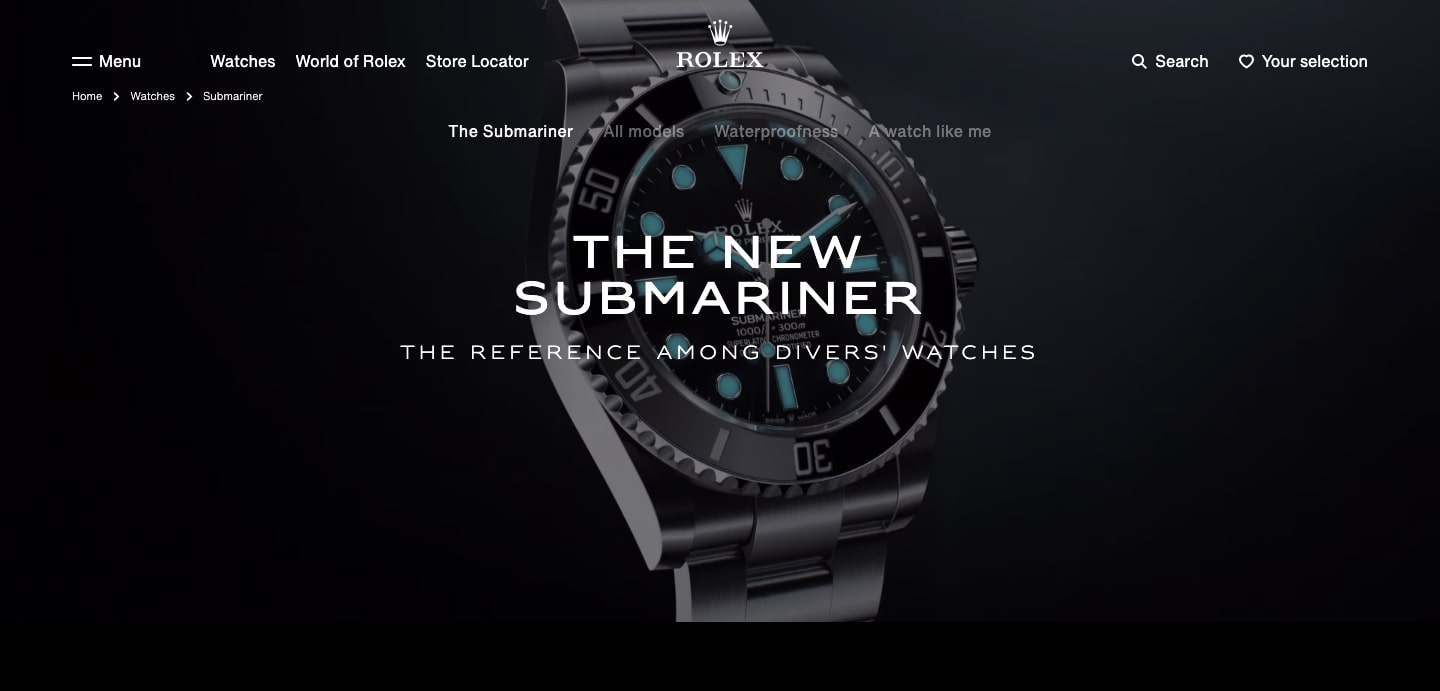
With a color palette of black and deep blues, touches of white, and elegant typography, Rolex’s UX feels as luxurious as their watches.
If your web design doesn’t go beyond being a rigid arrangement of text and images, you’re going to have to develop the UX before you’re ready to publish it.
We put together this comprehensive reading list about UX that any level of designer will find useful, so please head on over there when you’re through with this post.
Develop a consistent and usable user interface
User interface (UI) gives people what they need to connect and engage with a design. They are the controls and elements that make navigating through it an active experience. Whether it’s the left or right swipe of profiles in the search for romance on Bumble, the card layout on Pinterest, or the swirled arrows to retweet something on Twitter, UI encompasses these points of interactivity.
The functionality of every interactive element should be clear, from the top navigation menu to the call-to-action button. Recognizing what elements do should be almost immediate. UI elements need to be consistent and follow a consistent logic.
Before you publish your website, make sure that the UI provides an easy way to engage with it and that every interactive element makes sense.
3. Find web hosting

You’ve put together a solid layout, your content is tight, and you’re almost ready to launch. Just as you put the time and effort into building your web design, you should also put some thought into finding web hosting. When looking for hosting you need to consider the speed, reliability, level of security, as well as the ease of scalability to accommodate future traffic growth.
Speed
People landing on your website expect fast load times. If you’re going with hosting that’s limited to a single server, your website is going to be sluggish for people located farther away geographically. The key to snappy load times, no matter where someone is, is to have your website hosted through a provider that utilizes a content distribution network (CDN).
CDNs spread your website and its files across multiple data centers. Wherever someone is accessing the website from, it will transmit your website from the data center that’s closest in proximity. This ensures that no matter the location, the user will get speedy load times.
Web hosting services that utilize CDN platforms like Amazon Web Services (AWS) CloudFront, Cloudflare, Fastly, and MaxCDN are essential if you want people to have an efficient experience with your website — no matter where they are on the globe.

If you decide to go with Webflow to design and host your website, you’ll get the power that comes from our hosting, which utilizes both Amazon Web Services and Cloudflare in distributing your website across 100-plus servers for both speed and reliability.
Scalability
For startups, ecommerce sites, and others who see a bright future where they grow bigger and gain a larger audience, finding hosting that will accommodate increased traffic is essential.
Hosting that utilizes Amazon EC2 or Fastly (Webflow uses both) works by assessing traffic minute by minute, adjusting the capacities of a website and its needs in any given moment, and enlisting server power accordingly.
Don’t get boxed in by hosting that can’t keep up with fluctuations in visitors.
Reliability
Cheap hosting is like a cheap car. Unreliable. Prone to stalling. And ends up costing more in the form of lost revenue.
A website that goes down for any amount of time doesn’t look good. Your brand’s reputation depends on it being up and running at every moment.
And psst ... want to go with hosting that offers 99.99% reliability? That’s what you get when you go with Webflow.
4. Do a quality assurance audit

OK, your website is done, you found web hosting, and you’re ready to put it out into the world. Before you hit the publish button, make sure to do a thorough QA before going live. The process of creating a website can be a long one, with many changes and edits that may have happened along the way. Do a thorough walkthrough to make sure that nothing is amiss.
Proofread the content
Note that we used the word “proofread.” This doesn’t mean editing. Copyediting — in which every sentence is meticulously scanned for correct punctuation, syntax, misspellings, and proper grammar — should have been done long before the content made its way into the design. Proofreading should be one final pass. Both copyediting and proofreading involve editing the copy but at two different degrees.
Before you launch, proofreading is the final analysis to ensure that everything flows and no mistakes were made.
Check the spelling
Doing a manual read through of the copy and run it through the spell-checker of your choice to identify spelling mistakes. One thing you need to do on your own is to make sure that proper nouns, like the names of people or product names, are all spelled correctly, as spell-checkers won’t likely be able to identify them if they’re not.
Do a grammar check
Even the best writers have their grammatical shortcomings. Some cram their copy with adverbs. Others fall into sentence fragments, while some people’s inconsistency with tenses makes for writing that exists neither in the past, present, nor future, which is confusing for everybody.
Before you publish your website, run all of the copy through a grammar checker like Grammarly, Hemingway, or ProWritingAid.
Leave no sentence spliced and no participles dangled, and may your sentences be free from running on.
Check all the text
Words occupy many parts of a design. They’re in the headers, body content, captions for images, meta descriptions, page URLs, as well as other spots throughout a design. It’s important to make sure every word is spelled correctly wherever it may be.
Optimize images
An otherwise stellar layout can be blemished by images that aren’t optimized. Pixelated visuals and images that are out of proportion or otherwise not set up to display correctly can really bring down how people perceive a web design.
Image optimization is an essential part of responsive design. Whatever screen your website is being viewed on, it should offer a consistent experience. What looks good on mobile may not look great on a higher-definition screen, so check all of the images and make sure that they’re set up to display correctly on any screen.
Follow proper semantic structure
Semantic structure factors into how web crawlers analyze the content. For it to pack the most SEO punch, semantic structure must follow the proper format. It also functions in accessibility, giving the instructions needed to make your content viewable on devices like screen readers for people who are visually impaired.
Correct semantic structure includes using only one H1 tag, following the correct order in utilizing subcategories like H1–H6 tags (with the general rule of sticking to H1–H3), and using the correct tags, like paragraph tags, to identify given content. Semantic structure follows the content hierarchy, making it easier for both humans and web crawlers alike to make sense of the information.
If you want to go above and beyond, use HTML semantic elements to add even more information that could be used to better rank your page and bring in organic traffic.
Test links and integrations
Anything that involves user interactions and links needs to be tested to make sure that it’s functional and that the link goes to the right place.
This includes:
- Email newsletter signup forms
- Social media blocks
- Ecommerce product listings
- Navigational and footer links
Any link or visual that brings someone to another place in or out of the website needs to be double-checked.
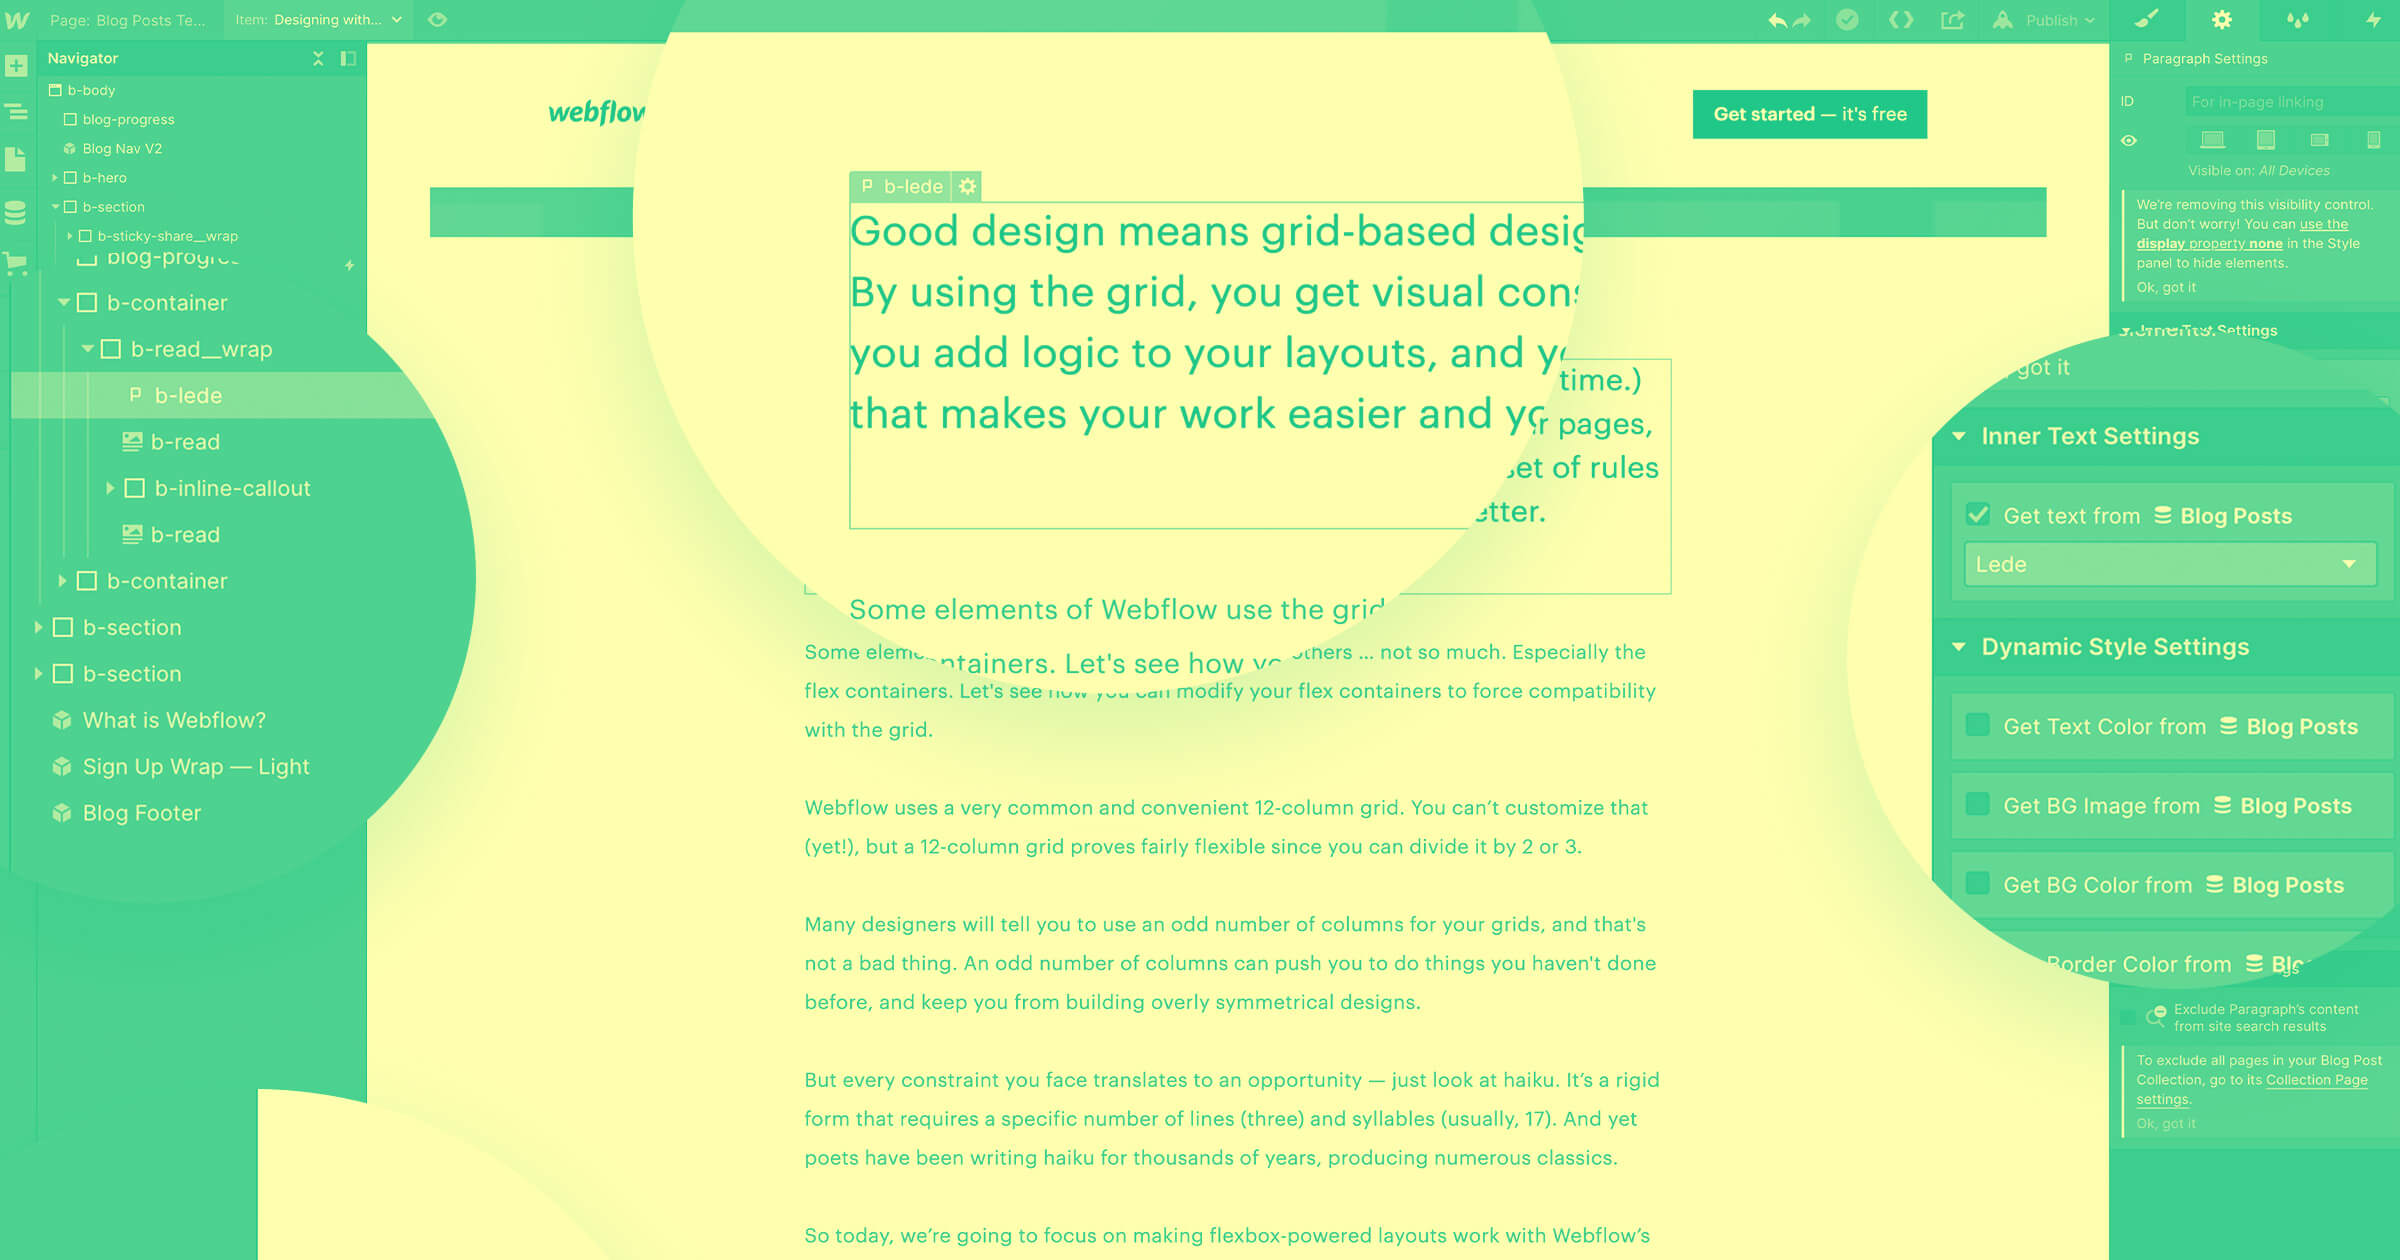
5. Publish your website using Webflow
Hitting publish may be the most satisfying part of the web design process —and it’s certainly the easiest step.
If you built your website using Webflow, there are two ways of making your website appear instantaneously on your chosen domain. You can either publish in the designer or do it straight from the project settings. All of this happens with the same big blue button.
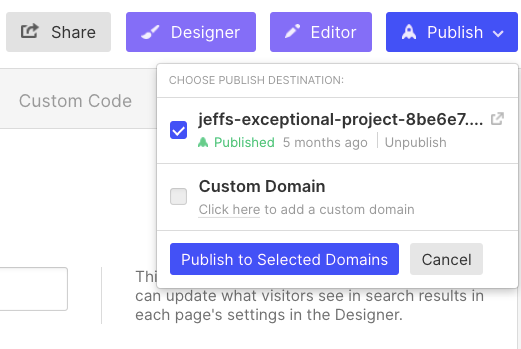
Publish in designer
Publish your website straight from Webflow’s designer by clicking on the blue publish button. All you need to do is select your domain, hit publish, and voila — your website is up and running. Keep in mind the default is a Webflow subdomain, but you can always add in your own custom domain if you have one.
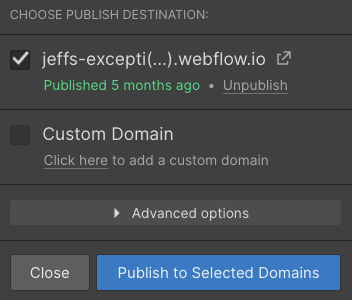
Publish from Webflow’s product settings
As you edit your website, you can publish straight from the editor. There’s no switching between screens. Go in, make your changes, and publish as you go, making anything you’ve done go live immediately. It all starts by hitting the blue button in your project settings.
Imagine, create, and launch
From the initial spark of an idea, through publishing your website, Webflow simplifies the design process. We’re happy to offer you a web design platform that gives you everything you need to design, optimize, host, and get your creativity out into the world.
Do you have any questions about how Webflow can help you out as a designer? Let us know in the comments below.


Get started for free
Create custom, scalable websites — without writing code. Start building in Webflow.