Now you can enable Web Payments as a payment method to let customers checkout faster with Apple Pay and other browser based payment methods, right from the shopping cart.
How this works
This new checkout option is built on top of the Web Payments API, which essentially lets websites ask browsers if the customer has a stored payment method available. If they do, then those payment and shipping details can be applied by the customer — no need to fill out a lengthy checkout form.
Because Web Payments is all browser based, the specific payment method available to customers depends on the browser they’re using.
- Safari: Customers with Apple Pay details stored will see an Apple Pay checkout button.
- Chrome and Edge: Customers with stored payment details on desktop and Android will see a “Pay with Browser” button
- Other browsers: Additional payment methods will become available as other browsers build in Web Payments support.
Ok, enough explanation of what this thing is — let’s look at how you add this to your site.
Styling the experience
Even before you to switch Web Payments on (in your ecommerce payment settings) for your live site, you can style these checkout buttons in the Designer to make sure it’s looking right.
To access these new payment buttons, open your shopping cart and check out the “Web payments” element.

You’ll notice the Web Payments button has three different states that you can style:
- None: No Web Payments checkout button (what customers see if they don’t have credit card information stored in their browser).
- Apple Pay: The button customers see on Safari (if they have Apple Pay set up).
- Pay with browser: The button customers see on Chrome and Edge (if they have credit card details saved to their browser).
While you can style the generic “Pay with browser” button however you’d like, due to Apple’s branding guidelines, you have limited control over the style of your Apple Pay button. (With that said, we’re looking to add additional preset, Apple-approved styles in the future, like a dark and light theme.)
Enabling Web Payments
Ok, so you’ve got your buttons all styled and now you want to flip the switch and show these new payment options on your live site. How do you do it?
For starters, to enable Web Payments, you’ll first need to add an ecommerce site plan to your project, connect your Stripe account, and enable checkout.
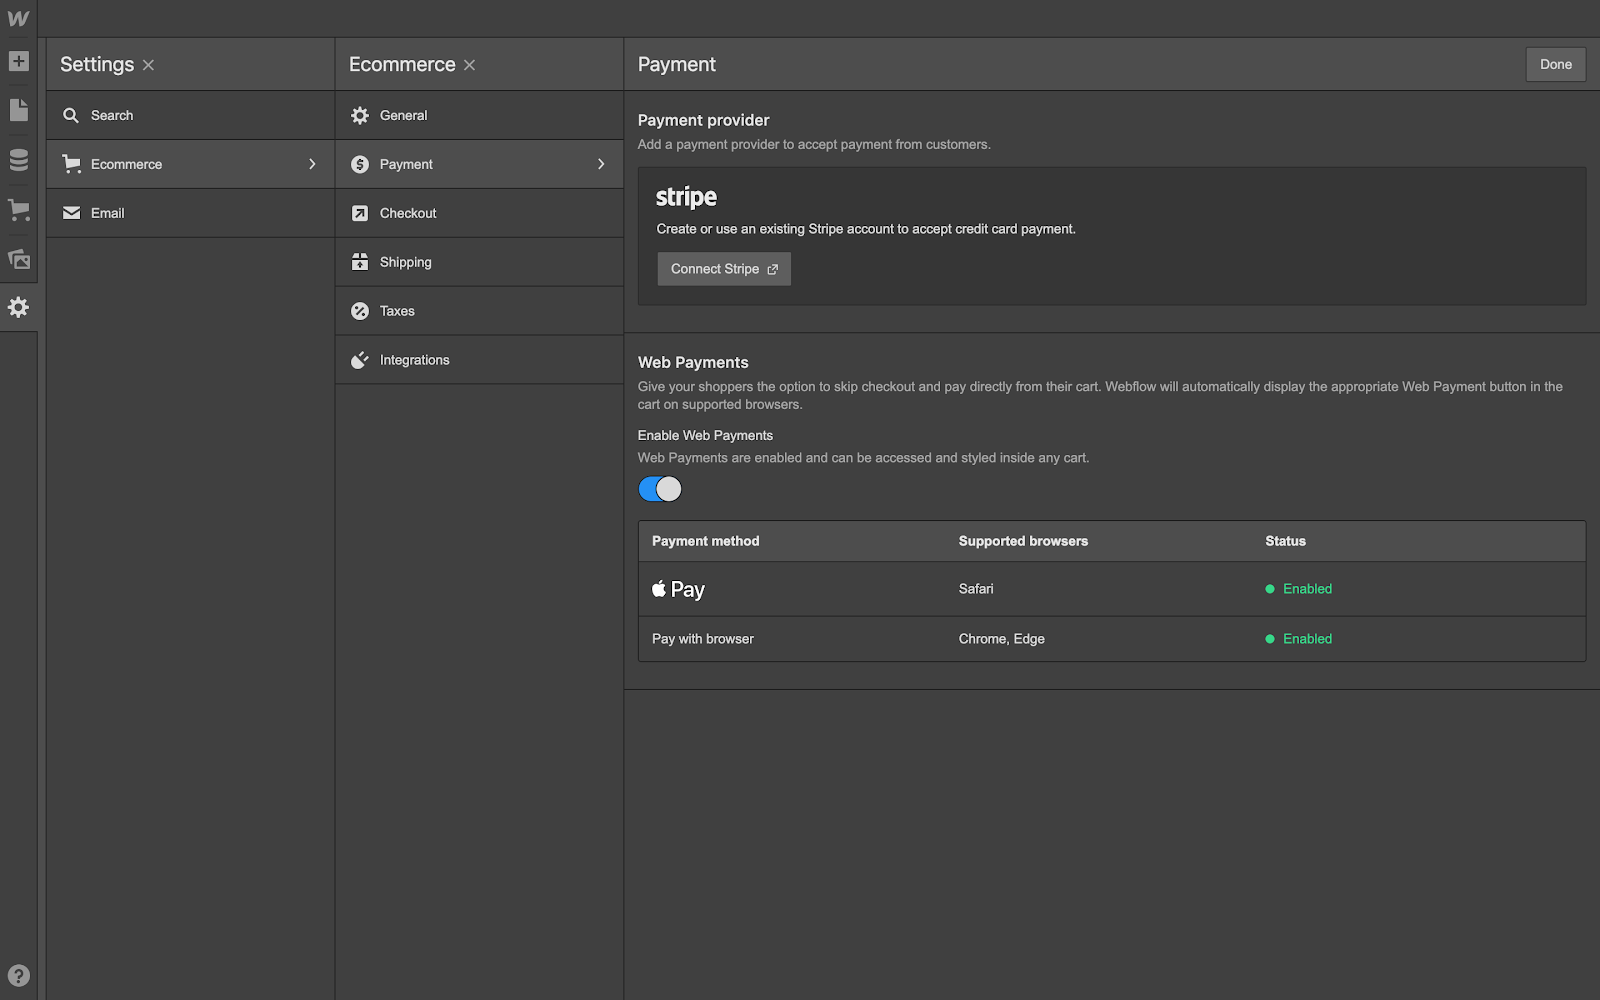
Once that’s sorted, head to the payment section of your ecommerce settings and toggle web payments on — then publish your site. And boom, you’re set.
With Web Payments enabled and your buttons styled, you’re all set to show these new payment methods on your site.


.jpeg)